We’ve all been there. That dreaded moment when the cursor turns into a spinning wheel, the screen freezes, and your application just… stops. It's one of the most common frustrations in modern computing, bringing productivity to a screeching halt. But what’s actually happening under the hood when an app becomes unresponsive?
It’s not a crash, at least not yet. The application is still running, but it’s stuck. It has stopped communicating with the operating system, so it can't process any new clicks, keystrokes, or commands. Think of it as being locked in a state of suspended animation.
Why Do Applications Stop Responding in the First Place?

That frozen screen is really just a symptom of a deeper problem. The application's main thread—the part responsible for handling all user interface interactions—is completely blocked. It’s been given a task it can't finish, or it's waiting for something that isn't coming. Until that blockage is cleared, nothing else can happen.
Digging into the Core Issues
From my experience, these freezes almost always trace back to one of a few common culprits. It’s rarely a random fluke; there’s a logical reason behind the stall.
- Resource Exhaustion: This is the big one. Every application needs a certain amount of CPU power and memory (RAM) to do its job. If your system is running low on either, or if another hungry process is hogging all the resources, your app will slow down and eventually freeze. It’s like trying to run a marathon on an empty stomach.
- Software Conflicts: Not all programs are designed to coexist peacefully. Sometimes, one piece of software can interfere with another, especially if they’re trying to use the same system files or hardware at the same time. I’ve often seen overly aggressive antivirus programs mistakenly flag a legitimate process, causing an application to lock up.
- Outdated Drivers or Software: Developers are constantly squashing bugs and improving performance through updates. If you’re running an older version of an app, its drivers, or even your entire operating system, you’re leaving yourself exposed to known issues that have long since been fixed.
The real issue is almost always a blockage. The application’s main thread gets stuck waiting on a long-running task to finish. This could be anything from a complex database query to a network request that never gets a response. While it waits, the entire user interface becomes unresponsive.
As our world becomes more app-centric, stability is more critical than ever. With global app downloads projected to soar to nearly 299 billion by 2025, a simple performance hiccup like an application not responding can disrupt millions of user sessions every single day. You can find more insights on mobile app usage and growth statistics to see the scale of the issue.
Let's quickly summarize the most common reasons for these freezes and where you're most likely to encounter them.
Common Causes of Application Freezes at a Glance
This table breaks down the primary reasons an application might become unresponsive, helping you quickly diagnose the potential problem based on your environment.
| Cause | Common Platforms | Quick Fix Hint |
|---|---|---|
| Memory (RAM) Shortage | Desktop OS (Windows, macOS), Mobile | Close unnecessary apps and browser tabs. |
| CPU Overload | All platforms | Check Task Manager or Activity Monitor for rogue processes. |
| Software Incompatibility | Desktop OS, complex development environments | Check for recent software or driver installations. |
| Endless Loop in Code | Development, Custom Enterprise Software | Requires debugging and code analysis to find the loop. |
| Deadlocked Threads | Multi-threaded applications, servers | A classic developer problem needing code-level fixes. |
| Unresponsive Network Call | Web apps, mobile apps, any networked software | Check internet connection; may be a server-side issue. |
| Outdated Drivers | Windows PCs (especially for graphics or peripherals) | Update drivers through the manufacturer's website. |
Understanding these root causes is the first real step. Once you can identify whether the freeze is from a resource shortage, a software clash, or a bug in the code, you can start moving toward a permanent solution instead of just force-quitting and hoping for the best.
Immediate Steps to Unfreeze a Stuck Application
We've all been there. You're deep in your workflow, and suddenly, everything grinds to a halt. The dreaded "Application Not Responding" message appears, or worse, just a frozen window staring back at you. When this happens, you don't need a deep-dive diagnostic; you need to get back on track—fast.
The first order of business is to regain control. Fortunately, every major operating system gives you a way to pull the plug on a misbehaving program without taking the whole system down with it.
Forcing the Application to Quit
The most direct method is to force the application to close. This is like an emergency override that tells the operating system to terminate the process immediately, skipping the standard shutdown procedure that the app is too locked up to follow.
On a Windows machine, your best friend is the Task Manager. The quickest way to bring it up is with the Ctrl+Shift+Esc shortcut. Once it's open, look for the frozen app in the "Processes" tab, click on its name, and hit "End task." It's a blunt but effective way to shut down a program that's ignoring every other command.
If you're on a Mac, you have a similar tool called the Activity Monitor, but for a faster fix, use the "Force Quit Applications" window. Just press Command+Option+Esc, select the unresponsive app from the list, and click the "Force Quit" button. For mobile users on Android or iOS, the process is usually as simple as opening the recent apps view and swiping the frozen application away.
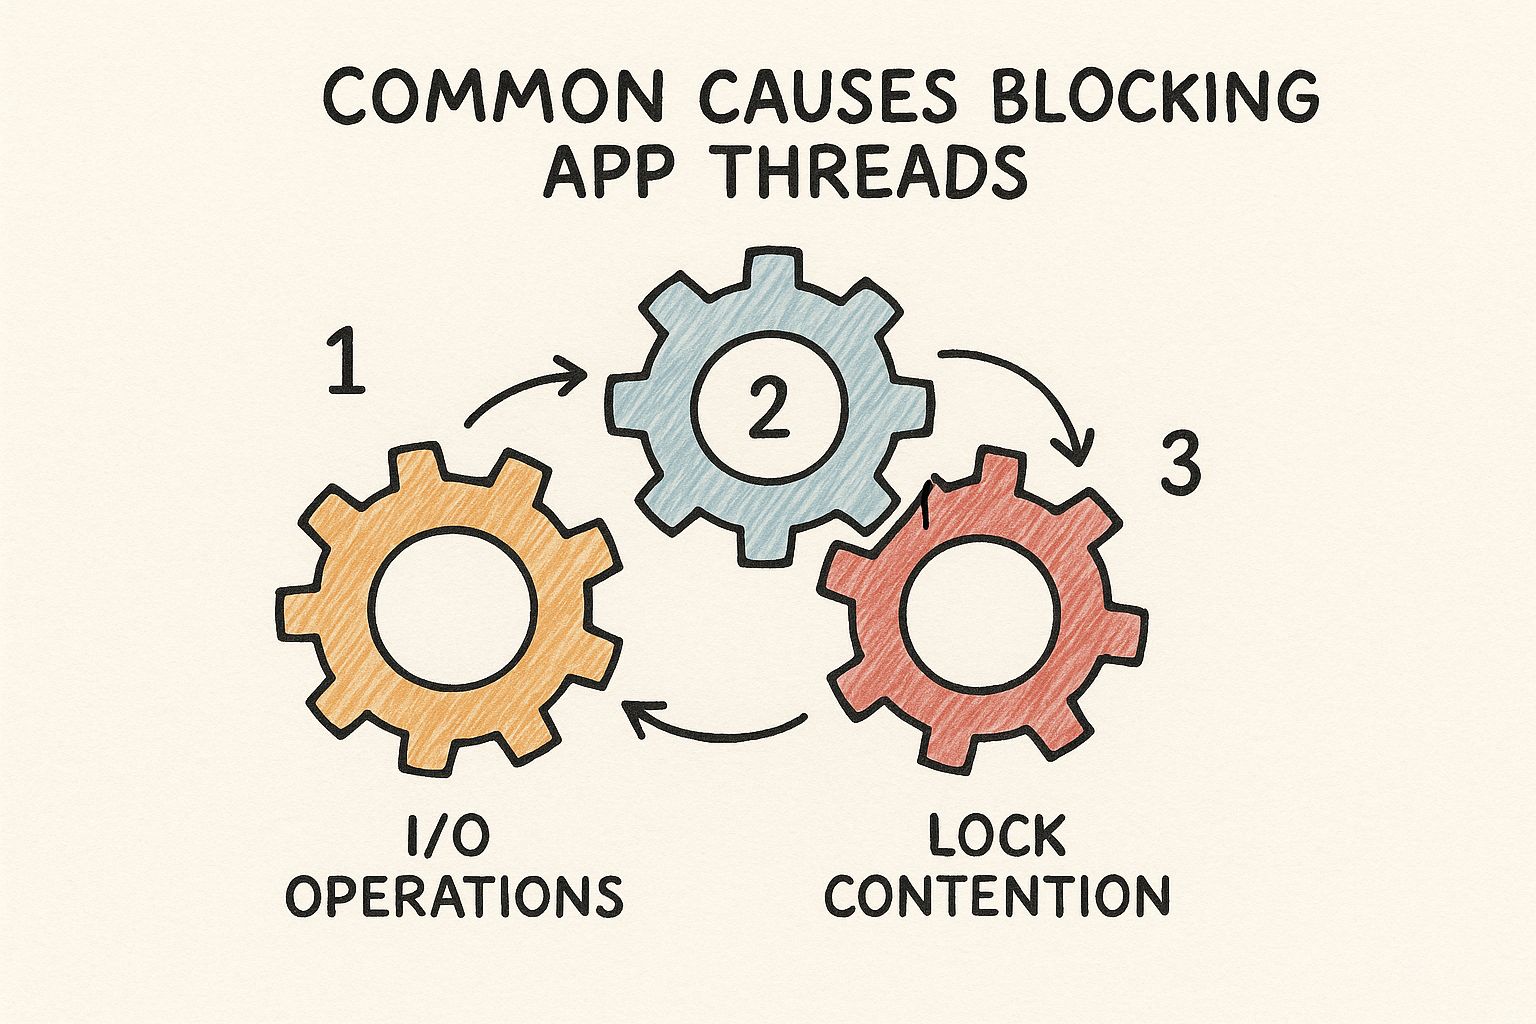
Think of your system's processes as interlocking gears. As the image above illustrates, a single stuck gear—whether it's a software bug or a resource conflict—can jam up the entire machine. A force quit essentially removes that one jammed gear so the rest can start moving again.
Beyond the Force Quit
Sometimes, force-quitting is just a temporary fix, and the problem comes right back. If the application freezes again almost immediately after you restart it, the issue might not be the app itself. It could be another process gobbling up all the system resources.
The old IT standby, "Have you tried turning it off and on again?" is popular for a reason—it works. A complete system reboot clears out temporary files, flushes the RAM, and kills off any rogue background processes that might be causing the conflict.
If a force-quit isn't cutting it or the problem persists, here are a couple of other quick things to check before you dig deeper:
- Look for Pending Updates: It’s entirely possible you’ve hit a known bug that has already been patched. A quick check for updates to both the application and your operating system can often provide a permanent fix.
- Hunt for Resource Hogs: Open your Task Manager or Activity Monitor again, but this time, sort the processes by CPU or Memory usage. You might discover that a totally unrelated background process is the real villain, starving your active application of the resources it needs to run properly.
These immediate actions are your first line of defense and will resolve most common freezing incidents, letting you get back to what you were doing with minimal fuss.
Tackling Persistent Freezes: Time to Play Detective
When an “application not responding” error stops being a rare annoyance and starts becoming a regular part of your day, you’ve got a bigger problem on your hands. A simple force-quit gets you back to work, but it’s just a band-aid. The real fix requires you to put on your detective hat and start looking for clues.
Think about the patterns. Does the application lock up every time you try to export a large video? Or maybe it only grinds to a halt when you have your web browser open with dozens of tabs. These aren't random occurrences; they're breadcrumbs leading you straight to the root cause.
Finding the Resource Hogs and Hidden Conflicts
More often than not, chronic freezing boils down to one thing: resource contention. Your computer only has so much CPU power and RAM to go around. When one greedy application starts gobbling up more than its fair share, every other program on your system starts to feel the squeeze. This is where your system's own monitoring tools become your best friend.
If you’re on Windows, the Resource Monitor is your go-to utility. It gives you a live, detailed breakdown of exactly what’s happening under the hood. To get there, just open Task Manager (Ctrl+Shift+Esc), head to the "Performance" tab, and click "Open Resource Monitor." You’ll see exactly which processes are maxing out your CPU, hammering your hard drive, or hogging all the memory.
Let's say you notice that right before your design software freezes, your cloud backup service suddenly spikes to 100% disk usage. Bingo. You've just found a major suspect. The two programs are fighting for resources, and your design tool is losing.
This isn't just a Windows issue, either. The same principles apply on a Mac, where frequent freezes often signal resource shortages or software incompatibilities, particularly after a major OS update. You can discover more insights about unresponsive Mac applications and see how their Activity Monitor serves the same diagnostic purpose.
An application rarely freezes in a vacuum. Its behavior is almost always connected to the overall health of your system. The culprit might not be the app you're using, but a completely unrelated process running silently in the background.
Isolate the Issue by Creating a Clean Slate
Once you've got a suspect in mind, the next logical step is to isolate it. By running the problematic app in a controlled, clean environment, you can start ruling out variables one by one until the true cause is exposed.
Here are a few ways to create that "clean slate" and narrow down the problem:
- Switch to a New User Profile: Create a brand-new user account on your computer. This fresh profile starts with default settings, no custom startup programs, and no weird configurations. If the application runs perfectly here, you know the problem is tied to something in your primary user account—a corrupt setting or a conflicting startup app.
- Reboot in Safe Mode: This is the ultimate test environment. Safe Mode loads only the bare-minimum drivers and system files needed to run the OS. If your application works flawlessly in Safe Mode, you can be almost certain the conflict lies with a third-party driver, a background service, or another piece of software you installed.
- Disable Other Software (One by One): Start by temporarily turning off non-essential programs. Think antivirus scanners, cloud sync clients, and system utility tools. Disable one, test the problematic app. Still freezing? Re-enable it and disable the next one. It’s tedious, but it’s a surefire way to pinpoint a direct software conflict.
This methodical approach turns a frustrating guessing game into a logical process of elimination. It helps you figure out if the problem is with the app itself, your system's configuration, or a battle between two programs.
For developers and IT pros managing cloud infrastructure, scripting and automating these kinds of test environments can be a massive time-saver. If you're working in the cloud, get a handle on managing your setups by checking out our guide on the Azure PowerShell module.
How Developers Can Prevent ANR Errors in Code

As a developer, seeing an "application not responding" error is more than just a bug report—it's a flashing red light telling you something is fundamentally broken in your code. These errors, what we often call Application Not Responding (ANR) in the Android world, almost always point back to one classic mistake: blocking the main UI thread.
The main thread is the lifeblood of your app's user experience. It handles everything the user sees and does, from drawing the screen to responding to a button tap. The moment you saddle it with a long-running task—like a hefty network request or a complex database query—it grinds to a halt. And when it’s busy, the entire UI freezes solid.
Keep the Main Thread Free at All Costs
Think about an e-commerce app loading high-resolution product images. If you try to download and process those images directly on the main thread, the user is stuck. They can't scroll, they can't tap, they can't do anything until every last byte is loaded. It’s a frustrating experience and a surefire way to trigger an ANR.
The solution here is asynchronous programming. You have to push any operation that might take a while onto a background thread. This simple shift keeps your main thread available and light on its feet, ready to respond instantly to whatever the user does.
Here are the usual suspects that should never touch the main thread:
- Network Operations: Making API calls, downloading files, or syncing data.
- Database Queries: Reading or writing anything to a local database.
- Complex Calculations: Heavy data parsing, encryption, or image manipulation.
Proactive Debugging and Analysis
Good coding habits are just the start. To truly stamp out ANRs, you need to get proactive with your analysis and debugging. Don't sit around waiting for users to complain about freezes; use profiling tools to hunt down bottlenecks before your app ever goes live.
An ANR isn't the problem itself; it's the final, frustrating symptom of a blockage that's gone on for too long. By the time that dialog box appears, your user has already been waiting for a painful number of seconds. The real goal is to find and fix these delays long before anyone notices.
For instance, on Android, tools like the CPU Profiler in Android Studio are invaluable. It lets you visualize what every thread is doing, making it much easier to see exactly where your main thread is getting bogged down. Digging into thread dumps is another powerful trick. A thread dump is just a snapshot of every thread's state, revealing the exact operation that's causing the logjam.
Properly managing application identity can also prevent conflicts, especially in complex enterprise apps. For a deeper dive into this, our article on https://az204fast.com/blog/azure-active-directory-integration offers some great context.
Mobile app stability is no small matter. The average Application-Not-Responding rate for Android apps hovers around 0.63%. That might sound tiny, but it translates into millions of frustrating user sessions that often end with an uninstall and a bad review. You can find more data on this topic by exploring mobile app stability on Instabug.com.
By diligently offloading heavy work and using the right tools to hunt down performance hogs, you can build software that feels fast, fluid, and reliable, even when it's under pressure.
Proactive Tips to Keep Your Applications Running Smoothly
The best way to fix an "application not responding" error is to stop it from ever happening. Instead of just reacting when things go wrong, a bit of preventative maintenance can make all the difference. These habits are surprisingly easy to pick up and will drastically improve your system's stability.
Think of it like taking care of a car. You wouldn't wait for the engine to seize up before getting an oil change, right? The same logic applies here. Keeping your digital environment tidy and up-to-date prevents the kind of gunk that grinds applications to a halt.
Embrace Consistent Software Updates
You know those constant update notifications? They’re not just there to annoy you. Developers are always pushing out patches and new versions for a reason—they often contain critical bug fixes that solve the very performance problems that cause applications to hang. Ignoring an update is like saying "no thanks" to a free tune-up.
I make it a habit to check for updates at least once a week. This isn't just for your main applications, but also for your operating system and even your hardware drivers. You'd be surprised how often an outdated graphics driver, for example, is the hidden culprit behind a creative app that keeps freezing up.
Tame Your Startup Programs
Every time you turn on your computer, a whole bunch of programs quietly launch in the background. Some are essential, sure, but many are just eating up resources for no good reason. Each one takes a bite out of your precious RAM and CPU power.
Take five minutes and audit what's starting up with your machine.
- On Windows: Pop open Task Manager (Ctrl+Shift+Esc) and head to the "Startup" tab.
- On macOS: Go to System Settings > General > Login Items.
Be ruthless. If you don't need it the second your computer boots, disable it. You can always open those apps manually later. This single cleanup can free up a surprising amount of processing power, giving your active applications the breathing room they desperately need. For those of you working with cloud-native apps, understanding the underlying platform is just as critical; a good starting point is learning what Azure App Service is and how it handles resource allocation.
Proactive maintenance isn’t about becoming a tech guru; it’s about building simple, consistent routines. A few minutes spent clearing caches or updating software each month can save you hours of hair-pulling frustration down the line.
Finally, never underestimate the power of clearing your cache. Applications store temporary files to work faster, but over time, that data can get bloated or corrupted, causing slowdowns and freezes. Regularly clearing the cache for your web browser and other heavy-use apps is a quick win for keeping them snappy and responsive.
A Few Common Questions About Unresponsive Apps
Even with the best troubleshooting steps, some questions always seem to pop up. Let's walk through a few of the most common ones I hear from developers and users dealing with frozen applications.
What's the Real Difference Between an App Crashing and Not Responding?
It’s easy to get these two mixed up, but from a technical standpoint, they're worlds apart.
A crash is a sudden death. The application hits a fatal error it can't handle—think of it like a critical exception that wasn't caught—and the operating system shuts it down immediately. One second it's there, the next it's gone.
An app that's not responding, however, is still running. It's just stuck. It's alive but paralyzed, often caught in an infinite loop, deadlocked waiting on a resource, or waiting for a network response that will never arrive. The user interface freezes, but the process is still active in the background until you decide to kill it.
A crash is a sudden, unrecoverable failure. A "not responding" state is a program that's still running but has become completely stuck, unable to process any new input.
Could a Virus Be Making My Apps Unresponsive?
Yes, and it happens more often than you'd think. Malware is infamous for being a resource parasite. A virus can secretly chew up your system's CPU and memory, leaving your other applications starved for the resources they need to function.
When an application can't get the processing power or memory it's asking for, it can easily grind to a halt. If you suddenly notice several different programs starting to freeze for no apparent reason, a malware scan should jump to the top of your to-do list.
Is Reinstalling an App That Keeps Freezing a Good Idea?
Sometimes, it’s the perfect fix. If the problem is due to corrupted files from a botched update or a disk error, a clean reinstall is often the quickest way to solve it. It wipes the slate clean by replacing all the application's files with fresh copies.
But it's not a cure-all. Reinstalling won't help if the issue is a fundamental bug in the code, an incompatibility with another piece of software, or a problem with your system configuration. My advice? Treat reinstallation as a powerful tool, but not your first one. Try clearing the cache or checking for updates first—you might save yourself a lot of time.
Are you a developer looking to build more resilient applications and master Azure? AZ-204 Fast gives you the focused study materials you need to ace your certification in weeks, not months. Stop fighting with unresponsive apps and start building better ones from the ground up. Check out the platform and take the next step in your cloud career.