Blog

  • Allow Remote Connections SQL Server: Secure Setup Guide

    Allow Remote Connections SQL Server: Secure Setup Guide

    So, you need to open up your SQL Server to the outside world. This isn't just a simple switch you flip; it’s a deliberate process involving a few key steps. You'll need to enable the right network protocol, tell SQL Server to actually listen for incoming connections, and then poke a hole in your firewall to let the traffic through. Getting these steps right is what makes your database available to the applications and people who need it.

    Why Bother with Remote SQL Server Access?

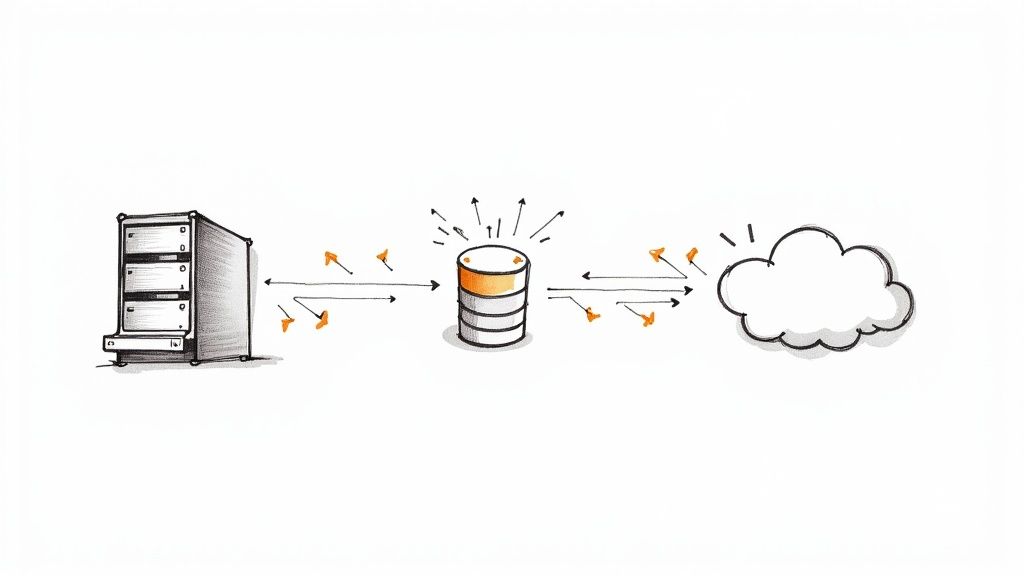
    Before we jump into the "how," let's quickly cover the "why." In almost any real-world setup, your database can't live in a silo. Making it accessible from other machines isn't just a nice-to-have; it’s the backbone of modern application design. Your database needs to talk to other parts of your system, and enabling remote access is how you make that conversation happen.

    Think about a standard web application. You almost never have your web server and database server on the same machine. For performance, security, and scalability, they're kept separate. That web server needs to reach across the network to query the SQL Server to do its job. It's the same story with business intelligence tools like Power BI or Tableau. Your data analysts are running these on their own computers, and they need a direct line to the database to build their reports and dashboards.

    Here are a few classic scenarios I see all the time where remote access is a must:

    • Websites and Apps: The front-end and back-end logic run on different servers, all communicating with a central SQL Server.
    • Remote Database Management: As a DBA, you need to manage servers from your own workstation. You can't be expected to log into the server console for every little task.
    • Connecting Services: Your SQL Server often needs to sync data with other systems, like a data warehouse or a cloud service.

    This push for connected data is a huge deal. The market for what's called SQL Server Transformation—which includes making data more accessible—was valued at roughly USD 20.7 billion in 2025 and is expected to hit USD 54.2 billion by 2035. That explosive growth shows just how essential it is to get this right. If you're interested in the market trends, you can dig deeper into this detailed report on SQL Server transformation.

    But let’s be clear: opening your SQL Server to remote connections also opens it up to potential threats. Every step we take from here on out will be viewed through a security lens. Connectivity is the goal, but security is the priority.

    Switching On TCP/IP in SQL Server Configuration

    First things first: your SQL Server won't talk to the outside world until you tell it to. For security, most fresh SQL Server installations come with network connectivity turned off by default. So, your initial task is to dive into the SQL Server Configuration Manager and flip the right switch.

    This utility is your control panel for all things related to SQL Server services and network protocols. It's a bit hidden away—you won't find it in the Start Menu alongside your other SQL tools. The quickest way to pull it up is by searching for SQLServerManager<version>.msc. For instance, if you're running SQL Server 2019, you’d search for SQLServerManager15.msc.

    Once you've got it open, you'll see a slightly old-school interface, but don't let that fool you; its purpose is direct and powerful. Your target is the SQL Server Network Configuration node in the pane on the left.

    Finding Your Way Through the Configuration Manager

    When you expand the network configuration node, you'll see a list of protocols for every SQL Server instance on that machine. You need to zero in on the specific instance you want to open up for remote access. This is usually MSSQLSERVER for a default instance, but it could also be a custom name if you're working with a named instance.

    After selecting your instance, look to the right-hand pane. You'll find a few protocols listed, like Shared Memory and Named Pipes. Your focus, however, is solely on TCP/IP.

    Image

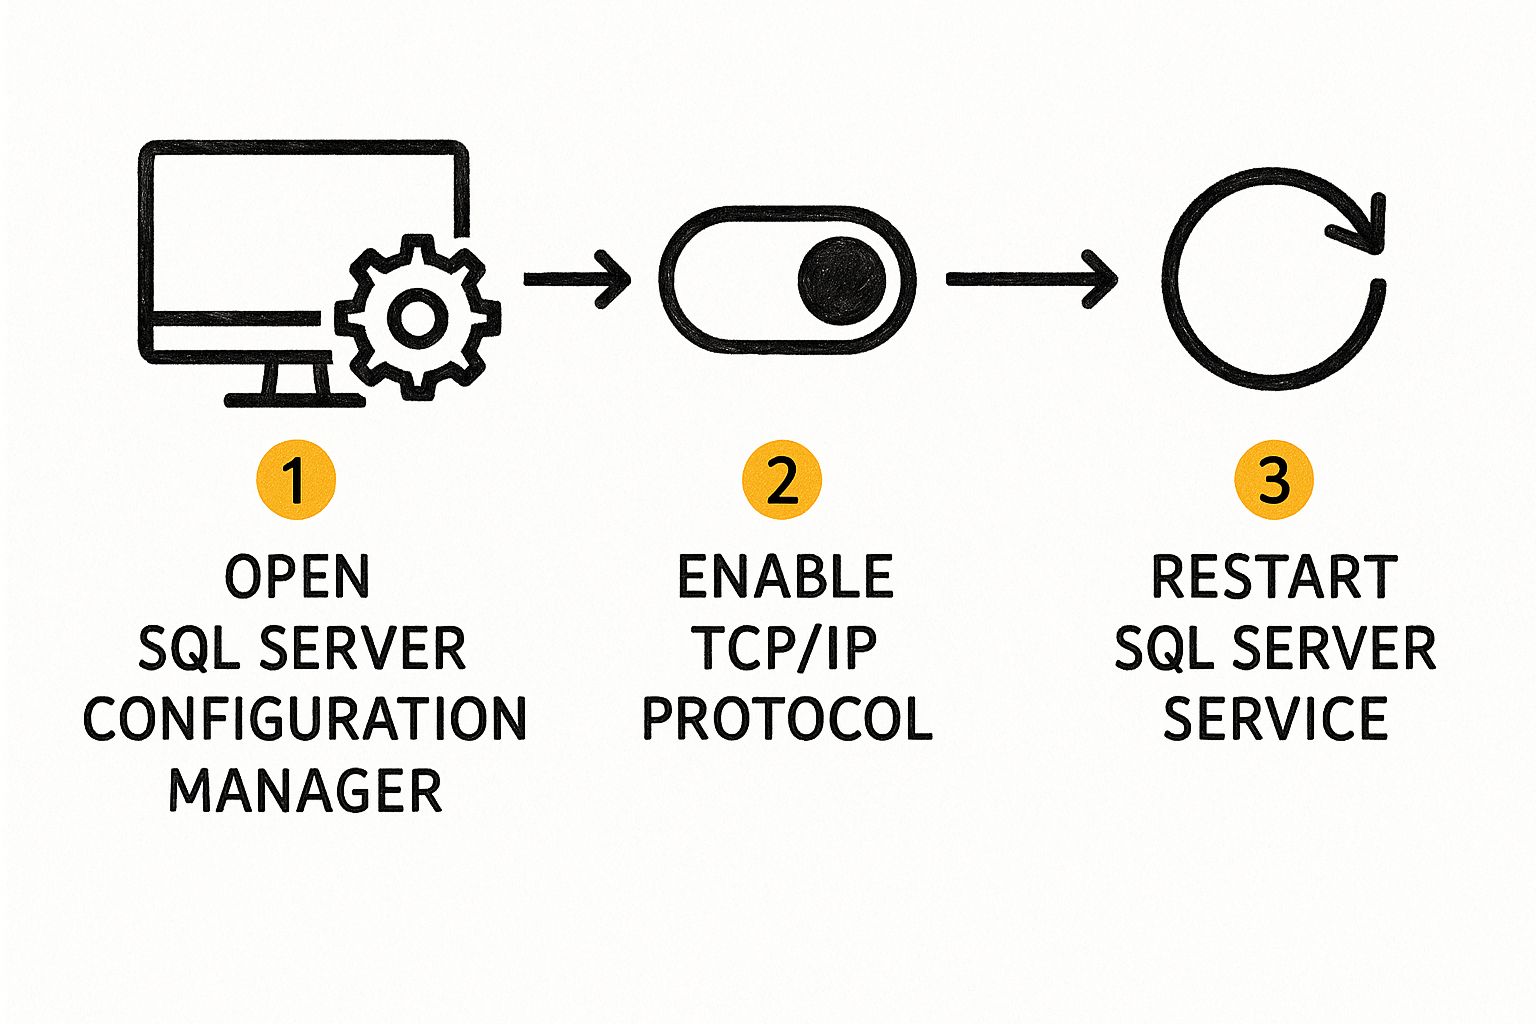
    Right-click on TCP/IP and choose Enable. You'll immediately get a small pop-up warning that the change won't take effect until the service is restarted. This is a critical step that trips a lot of people up. Just enabling the protocol doesn't complete the job—you have to restart the SQL Server service itself for it to begin listening.

    My Two Cents: Think of this as the master switch. If TCP/IP is disabled, nothing else you do with firewall rules or server settings will matter. The server simply won't be listening for network requests.

    Making the Changes Stick

    With TCP/IP enabled, it's time to make it official by restarting the SQL Server service. The good news is you can do this right from the Configuration Manager.

    • Head over to the SQL Server Services node in the left-hand pane.
    • Locate the SQL Server service that corresponds to your instance, like SQL Server (MSSQLSERVER).
    • Just right-click the service and select Restart.

    The service will quickly stop and start back up. Once it's running again, it's now actively listening for connections using the TCP/IP protocol. You've just knocked out the first major hurdle. The next logical step is getting your firewall to let that traffic through.

    Configuring Your Server for Secure Connections

    Just because TCP/IP is active doesn't mean your SQL Server is ready for company. Think of it this way: you've turned on the lights, but the front door is still locked. The next step is to explicitly tell your SQL Server instance that it's okay to accept connections from other machines.

    This critical permission is managed right inside SQL Server Management Studio (SSMS). Go ahead and open SSMS and connect to your instance. In the Object Explorer panel, find the very top node—your server's name—right-click it, and choose Properties. This opens the command center for your entire instance. From here, click on the Connections page in the left-hand pane.

    Look for the checkbox that says Allow remote connections to this server. This is the master switch. You need to make sure it's checked. Without this, all your other configuration work is for nothing; the server will simply refuse any connection that isn't coming from the local machine.

    Image

    The Critical Authentication Decision

    Now for arguably the most important decision you'll make in this process: how will users prove who they are? In the same Server Properties window, click over to the Security page. This is where you set the authentication mode.

    Your choice here has significant security implications, so it’s important to understand the difference.

    SQL Server Authentication Modes Compared

    Feature Windows Authentication Mode Mixed Mode (SQL Server and Windows Authentication)
    Who It's For Environments where all users and applications are on the same Windows domain. Environments with non-domain users, legacy applications, or specific third-party tools that require SQL logins.
    Security More secure. Leverages Active Directory's robust policies (password complexity, expiration, account lockouts). No passwords sent over the network. Less secure by nature. You are now responsible for managing SQL login passwords. Requires diligent password policies.
    Management Centralized in Active Directory. DBAs don't manage individual passwords. Requires manual management of SQL logins and passwords directly within SQL Server.
    Best Practice The default and recommended setting for most corporate environments. Use only when absolutely necessary. If you enable it, you must secure the 'sa' account with a very strong password and disable it if possible.

    In my experience, you should always stick with Windows Authentication unless you have a compelling, undeniable reason not to. It's simply more secure and easier to manage.

    If you find yourself needing Mixed Mode—perhaps for a specific web application or a partner connecting from outside your network—you’re also taking on a serious responsibility.

    Enabling Mixed Mode isn't just a setting; it's a security commitment. You must enforce a strong password policy for all SQL logins, including complexity, history, and expiration. A weak 'sa' password is one of the most common and dangerous security vulnerabilities I see in the wild.

    Navigating Different SQL Server Versions

    The version of SQL Server you're running also plays a part. The landscape is dominated by a few key players; recent data shows SQL Server 2019 still holds a 44% share, but the newer SQL Server 2022 has quickly grown to 21%.

    Why does this matter? Newer versions come with more robust and streamlined security features for remote access, like improved encryption. Sticking with a supported, modern version isn't just about new features—it's a critical security practice.

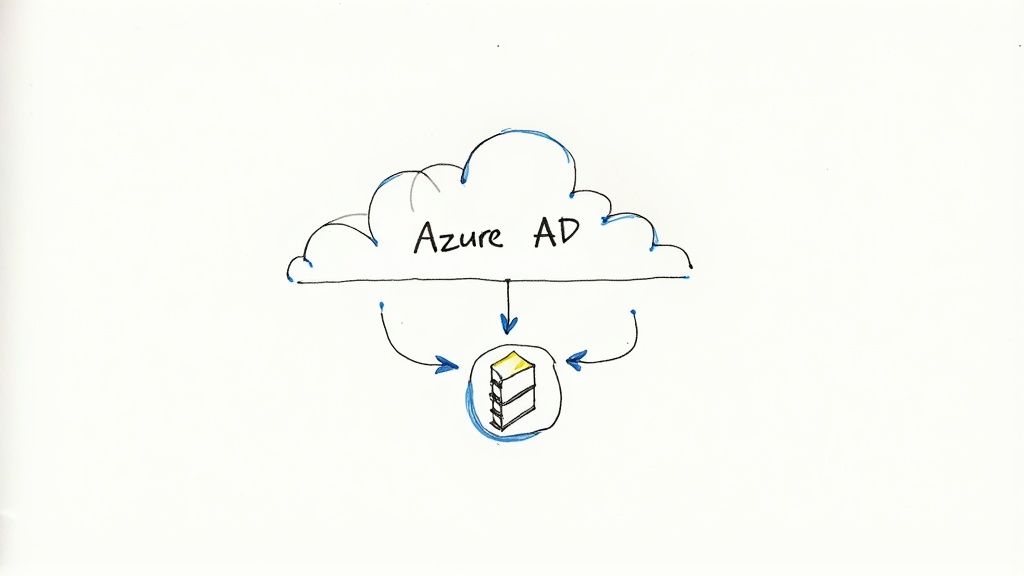
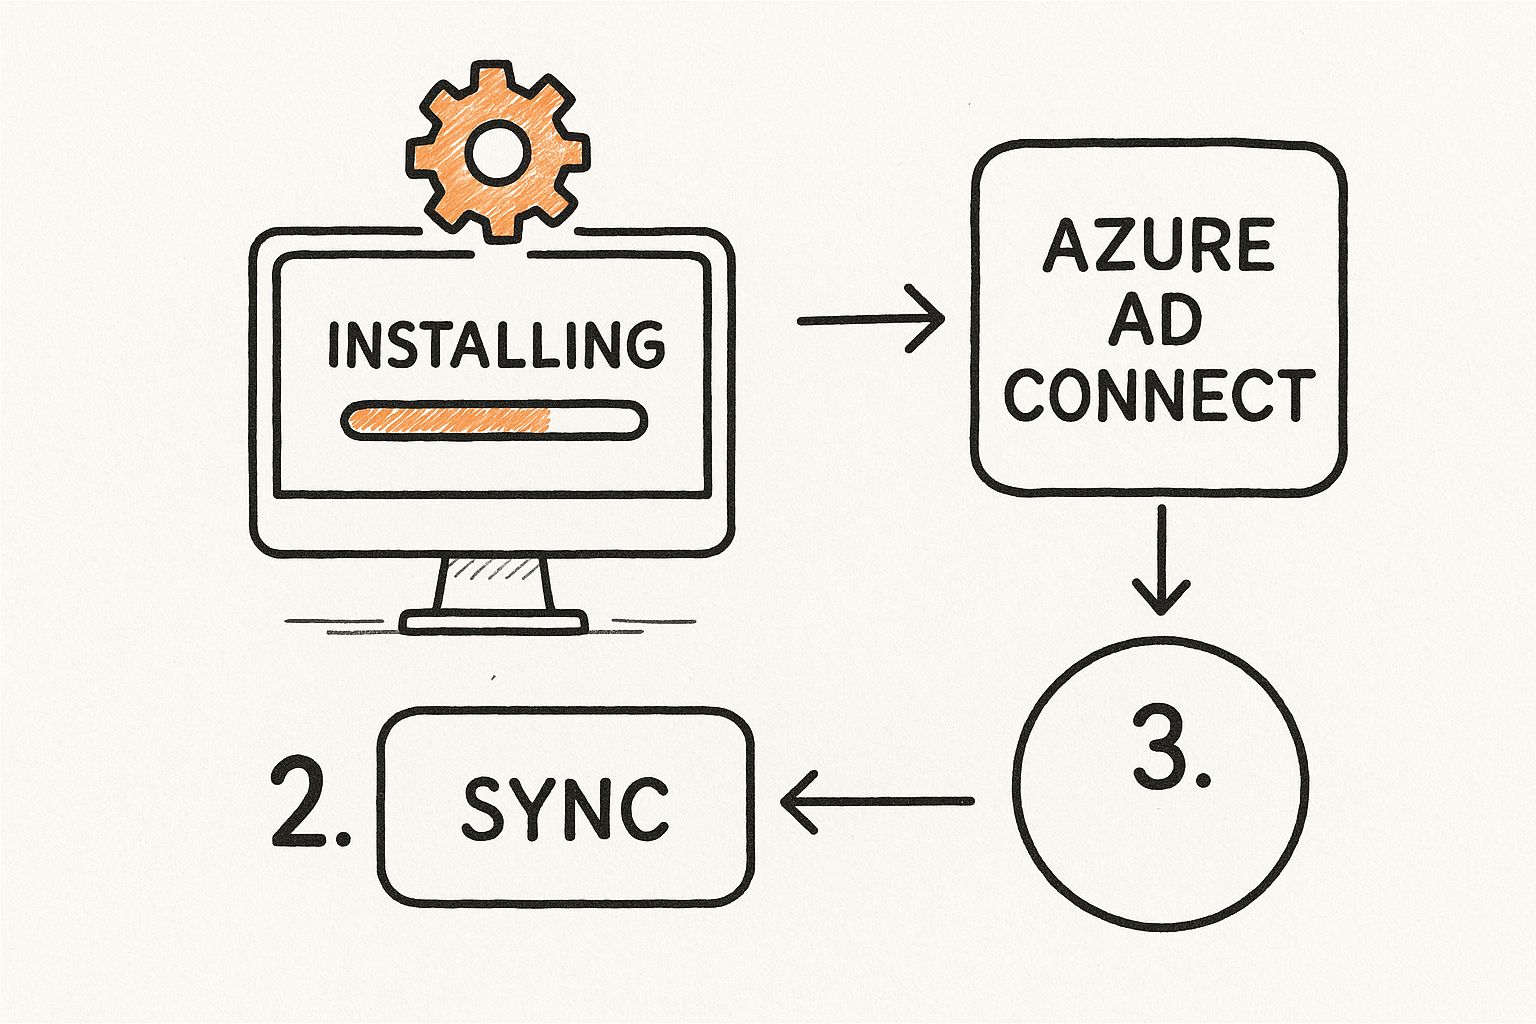
    For organizations running a hybrid setup, the lines between on-premises and cloud are blurring. It's now quite common to sync local user accounts with the cloud. If this sounds like your environment, you might want to look into how to handle https://az204fast.com/blog/azure-active-directory-sync. This approach centralizes your identity management, which can dramatically strengthen your security posture for all connections, remote or otherwise.

    Navigating Windows Firewall for SQL Server

    So, you’ve sorted out the protocols and your server settings are dialed in. Now for the final boss: the Windows Defender Firewall. In my experience, if you can't get a remote connection to SQL Server, a misconfigured firewall is the culprit 9 times out of 10. It’s that silent gatekeeper that just denies traffic, leaving you staring at a "cannot connect" error and scratching your head.

    Image

    Let's cut through the confusion. The goal is to create a specific inbound rule that tells the firewall to let traffic through to your SQL Server instance. You'll do this from inside the Windows Defender Firewall with Advanced Security tool.

    Creating Program-Based Firewall Rules

    The most foolproof way to do this is by creating a rule that points directly at the SQL Server program file, which is sqlservr.exe. I strongly recommend this method over a port-based rule, especially if your SQL Server is using dynamic ports. Why? Because dynamic ports can change every time the service restarts, and a program-based rule doesn't care—it just works.

    Here’s the game plan for the Database Engine rule:

    1. Inside the firewall tool, find Inbound Rules on the left, right-click it, and hit New Rule.
    2. When the wizard pops up, select the Program rule type.
    3. You'll be asked for the program path. Browse to where sqlservr.exe lives. It’s usually buried in a path similar to C:\Program Files\Microsoft SQL Server\MSSQL<version>.<InstanceName>\MSSQL\Binn\.
    4. Next, choose Allow the connection.
    5. Apply the rule to the network profiles that make sense for your environment (Domain, Private, Public). Finish by giving it a clear name, something like "SQL Server – DB Engine Access," so you know what it is later.

    This approach essentially gives the sqlservr.exe application a free pass through the firewall, no matter what port it decides to listen on.

    Pro Tip: Don't forget about the SQL Server Browser service! If you're using a named instance or relying on dynamic ports, this service is non-negotiable. You'll need to create a second inbound rule for it, this time pointing to the sqlbrowser.exe file. You can typically find it in C:\Program Files (x86)\Microsoft SQL Server\90\Shared\.

    Why a Static Port Is Often Better

    While program-based rules are great for dynamic environments, many seasoned DBAs prefer a more predictable setup. By configuring your SQL Server instance to use a static port (like the classic default of 1433), you create a more secure and straightforward environment. It just makes firewall management simpler because you know exactly which door needs to be unlocked.

    If you go the static port route, you can create a port-based firewall rule instead. Some argue this is slightly more performant and it’s definitely considered a standard security practice in many corporate environments. You're trading a little extra configuration work upfront for a whole lot of long-term stability.

    As security becomes a bigger and bigger deal, these kinds of specific firewall rules are essential. Modern best practices often mean locking down everything and only opening what’s absolutely necessary, usually in combination with VPNs and full encryption. This security-first approach is a major driver behind the adoption of newer versions like SQL Server 2022, which offers enhanced security features. You can see how these trends are playing out across the industry in this insightful SQL Server security practices report.

    For organizations blending on-premise systems with the cloud, identity management is another key piece of the security puzzle. Looking into solutions for Azure Active Directory integration can centralize how users are authenticated, adding another powerful layer of protection for your remote connections.

    Solving Common SQL Connection Problems

    Even after following every step perfectly, you might still run into the dreaded error message: "A network-related or instance-specific error occurred while establishing a connection to SQL Server." This is one of the most infamous and frustrating errors for anyone working with SQL Server. It tells you something is wrong but gives you almost no clue what it is.

    When you see this, take a breath. The key is to troubleshoot systematically, not to start changing settings at random. Think like a detective and work your way from the client machine back to the server to isolate where the connection is failing. Is the server even reachable? Is the SQL instance itself the problem? Or is it a simple authentication mix-up?

    Your Diagnostic Toolkit

    One of the most powerful yet simple tools in your arsenal is a Universal Data Link (UDL) file. It's a lifesaver. On the client machine trying to connect, just right-click your desktop, create a new text document, and rename it to something like test.udl.

    Double-clicking that file opens the Data Link Properties window—a generic connection utility that’s incredibly useful for diagnostics.

    Image

    Here, you can plug in your server name and credentials and test the connection directly. The feedback it provides is often far more specific than what your application will give you. For instance, if the connection hangs for 30-60 seconds before failing, you're almost certainly looking at a network or firewall problem. If it fails instantly with an "invalid login" message, you know you've reached the server, and the issue is with the username or password.

    Another fantastic tool is the command-line utility SQLCMD. From a command prompt on the client, you can try connecting directly, completely bypassing your application's code. For a named instance, the command looks like this:

    SQLCMD -S YourServerName\YourInstanceName -U YourSqlLogin -P YourPassword

    This gives you a raw, unfiltered test of connectivity.

    Remember, troubleshooting is all about isolation. Using a UDL file or SQLCMD from the client machine helps you figure out if the problem is with the network and firewall or something in your application's connection string. This one step can save you hours of frustrated guesswork.

    The Troubleshooting Checklist

    When you're trying to allow remote connections to SQL Server and keep hitting a wall, run through this quick checklist:

    • Is the SQL Browser Service Running? This is a classic culprit for named instances. If this service is stopped, clients have no way of finding out which port your instance is listening on.
    • Can the Client Reach the Server? Try a simple ping command with the server's name. If ping fails, you're dealing with a DNS problem or a more fundamental network block that has nothing to do with SQL Server itself.
    • Is the Firewall Rule Correct? Go back and double-check the inbound rule on the server. Make sure it's enabled and correctly configured for either the SQL Server program (sqlservr.exe) or the specific TCP port. A typo here is all it takes to block everything.

    In larger environments, automating these checks can be a real game-changer. If you manage SQL Server on Azure VMs, scripting these diagnostics can save a ton of time. For a deeper dive into automation, you might find our guide on the Azure PowerShell module helpful.

    By methodically working through these common failure points, you can turn that vague, frustrating error into a clear, solvable problem.

    Frequently Asked Questions About Remote SQL Access

    https://www.youtube.com/embed/lJ_WRSN_wD0

    Even when you follow a guide perfectly, setting up remote SQL Server access always seems to have a few lingering questions. Let's walk through some of the common ones I hear all the time to clear up any confusion and make sure your setup is both functional and secure.

    Should I Use the Default Port 1433 or a Custom Port?

    While using the default port 1433 is easy, it’s like putting a giant "SQL Server here!" sign on your network. It’s the very first place automated bots and attackers will look. My advice? For any production server, especially one with sensitive data, switch to a custom, non-standard port.

    This is a classic example of "security through obscurity." It won't single-handedly stop a dedicated attacker, but it's an incredibly simple and effective way to sidestep the vast majority of low-effort, automated scans looking for easy prey on the default port.

    Is a VPN Required to Connect to SQL Server Remotely?

    Technically, no, the connection will work without one. But from a security standpoint, it’s non-negotiable. Using a Virtual Private Network (VPN) is an absolute must for secure remote access. The VPN wraps all the traffic between you and the server in an encrypted tunnel, shielding your data from prying eyes.

    Think of it this way: exposing SQL Server directly to the internet is a massive risk. A VPN creates a secure, private corridor that dramatically shrinks your attack surface. It's the industry-standard method for secure remote database administration for a reason.

    The need for secure remote access isn't going away; it's accelerating. You just have to look at the latest SQL Server population trends to see how many environments, including cloud services like Azure SQL, are built for remote connectivity.

    Can I Allow Connections From Only Specific IP Addresses?

    Absolutely, and you definitely should. This is one of the most effective security layers you can add. Instead of creating a firewall rule that allows traffic from "Any IP address," lock it down.

    Here’s how you do it:

    1. Open your firewall rule in Windows Defender Firewall.
    2. Go to the Scope tab.
    3. Under the "Remote IP addresses" section, choose "These IP addresses."
    4. From there, you can add a list of the specific, static IP addresses of the machines that need to connect.

    This is a powerful gatekeeping measure. It ensures that only pre-approved clients can even knock on the door, blocking all other traffic at the network's edge.

    How Do I Find My SQL Server Instance Name?

    It happens to the best of us, especially when you're juggling multiple servers. The quickest and most reliable way to find your instance name is to log into the server locally using SQL Server Management Studio (SSMS).

    Once you're connected, just run this simple T-SQL query:

    SELECT @@SERVERNAME

    The query will return the full name you need, typically in the format of YourServerName\YourInstanceName. If you're using a default instance, it will just show the server's name. You'll need this exact string when setting up your connection from a remote machine.


    Preparing for your Azure Developer exam? Stop cramming and start learning effectively. AZ-204 Fast offers a smarter way to study with interactive flashcards, adaptive practice exams, and progress analytics designed to get you AZ-204 certified, faster. See how our system works at https://az204fast.com.

  • Backup SQL Database: Essential Strategies for Data Safety

    Backup SQL Database: Essential Strategies for Data Safety

    A solid SQL database backup strategy is more than just running a few scripts; it's a careful blend of business understanding and technical know-how. At its heart, it's about knowing your business needs—your RPO and RTO—and then picking the right tools for the job, like full, differential, and transaction log backups. Getting these fundamentals right from the start is what separates a reliable recovery plan from a recipe for disaster.

    Building Your Bedrock Backup Strategy

    Image

    Before you write a single line of T-SQL or touch the Azure portal, pause and think about the big picture. A truly resilient backup plan isn't built on commands; it’s built on a deep understanding of your business requirements. I've seen too many people jump straight to the technical side, only to find their backups can't deliver when a real crisis hits.

    The whole process really boils down to answering two critical questions that will become the pillars of your entire data protection strategy.

    Defining Your Recovery Objectives

    Everything you do from this point on will flow from your Recovery Point Objective (RPO) and Recovery Time Objective (RTO). These aren't just abstract terms; they are concrete business metrics that directly impact how well you can weather a storm.

    • Recovery Point Objective (RPO): This is all about data loss. It asks, "What's the maximum amount of data we can afford to lose?" If your business sets an RPO of 15 minutes, your backups must be able to restore the database to a state no more than 15 minutes before the failure. A low RPO is more complex and costly, while a higher one is simpler but risks losing more data.

    • Recovery Time Objective (RTO): This is all about downtime. It asks, "How quickly do we need to be back up and running?" An RTO of one hour means the entire restore process—from start to finish—has to be completed within 60 minutes. Hitting a tight RTO requires fast hardware, well-tested scripts, and a team that knows exactly what to do.

    Don't make the mistake of seeing RPO and RTO as purely technical decisions. They are business decisions, first and foremost. The business must define its tolerance for downtime and data loss; your job is to build the technical solution that meets those targets.

    Choosing the Right SQL Backup Types

    With your RPO and RTO clearly defined, you can now choose the right mix of backup types to achieve them. SQL Server gives you three main options, and each plays a specific role in a well-rounded strategy.

    • Full Backups
      A full backup is the foundation of your recovery plan. It’s a complete copy of the entire database, including a portion of the transaction log. While they are absolutely essential, running them too often on a large, busy database can be a major drain on storage and I/O. Think of it as your reliable, complete baseline.

    • Differential Backups
      These are the smart, efficient backups. A differential backup only captures the data that has changed since the last full backup. They’re much smaller and faster to create, making them perfect for bridging the gap between full backups. A common and effective pattern is to take a full backup once a week and a differential every day.

    • Transaction Log Backups
      This is your secret weapon for hitting a low RPO. A log backup captures all the transaction log records generated since the last time a log backup was taken. By scheduling these frequently—say, every 10-15 minutes—you enable what's called a point-in-time recovery. This lets you restore a database to a specific moment, like just before a user accidentally wiped out a critical table.

    Understanding SQL Server Recovery Models

    The final piece of this strategic puzzle is the database recovery model. This setting dictates how transactions are logged, which in turn determines which backup and restore options are even available to you. Picking the wrong one can completely undermine your entire backup strategy.

    There are three recovery models to choose from:

    • Full: This is the gold standard for production databases. It fully logs every transaction, which is a prerequisite for taking transaction log backups. The Full model gives you the most power and flexibility, including point-in-time restores.

    • Simple: In this model, the log space is automatically reclaimed, keeping the log file small. The major trade-off? You can't take transaction log backups. This means you can only restore to the time of your last full or differential backup, making it a poor choice for any system where you can't afford to lose data.

    • Bulk-Logged: This is a specialized, hybrid model. It acts like the Full model but minimally logs certain bulk operations (like rebuilding a large index) to boost performance. While it saves log space, it can complicate point-in-time recovery scenarios, so use it with caution.

    For any plan designed to backup a SQL database that's critical to your business, the Full recovery model is almost always the right answer. It’s the only model that provides the granularity you need to meet demanding RPO and RTO targets.

    Hands-On Database Backups with T-SQL Scripts

    Image

    While portals and GUIs are great for quick tasks, nothing gives you the raw power and fine-grained control over your backups like good old T-SQL. When you get your hands dirty with scripting, you move beyond simple point-and-click operations and start building a genuinely resilient, customized SQL database backup process. It’s all about taking full control to make sure your backup routines are truly optimized for your environment.

    The BACKUP DATABASE command is your entry point, but its real value comes from the powerful options that can make a world of difference in efficiency and reliability. Let's look at the practical scripts that I and other DBAs use to keep production systems safe.

    Fine-Tuning Backups with Core Options

    Just running a backup isn't enough; you have to make it efficient. Two of the most crucial clauses I use are WITH COMPRESSION and WITH CHECKSUM. Honestly, I consider these non-negotiable for almost any production backup.

    • WITH COMPRESSION: This is a game-changer. It can shrink your backup files by 50-70% or even more. That doesn't just save a ton of disk space—it also speeds up the entire backup process because there’s simply less data to write to disk.

    • WITH CHECKSUM: Think of this as your first line of defense against data corruption. It tells SQL Server to verify every page as it's being written to the backup file. If it finds a bad page, the backup fails immediately, alerting you to a serious problem before you end up with a useless backup.

    Putting these together, a solid full backup command looks clean and simple.

    BACKUP DATABASE [MyProductionDB]
    TO DISK = 'D:\Backups\MyProductionDB_FULL.bak'
    WITH
    COMPRESSION,
    CHECKSUM,
    STATS = 10;
    I like to add STATS = 10 for a bit of user-friendliness. It gives you progress updates in 10% chunks, so you're not just staring at a blinking cursor, wondering if it's working.

    Scripting Different Backup Types

    A robust strategy always involves a mix of backup types. Here’s how you can script each one.

    A differential backup, which captures all changes since the last full backup, just needs one tweak: the WITH DIFFERENTIAL clause.

    BACKUP DATABASE [MyProductionDB]
    TO DISK = 'D:\Backups\MyProductionDB_DIFF.bak'
    WITH
    DIFFERENTIAL,
    COMPRESSION,
    CHECKSUM;

    For transaction log backups—the key to point-in-time recovery—the command is a bit different. Just remember, you can only run log backups if your database is in the Full or Bulk-Logged recovery model.

    BACKUP LOG [MyProductionDB]
    TO DISK = 'D:\Backups\MyProductionDB_LOG.trn'
    WITH
    COMPRESSION,
    CHECKSUM;

    A pro tip I swear by: always script your backups with dynamic file names. Include the database name and a timestamp. This stops you from accidentally overwriting old backups and makes finding the right file so much easier when the pressure is on during a restore.

    Tackling Very Large Databases

    What do you do when your database swells into a multi-terabyte beast? Backing up to a single, massive file becomes a huge bottleneck for both backups and restores. The answer is backup striping—splitting the backup across multiple files.

    SQL Server is smart enough to write to all these files at the same time. If you can point each file to a different physical disk, you can see a dramatic boost in backup speed.

    Here’s what that looks like, striping a full backup across four separate files and drives.

    BACKUP DATABASE [VeryLargeDB]
    TO
    DISK = 'D:\Backups\VeryLargeDB_1.bak',
    DISK = 'E:\Backups\VeryLargeDB_2.bak',
    DISK = 'F:\Backups\VeryLargeDB_3.bak',
    DISK = 'G:\Backups\VeryLargeDB_4.bak'
    WITH
    COMPRESSION,
    CHECKSUM,
    STATS = 5;
    This approach makes the entire operation faster and much more manageable.

    Embracing Modern Compression

    The standard compression in SQL Server has served us well for years, but things are always improving. One of the most exciting recent developments is the Zstandard (ZSTD) compression algorithm. In tests on a 25.13 GB database, ZSTD hit a backup speed of 714.558 MB/sec. For comparison, the traditional algorithm clocked in at 295.764 MB/sec with similar compression levels. That’s a massive performance gain.

    You can dive deeper into these benchmarks and see how to use the new algorithm by checking out this fantastic analysis of SQL Server 2025's new backup magic.

    By going beyond the basic commands and using these real-world T-SQL techniques, you can build a SQL database backup plan that’s not just dependable, but incredibly efficient.

    Managing Backups in Azure SQL Database

    https://www.youtube.com/embed/dzkl6ZCQO9s

    When you make the leap from a traditional on-premises server to an Azure SQL Database, your whole operational playbook changes. This is especially true for backups. The days of manually scripting and scheduling jobs are mostly over. In Azure, you hand over that daily grind, but you're still in the driver's seat when it comes to understanding and managing your data's safety.

    Azure SQL Database completely redefines backup management by giving you a powerful, automated service right out of the box. You'll likely never need to write a BACKUP DATABASE command for routine protection again. Behind the scenes, Azure is constantly running a mix of full, differential, and transaction log backups for you.

    This automation is the magic that enables one of Azure's most powerful features: Point-in-Time Restore (PITR). Depending on your service tier, you can rewind your database to any specific second within a retention window, which typically falls between 7 and 35 days. It’s your go-to solution for those heart-stopping moments, like a developer dropping a table or running a DELETE without a WHERE clause.

    Configuring Long-Term Retention for Compliance

    The built-in PITR is a lifesaver for operational recovery, but what about the long haul? Many industries have strict rules that require you to keep backups for months or even years. For that, you need Long-Term Retention (LTR).

    LTR lets you create policies to automatically copy specific full backups into separate Azure Blob Storage, where they can be kept for up to 10 years. You can set up a simple policy that ensures you stay compliant, then forget about it.

    A common LTR policy I've seen in the field looks something like this:

    • Keep the weekly backup from the last 8 weeks.
    • Keep the first weekly backup of every month for 12 months.
    • Keep the first weekly backup of the year for 7 years.

    Setting this up is a breeze. From the Azure Portal, just go to your SQL server, find "Backups," and click on the "Retention policies" tab. From there, you can pick the databases you want to protect and configure the weekly, monthly, and yearly schedules. It’s a few clicks for a ton of long-term security.

    Trusting the automation is key, but so is knowing how to verify it. I make it a habit to regularly check the "Available backups" for a database in the portal. This screen is your confidence dashboard—it shows you the earliest PITR point, the latest restore point, and all your available LTR backups.

    The Ultimate Safety Net: Geo-Redundant Backups

    What’s the plan if an entire Azure region goes down? It’s the worst-case scenario, but it’s one that Azure is built to handle. By default, your database backups are stored in Geo-Redundant Storage (GRS). This doesn't just mean your backups are copied within your primary region; they are also being asynchronously replicated to a paired Azure region hundreds of miles away.

    This geo-replication is your ultimate disaster recovery parachute. If a regional catastrophe occurs, you can perform a geo-restore to bring your database back online in the paired region using the last available replicated backup. The best part? It's enabled by default, giving you a level of resilience that would be incredibly complex and costly to build on your own. This type of built-in resilience is a core principle in Azure's platform services. To see how it applies to web hosting, you can read our detailed guide on what Azure App Service is and its capabilities.

    By getting a handle on these layers of protection—from automated PITR to configurable LTR and built-in GRS—you can move from being a script-runner to a true strategist for your SQL database backup plan in the cloud. You get to ensure your data is safe, compliant, and always recoverable.

    Automating Your Backups with PowerShell and the Azure CLI

    If you're managing more than a handful of databases, clicking through a portal for backups just isn't sustainable. Manual work doesn't scale well, it’s a breeding ground for human error, and frankly, it eats up time you don’t have. This is where command-line tools like PowerShell and the Azure CLI stop being nice-to-haves and become absolutely essential for modern data management.

    By scripting your backups, you can shift from being a reactive admin putting out fires to proactively managing your entire data environment. Let's dig into some practical scripts you can adapt right now to bring some much-needed efficiency and consistency to your operations, whether your servers are in your own data center or in the cloud.

    This diagram shows how you can turn a tedious manual task into a reliable, hands-off system.

    Image

    It’s all about moving from one-off script development to a fully scheduled and monitored workflow.

    PowerShell for On-Premises SQL Server

    When you're working with on-premises SQL Server instances, PowerShell is your best friend. The community-driven dbatools module is a powerhouse, but you can get a ton done with the native SqlServer module that comes with SQL Server Management Studio. The main command you'll get to know is Backup-SqlDatabase.

    A basic full backup command is simple enough:

    Backup-SqlDatabase -ServerInstance "YourServerName" -Database "YourDatabase" -BackupFile "D:\Backups\YourDatabase_Full.bak"

    But scripting is where the magic really happens. Let's say you need to back up all the user databases on a server. Instead of a mind-numbing, one-by-one process, you can string commands together.

    Get-SqlDatabase -ServerInstance "YourServerName" | Where-Object { $.Name -ne "master" -and $.Name -ne "model" -and $.Name -ne "msdb" -and $.Name -ne "tempdb" } | Backup-SqlDatabase

    This slick one-liner grabs all user databases and feeds them straight into the backup command, giving you a consistent backup sql database operation across the entire instance. Just drop this script into Windows Task Scheduler, set it to run daily, and you've automated a critical task.

    I once had to standardize backup procedures across two dozen servers for a new client. Scripting this with PowerShell saved us what would have been days of tedious clicking. More importantly, it ensured every single server used the exact same compression and verification settings, which eliminated the configuration drift we were fighting.

    Azure CLI for Cloud-Scale Management

    When your data lives in Azure, the Azure CLI offers a lightweight, cross-platform tool for managing everything from the command line. It's fantastic for weaving backup management into your CI/CD pipelines or for making changes across many resources at once. The command to know here is az sql db backup.

    For example, kicking off a long-term retention (LTR) backup for an Azure SQL Database is a single, clean command.

    az sql db ltr-backup create
    –resource-group YourResourceGroup
    –server YourServerName
    –name YourDatabaseName

    That’s handy, but the real power comes when you need to apply a setting at scale. Imagine a new compliance rule requires you to update the LTR policy for every database on a server. Doing that in the portal is a nightmare; a script makes it trivial.

    Here’s how you could set a policy to keep weekly backups for 10 weeks, monthly backups for 12 months, and yearly backups for 5 years:

    az sql db ltr-policy set
    –resource-group YourResourceGroup
    –server YourServerName
    –name YourDatabaseName
    –weekly-retention "P10W"
    –monthly-retention "P12M"
    –yearly-retention "P5Y"
    –week-of-year 1

    Wrap this in a simple loop that reads a list of your databases, and you can update hundreds of policies in minutes. That kind of automation is what keeps you sane while ensuring compliance in a large cloud environment. If you're just getting started with Azure's command-line tools, our guide on the Azure PowerShell module is a great place to learn the fundamentals.

    Choosing Your SQL Backup Method

    Deciding which tool to use often comes down to where your database lives and how much control you need. This table breaks down the most common methods to help you pick the right one for the job.

    Method Best For Control Level Environment Automation
    Azure Portal UI Beginners, one-off tasks, visual checks Low Azure Manual
    SSMS UI On-prem admins, visual workflow Medium On-Premises Manual
    PowerShell On-prem automation, granular control High On-Premises / Azure Excellent
    Azure CLI Cloud automation, DevOps pipelines High Azure Excellent
    T-SQL Scripts Deep customization, legacy systems Very High On-Premises / Azure High (via Agents)

    Ultimately, PowerShell and the Azure CLI are built for scale. While the UI is great for a quick look or a single task, automation is the only way to reliably manage a growing data estate without losing your mind.

    The Unskippable Step: Validating and Testing Your Backups

    Image

    Let's be blunt: an untested backup is nothing more than a hope. It’s not a recovery plan. It's the digital equivalent of Schrödinger's cat—you have no idea if your data is alive or dead inside that file until you actually look. This validation step is easily the most important part of any data protection strategy, and sadly, it's also the most frequently skipped.

    It's tempting to see that "backup completed successfully" message and feel a sense of security. But all that message confirms is that a file was created. It tells you nothing about whether that file is actually restorable, free of corruption, or even contains the data you think it does. Moving from hoping your SQL database backup will work to knowing it will is what separates the pros from the amateurs.

    The First Pass: RESTORE VERIFYONLY

    For a quick spot-check, you can use the RESTORE VERIFYONLY command. This T-SQL command is a basic checkup. It looks at the backup file's header to confirm it's readable and appears to be a legitimate SQL Server backup. The best part? It’s lightning-fast and uses minimal server resources.

    RESTORE VERIFYONLY
    FROM DISK = 'D:\Backups\MyProductionDB_FULL.bak';

    While it’s a good first step, relying only on VERIFYONLY is a recipe for disaster. It doesn't inspect the internal structure of your data pages or guarantee the data within is uncorrupted. Think of it as checking that a book has a cover and the right number of pages, but never actually reading the words to see if they make sense.

    An untested backup is a liability waiting to happen. True confidence doesn't come from a "backup successful" message; it comes from regularly proving you can restore your data, intact and usable, when it matters most.

    The Real Test: Full Restore Drills

    The undisputed gold standard for backup validation is performing regular, full restore drills. This means taking your production backups and restoring them onto a separate, non-production server. This simple exercise validates two critical things at once: that your backup file is physically sound and that the database inside is logically intact.

    Your test environment doesn't need to be a mirror image of your production server's power, but it absolutely must have enough disk space to hold the restored database. Smart organizations automate this entire process, scripting a job that grabs the latest backup, restores it to a test instance, and then runs a series of checks.

    Verifying Data Integrity with DBCC CHECKDB

    Once the database is restored, you're not done yet. The final, non-negotiable step is to run DBCC CHECKDB against that freshly restored copy. This command is the ultimate health check for your database, performing an exhaustive analysis of all objects, pages, and structures to hunt down any signs of corruption.

    DBCC CHECKDB ('MyRestoredDB') WITH NO_INFOMSGS, ALL_ERRORMSGS;

    Running this command is the only way to be certain that the data you've backed up is not just present, but also consistent and usable. Finding corruption here, on a test server, is a routine administrative task. Finding it during a real production outage is a career-defining crisis.

    Managing Performance on Massive Databases

    As databases swell in size—with industry data showing growth around 30% annually—the backup and restore validation process can become a real resource hog. Using native backup compression has become a standard practice, often shrinking space requirements by up to 70% and helping you meet your Recovery Time Objectives (RTO). For more on this, check out how you can improve backup efficiency in modern SQL Server versions.

    When it comes to validation, scheduling is everything. Run your restore drills during off-peak hours, like overnights or weekends, to avoid impacting other development or test environments. This systematic approach ensures your testing doesn't become a bottleneck while building genuine, battle-tested confidence in your recovery plan. This kind of structured repetition aligns with proven learning principles, a concept you can explore further in our guide on how to use flashcards for studying.

    Answering Your Top SQL Database Backup Questions

    When you're dealing with SQL database backups, a few key questions always seem to pop up. Let's tackle them head-on with some practical, real-world answers that I've picked up over the years. This is the stuff that helps you move from theory to a solid, reliable backup strategy.

    Can I Back Up a Database While It's Being Used?

    You absolutely can, and in fact, you have to. SQL Server was built from the ground up to handle backups on live databases with active connections. There's no need to kick users out or take the system offline.

    It works by using a kind of snapshot. The moment you start the backup, SQL Server locks in the state of the data, ensuring the backup file is transactionally consistent. Any transactions that happen after the backup starts won't mess it up. Yes, there's a slight performance hit, but on modern systems, especially when using the COMPRESSION option, it's usually negligible.

    How Often Should I Run My Backups?

    This is the million-dollar question, and the honest answer is, "it depends." But what it really depends on is your Recovery Point Objective (RPO)—how much data can the business stand to lose?

    Once you have that answer, you can build a schedule. A battle-tested strategy for many businesses looks something like this:

    • Weekly Full Backups: Kick this off on a quiet day, like Sunday at 2 AM. This is your baseline, your complete copy.
    • Daily Differential Backups: Run these every night, say at 10 PM. They'll grab all the changes made since that last full backup, keeping your restore times faster than just using logs.
    • Frequent Transaction Log Backups: During business hours, this is your lifeline. Backing up the transaction log every 15 minutes is a common and effective target.

    With this setup, the absolute worst-case scenario means you lose no more than 15 minutes of work.

    Don't forget: Your backup schedule is a direct reflection of your business's tolerance for data loss. If management says losing an hour of transactions is unacceptable, then a simple daily backup plan just won't cut it.

    What's the Real Difference Between the Full and Simple Recovery Models?

    The recovery model you choose for a database is a critical setting. It dictates how transactions are logged, which directly impacts the types of backups you can even perform. Getting this wrong can completely derail your recovery plan.

    • Simple Recovery Model: Think of this as "easy mode." It automatically clears out the transaction log to keep it from growing. The massive trade-off? You cannot perform transaction log backups. This means you can only restore your database to the point of your last full or differential backup. It's really only meant for dev/test environments where losing data isn't a big deal.

    • Full Recovery Model: This is the non-negotiable standard for any production database. It meticulously logs every transaction and holds onto it until you specifically back up the transaction log. This is the only model that enables point-in-time recovery and lets you meet a tight RPO.

    Do I Really Need to Back Up the System Databases?

    Yes. Emphatically, yes. While your user databases hold the application data, system databases like master and msdb are the brain and central nervous system of your SQL Server instance.

    • The master database contains all your server-level configurations, logins, and pointers to all your other databases. If you lose master, you're essentially rebuilding your server's identity from scratch.
    • The msdb database is home to the SQL Server Agent. It stores all your jobs, schedules, alerts, and your entire backup history. Losing msdb means all of your carefully crafted automation is gone.

    Treat master and msdb with the same respect as your user databases. Back them up regularly and always after you make a significant server-level change.


    Mastering Azure concepts like backup and recovery is a critical skill for passing the AZ-204 exam. AZ-204 Fast provides all the tools you need—from interactive flashcards to dynamic practice exams—to build deep knowledge and pass with confidence. Start your focused study journey at https://az204fast.com.

  • A Developer’s Guide to Azure Storage Queue

    A Developer’s Guide to Azure Storage Queue

    Picture a busy restaurant kitchen on a Saturday night. Orders are flying in. Instead of yelling every single order at the chefs and overwhelming them, a simple ticket rail holds the incoming chits. The chefs can grab the next ticket whenever they're ready, working at a steady, manageable pace.

    Azure Storage Queue is that ticket rail for your cloud application. It’s a beautifully simple service designed to hold a massive number of messages, allowing different parts of your system to process that work asynchronously, right when they have the capacity.

    Understanding the Purpose of an Azure Storage Queue

    Image

    At its heart, an Azure Storage Queue solves a classic problem in building distributed systems: decoupling your application's components.

    Think about it. When one part of your app (let's call it the "producer") needs to hand off work to another part (the "consumer"), a direct, real-time connection creates a fragile dependency. If the consumer suddenly slows down, gets bogged down, or even fails, the producer grinds to a halt right along with it. The whole system becomes brittle.

    A queue elegantly sidesteps this by acting as a reliable buffer between them. The producer can just drop a message onto the queue and immediately move on, trusting that the work order is safely stored. Meanwhile, the consumer can pull messages off the queue and process them at its own pace, scaling up or down independently to handle the ebbs and flows of the workload. This simple but incredibly powerful pattern is a cornerstone of building resilient, high-performance cloud applications.

    Azure Storage Queue at a Glance

    To get a quick handle on where this service fits, here’s a look at its core characteristics. This table breaks down what you need to know to decide if it's the right tool for your job.

    Attribute Description
    Primary Use Case Asynchronous task processing and decoupling system components.
    Message Size Limit Up to 64 KiB per message, perfect for lightweight tasks and instructions.
    Queue Capacity A single queue can hold up to 500 TiB of data, accommodating millions of messages.
    Access Protocol Simple and universal access via standard HTTP/HTTPS requests.
    Ordering Provides best-effort ordering but doesn't guarantee strict First-In, First-Out (FIFO).
    Durability Messages are reliably stored within an Azure Storage Account.

    This isn't just some niche tool; it's a foundational service that props up a huge range of applications. The incredible growth of Microsoft Azure really underscores how vital services like this are. By mid-2025, Azure had captured nearly 25% of the cloud market, with thousands of companies in software, education, and marketing relying on its infrastructure. If you're curious about the numbers, you can dig into some great Azure market share insights on turbo360.com.

    Key Takeaway: Reach for an Azure Storage Queue when you need a simple, massive-scale, and seriously cost-effective buffer. It's ideal for managing background jobs, offloading long-running tasks, or creating a dependable communication channel between microservices without the overhead of a full-blown message broker.

    Understanding the Core Architecture and Message Lifecycle

    To really get the hang of Azure Storage Queue, it helps to peek under the hood. Its power lies in a simple, yet incredibly robust, architecture built for massive scale. The best way to think about it is like a physical warehouse system for your application's tasks.

    First, you have the Storage Account. This is the entire warehouse building, the main container in Azure that holds all your data services, including queues, blobs, and tables. Every single queue you create has to live inside a Storage Account.

    Inside that warehouse, you have dedicated aisles for different products. In this analogy, a Queue is one of those aisles—a named list where you line up your tasks. You can have tons of queues within one storage account, each one handling a different job for your application.

    Finally, you have the Messages. These are the individual boxes stacked in the aisle, each holding a small payload of information—up to 64 KiB in size. A message represents a single unit of work, like a request to generate a report or send a confirmation email.

    The Journey of a Message

    Every message goes on a specific journey to make sure work gets done reliably, without accidentally being processed twice. This lifecycle has a few key steps:

    1. Enqueue: A "producer" application adds a message to the back of the queue. At this point, the message is safely stored and just waiting for a worker to pick it up.
    2. Dequeue: A "consumer" (or worker role) asks for a message from the front of the queue. This is where some real magic happens.
    3. Process: The consumer gets to work, performing the task described in the message's content.
    4. Delete: Once the job is finished successfully, the consumer explicitly deletes the message from the queue for good.

    This flow is the foundation for using Azure Storage Queues effectively. Before you can even send your first message, you have to get the basic structure in place.

    Image

    As you can see, everything starts with that top-level Storage Account, which provides the security and endpoint for your queue to operate.

    The Role of Visibility Timeout

    So, what happens if a worker grabs a message and then crashes midway through its task? This is a classic problem in distributed systems. To prevent that message from being lost in limbo, Azure Storage Queue uses a clever feature called the visibility timeout.

    When a consumer dequeues a message, it isn't actually removed from the queue. Instead, it’s just made invisible to all other consumers for a set period of time—the visibility timeout.

    If the worker finishes its job within that timeout window, it deletes the message, and all is well. But if the worker crashes or the process fails, the timeout simply expires. The message automatically becomes visible again on the queue, ready for another worker to pick it up and try again.

    This "peek-lock" pattern is what makes the service so resilient. It’s perfect for background jobs running in services like WebJobs, which you can learn more about Azure App Service in our detailed guide. By understanding this simple mechanism, you can build incredibly robust applications that handle failures gracefully, ensuring no task ever gets dropped on the floor.

    Choosing Between Storage Queues and Service Bus Queues

    Image

    When you're building an application in Azure and need to pass messages between different parts of your system, you'll quickly run into a fork in the road. On one side, you have Azure Storage Queues, and on the other, Azure Service Bus Queues. This isn't just a minor technical detail—it's a fundamental architectural decision that will shape your application's reliability, complexity, and cost.

    Making the right call here means picking the tool that solves your problem perfectly, without saddling you with unnecessary complexity or a bigger bill than you need.

    Azure Storage Queue vs Service Bus Queues

    To make sense of the choice, it helps to use an analogy. Think of a Storage Queue as a simple, incredibly efficient conveyor belt. Its job is to move a massive number of small items from one place to another. It doesn't really care about the exact order they arrive in, just that they get there reliably to be processed. It's built for simplicity and huge scale, communicating over standard HTTP/HTTPS.

    In contrast, Service Bus is more like a sophisticated, fully automated sorting facility at a major logistics hub. It’s packed with advanced features for handling complex workflows, guaranteeing that items are delivered in a specific order, managing transactions, and even automatically rerouting problematic packages to a special handling area.

    To really nail down the differences, here’s a side-by-side look at what each service brings to the table.

    Feature Azure Storage Queue Azure Service Bus Queues
    Message Ordering Best-effort (No guarantee) Guaranteed First-In, First-Out (FIFO)
    Duplicate Detection No built-in mechanism Yes, configurable detection window
    Dead-Lettering Manual setup required ("poison queue") Automatic dead-lettering for failed messages
    Message Size Up to 64 KB Up to 1 MB (with Standard or Premium tier)
    Transaction Support No Yes, supports atomic operations
    Communication HTTP/HTTPS Advanced Message Queuing Protocol (AMQP)
    Best For Simple, high-volume background tasks Complex workflows, transactional systems, and pub/sub scenarios

    This table lays it all out, but let's talk about what these features mean in the real world.

    When Simplicity and Scale Are What You Need

    You should reach for a Storage Queue when your needs are straightforward. If you just need to offload background tasks—like processing image thumbnails after an upload or firing off email notifications—Storage Queues are your best bet.

    Imagine users are uploading thousands of images to your app. Each upload needs to kick off a task to resize the image into a few different formats. In this case, the order of processing doesn't matter, and each resizing job is completely independent. This is a textbook use case for a Storage Queue.

    Here's why it works so well:

    • Massive Throughput: A single queue can handle up to 2,000 messages per second, and a storage account can hold a staggering 500 TiB of data.
    • Cost-Effectiveness: You primarily pay for storage and the number of operations, which becomes extremely cheap when you're dealing with high volumes.
    • Architectural Simplicity: It's a lightweight, easy-to-implement way to decouple your application's components without the heavy lifting of a full message broker.

    If your project is all about high-volume, non-critical background work, the simplicity and low cost of a Storage Queue are tough to beat.

    When You Need Enterprise-Grade Features

    On the flip side, if your application involves complex business logic or financial transactions, the advanced capabilities of Azure Service Bus become non-negotiable. It's a true enterprise message broker, offering features that Storage Queues just don't have.

    Critical Distinction: Service Bus guarantees First-In, First-Out (FIFO) message ordering. If the sequence of operations is vital—like the steps in a user registration workflow or an e-commerce order—Service Bus is your only real choice.

    Service Bus also provides features like automatic dead-lettering for failed messages and transaction support, which are deal-breakers for building robust, enterprise-grade systems. To get the full picture, you can explore our comprehensive guide on Azure Service Bus.

    Ultimately, the choice boils down to this: start by asking yourself if you need strict ordering, transactions, or duplicate detection. If the answer is yes to any of those, your path leads directly to Service Bus. If not, the simplicity, scale, and cost-efficiency of an Azure Storage Queue make it the clear winner.

    Unpacking Key Features and Scale Limits

    When you start working with Azure Storage Queue, it's easy to think of it as just a simple list for messages. But that's just scratching the surface. It’s actually a highly-engineered service built for massive scale, and to get the most out of it, you need to understand both its powerful features and its performance boundaries.

    Think of these limits not as constraints, but as guardrails. They help you design resilient systems that can handle huge workloads without stumbling. The sheer capacity for both message volume and throughput is one of its most impressive traits. It’s designed from the ground up to process millions of messages asynchronously, making it a perfect foundation for scalable background job processing. This lets your front-end applications stay snappy and responsive while worker roles plow through tasks in the background.

    This scalability isn't just a vague promise; it's backed by very specific performance targets. For instance, a single queue can grow to a massive 500 tebibytes (TiB). That’s more than enough space for millions upon millions of messages. Each message can be up to 64 kibibytes (KiB), and an entire storage account can handle up to 20,000 one-kilobyte messages per second. For a deep dive into all the metrics, it's worth checking out the official Azure scalability targets.

    Securing Your Messaging Infrastructure

    Scale is great, but it’s worthless without strong security. An unprotected messaging layer can leak sensitive data and open up major holes in your application. Thankfully, Azure Storage Queue comes with multiple security layers to protect your messages both in transit and at rest.

    You get fine-grained control over who can touch your queues and what they're allowed to do. Here are the main ways to lock things down:

    • Azure Active Directory (Azure AD) Integration: This is the gold standard for modern apps. Using Azure AD lets you assign permissions to users, groups, or service principals through Azure's role-based access control (RBAC). This is a huge win because you no longer have to pass around shared keys, and you get much better security and auditing.
    • Shared Access Signatures (SAS): A SAS token is a special URL that grants limited, temporary access to your storage resources. You can define exactly what someone can do (read, add, update, process), which queue they can access, and for how long the token is valid. It's ideal for giving clients limited access without handing over the keys to the kingdom.
    • Storage Account Access Keys: These keys give you full, unrestricted access to your storage account. Treat them like a root password. They should only be used by trusted, server-side applications that genuinely need that level of control.

    Pro Tip: Whenever you have a choice, go with Azure AD integration for authentication. It centralizes access management and gets rid of the headache and risk of managing and rotating storage account keys or SAS tokens.

    By understanding these performance limits and using the built-in security features, you can build systems that are not only massively scalable but also secure from the start. Knowing the boundaries—like the 2,000 messages per second target for a single queue—helps you architect solutions that can grow with your needs, avoid throttling, and keep your application dependable under pressure. This knowledge turns the Azure Storage Queue from a simple tool into a strategic part of any powerful, decoupled enterprise application.

    Implementing Common Operations with Code Examples

    Theory is great, but let's be honest—getting your hands dirty with code is where the real learning happens. This section is all about rolling up our sleeves and working directly with Azure Storage Queue. We'll walk through practical, real-world code examples using the modern .NET SDK to handle the day-to-day operations you'll actually need.

    We're going to cover the entire lifecycle of a message. We'll start by creating a queue, then add some work to it, process that work, and finally clean up. Think of this as your go-to playbook for talking to queues programmatically. Every snippet is designed to be clear and straightforward.

    Setting Up the Queue Client

    Before you can do anything, you need a way to connect to your queue. That’s where the QueueClient comes in. This object is your gateway to Azure Storage Queue. It's lightweight and designed to be reused throughout your application, which is a key best practice for performance.

    To get started, you just need two things:

    • Your Azure Storage Account's connection string.
    • The name of the queue you want to work with.

    Here’s how you can initialize the client. For our examples, we'll pretend we have a queue named "image-processing-jobs".

    // At the top of your file
    using Azure.Storage.Queues;

    // Your connection string and queue name
    string connectionString = "YOUR_STORAGE_ACCOUNT_CONNECTION_STRING";
    string queueName = "image-processing-jobs";

    // Create a QueueClient which will be used to interact with the queue
    QueueClient queueClient = new QueueClient(connectionString, queueName);

    // Ensure the queue exists before we start using it
    await queueClient.CreateIfNotExistsAsync();

    That CreateIfNotExistsAsync() method is a lifesaver. It’s a simple, idempotent call that checks if the queue is ready for action. If it's already there, nothing happens. If not, it creates it for you. This tiny step prevents a lot of headaches and runtime errors down the road.

    Adding and Retrieving Messages

    With our client ready, let's get to the core of it: adding (enqueuing) and retrieving (dequeuing) messages. It’s a lot like a busy kitchen—one person puts an order ticket on the rail, and a chef grabs it to start cooking.

    Enqueuing a Message

    To add a message to the queue, you just call SendMessageAsync(). The message itself is a string, which is perfect for serialized data like JSON that describes the task at hand.

    // Example: A message asking a worker to resize an image
    string messageText = "{ "imageId": "img-12345", "targetSize": "500×500" }";

    // Send the message to the Azure Storage Queue
    await queueClient.SendMessageAsync(messageText);
    Console.WriteLine($"Sent a message: {messageText}");

    This operation is blazing fast. It lets your producer application offload the work and immediately move on to its next task.

    Important Insight: Messages are stored as Base64-encoded strings. This ensures they can safely handle any type of data you throw at them. The good news is the SDK handles all the encoding and decoding for you behind the scenes, so you can just work with plain text.

    Peeking at Messages

    Sometimes, you need to see what's at the front of the line without actually taking the ticket. The PeekMessageAsync() method lets you do just that. It's a non-destructive way to inspect the next message.

    // Peek at the next message without removing it from the queue
    var peekedMessage = await queueClient.PeekMessageAsync();
    Console.WriteLine($"Peeked message content: {peekedMessage.Value.Body}");

    This is incredibly useful for debugging or for building monitoring tools that need to check the queue's health without interfering with the actual workers.

    Processing and Deleting Messages

    Now for the main event: the worker's job. A consumer application's workflow is a simple, robust loop.

    1. Receive a Message: You use ReceiveMessageAsync() to pull a message from the queue. This action makes the message invisible to other consumers for a set period (the visibility timeout).
    2. Process the Work: This is where your business logic kicks in—resizing an image, sending an email, whatever the task requires.
    3. Delete the Message: Once the job is done, you call DeleteMessageAsync() using the message's unique MessageId and PopReceipt. This permanently removes it from the queue, marking the work as complete.

    Here’s what that entire "peek-lock-delete" pattern looks like in code:

    // Ask the queue for a message
    var receivedMessage = await queueClient.ReceiveMessageAsync();

    if (receivedMessage.Value != null)
    {
    Console.WriteLine($"Processing message: {receivedMessage.Value.Body}");

    // Simulate doing some work...
    await Task.Delay(2000); 
    
    // Delete the message from the queue after successful processing
    await queueClient.DeleteMessageAsync(receivedMessage.Value.MessageId, receivedMessage.Value.PopReceipt);
    Console.WriteLine("Message processed and deleted.");
    

    }
    else
    {
    Console.WriteLine("No messages found in the queue.");
    }

    This pattern is the foundation of any resilient worker process. If your app crashes after receiving the message but before deleting it, no problem. The visibility timeout will eventually expire, and the message will reappear in the queue for another worker to safely pick up.

    By the way, if you prefer managing Azure resources with scripts, you might find our guide on the Azure PowerShell module helpful for automating these kinds of cloud tasks.

    2. Best Practices for Building Resilient and Performant Queues

    Image

    Moving beyond a simple proof-of-concept to a truly production-ready solution means thinking strategically. It's one thing to drop a message onto an Azure Storage Queue; it's another thing entirely to build a system that can handle real-world stress and recover from the inevitable hiccup. These battle-tested practices are what separate a fragile application from a resilient one.

    One of the first things you'll learn in the trenches is the importance of a solid retry strategy. In any cloud environment, temporary network blips and transient service issues are just part of the game. Instead of letting one failed attempt bring down your whole workflow, your worker application needs to try again. The best way to do this is with an exponential backoff algorithm—wait a short time after the first failure, a bit longer after the second, and so on. This simple technique prevents your app from hammering a service that might just need a moment to recover.

    Design for Resilience and Efficiency

    Beyond simple retries, how you design your messages and processing logic is what truly builds a fault-tolerant system. Two principles are absolutely fundamental here: idempotency and message size.

    • Design Idempotent Messages: An operation is idempotent if you can run it ten times and get the same result as running it just once. Since a message might get processed more than once during a retry, this is a non-negotiable. For instance, if a worker's job is to update a user's status, it should always check the current status first before making a change. This prevents all sorts of messy, unintended side effects.

    • Keep Messages Small: Remember that every message has a strict 64 KiB limit. This isn't just a constraint; it's a design guideline. It pushes you to send small, focused commands instead of bulky data blobs. If you need to process a large file, the right move is to upload it to Azure Blob Storage first, then just pop the file's URL into the queue message. This keeps your queue zippy and your operations lean.

    Key Takeaway: You have to build your system with the assumption that things will fail. By making your message handlers idempotent, you remove the risk and uncertainty from retries, leading to a far more stable and predictable application.

    Optimize for Cost and Performance

    Once you've built a resilient foundation, you can start fine-tuning for performance and cost. A few small tweaks in how you interact with the queue can have a massive impact on your throughput and your monthly bill, especially as you scale.

    Message batching is a perfect example. Instead of pulling messages down one by one, your worker can grab up to 32 messages in a single go. This drastically cuts down on API calls, which directly lowers your transaction costs and speeds up the entire processing pipeline.

    Another critical pattern is creating your own dead-letter queue. You will eventually encounter "poison messages"—messages that your worker can't process, no matter how many times it retries. Letting them sit in the main queue is a recipe for disaster. The standard practice is to have your worker logic move these stubborn messages to a separate queue (often named something like <queuename>-poison). This gets the problem message out of the way, allows you to inspect it later, and keeps the main queue flowing smoothly.

    It's this kind of robust, thoughtful design that makes Azure Storage Queue a trusted choice for mission-critical workloads. In fact, it's a core part of a platform trusted by an estimated 85–95% of Fortune 500 companies. You can read more about Azure's role in the enterprise on Turbo360.com.

    Common Questions About Azure Storage Queue

    When you first start digging into Azure Storage Queue, a few questions almost always pop up. They usually circle around message reliability, how to deal with failures, and whether you can count on messages being processed in order. Getting these concepts straight is fundamental to building a solid, dependable system on top of this service.

    Let's tackle one of the biggest concerns right away: message durability. What happens if a worker process grabs a message and then crashes? Is the message lost forever?

    Thankfully, no. The magic here is a feature called the visibility timeout, which is part of a two-step deletion process. When a consumer reads a message, the queue doesn't delete it. Instead, it just hides it, making it invisible to other consumers for a set period. If the worker finishes its job successfully, it sends a separate command to permanently delete the message.

    But if that worker crashes or the timeout expires, the message simply reappears in the queue, ready for another worker to pick it up. This "peek-lock" pattern is the bedrock of reliability in Storage Queue, ensuring that temporary glitches don’t cause you to lose data.

    What About Messages That Always Fail?

    So, what if a message is fundamentally broken? It gets picked up, a worker crashes, it reappears, another worker tries, and the cycle repeats. This is what we call a "poison message," and if you're not careful, it can grind your whole system to a halt.

    While Azure Storage Queue doesn't have a built-in "dead-letter queue" like its cousin, Azure Service Bus, it gives you everything you need to create your own. This is a standard and highly recommended best practice.

    Here’s the game plan:

    1. Check the Dequeue Count: Every time a message is retrieved, the queue increments a DequeueCount property. Your worker should always check this number first.
    2. Define a Limit: Decide on a reasonable retry limit for your application. For many scenarios, 5 attempts is a good starting point.
    3. Move the Poison: If the DequeueCount goes past your limit, the worker's logic should stop trying to process it. Instead, it should copy the message to a separate queue (often named something like myqueue-poison) and then delete the original.

    This strategy effectively quarantines the problematic message, letting the rest of your queue flow smoothly. Later, you can inspect the poison queue to debug the issue without having to take down your live system.

    Can I Get Guaranteed Message Order?

    This is another big one. People often assume a queue is strictly First-In, First-Out (FIFO). With Azure Storage Queue, is that a safe assumption?

    The short answer is no.

    Azure Storage Queue offers best-effort ordering, but it absolutely does not guarantee FIFO delivery. It's built for massive scale, with many different nodes handling requests. This means the exact order you put messages in isn't necessarily the exact order you'll get them out.

    If your application requires strict, in-order processing—like handling steps in a financial transaction or a user signup wizard—then Azure Storage Queue isn't the right choice. For those ironclad ordering guarantees, you'll want to use Azure Service Bus Queues, which are designed specifically for that purpose.

    For the vast majority of background jobs where the exact order doesn't matter, the incredible scalability and simplicity of Storage Queues make it a perfect fit.


    Ready to master the skills needed for the Azure Developer certification? AZ-204 Fast provides interactive flashcards, comprehensive cheat sheets, and dynamically generated practice exams to ensure you're fully prepared. Stop cramming and start learning effectively with our research-backed platform. Check out our tools at az204fast.com.

  • Mastering the Azure PowerShell Module

    Mastering the Azure PowerShell Module

    Imagine managing your entire Azure infrastructure without ever clicking a single button in the portal. That's the power the Azure PowerShell module puts right at your fingertips. This command-line tool isn't just an alternative to the graphical interface; for many tasks, it's a far better way to work, especially when it comes to automation, consistent deployments, and managing resources at scale.

    Why the Azure PowerShell Module Is Your Automation Superpower

    If you've ever found yourself clicking through the same sequence of screens in the Azure Portal day after day, you already feel the need for automation. The Azure PowerShell module, known simply as the 'Az' module, is the solution. It lets you turn those manual, error-prone processes into reliable scripts that you can run over and over again with perfect results.

    Think of it this way: The Azure Portal is like driving a car manually. You're in complete control, handling the steering, pedals, and gears for every single action. The Az module, on the other hand, is like plugging a destination into a self-driving car. You just define the outcome—"create three virtual machines with these specs and connect them to this network"—and PowerShell figures out all the steps to get you there. It's not just faster; it also dramatically cuts down on the chance for human error.

    The Shift from AzureRM to the Modern Az Module

    The Azure PowerShell module marks a huge leap forward for cloud management. Microsoft introduced it as the modern, cross-platform successor to the older, Windows-only AzureRM module. Because the Az module is built on .NET Standard, it runs just as well on Windows, macOS, and Linux. For the best experience, you'll want to be on PowerShell 7.2 or higher. This move brought more secure, stable, and powerful commands for wrangling all your Azure resources. You can check out Microsoft's official documentation to see all the cross-platform benefits firsthand.

    The real magic of scripting isn't just about speed; it's about consistency. A script guarantees that a complex environment is deployed the exact same way in development, testing, and production. It completely wipes out the classic "it worked on my machine" headache.

    A quick comparison can help you decide when to use which tool for maximum efficiency.

    Choosing Your Azure Management Tool

    Feature Azure PowerShell Module (Az) Azure Portal (GUI)
    Best For Automation, bulk operations, repeatable tasks Visual exploration, one-off tasks, learning
    Speed Extremely fast for complex or large-scale tasks Slower, requires manual clicks for each step
    Consistency High; scripts ensure identical deployments every time Low; prone to human error and missed steps
    Learning Curve Steeper; requires learning commands and syntax Gentle; intuitive and easy for beginners
    Integration Excellent for CI/CD pipelines and DevOps workflows Limited; not designed for automated pipelines

    While the portal is great for discovery, once you know what you need to do, the command line is where the real work gets done efficiently.

    Practical Applications and Benefits

    The true value of the Azure PowerShell module really shines when you see it in action. Instead of manually clicking through blade after blade to configure a web application, you can run a single script to set everything up. This can include provisioning the core infrastructure, like an Azure App Service plan, and even deploying your code. If you're new to that, you can learn more about what Azure App Service is and see how it fits in.

    This scripting power reaches every part of your Azure environment. Here are just a few key benefits:

    • Scalability: Effortlessly manage hundreds or even thousands of resources using simple loops and logic. Trying to do that in the portal would be a nightmare.
    • Audit and Reporting: Quickly generate detailed reports on resource configurations, costs, or security compliance by querying your entire Azure subscription with just a few lines of code.
    • Integration: Seamlessly plug Azure management into your CI/CD pipelines. This opens the door to true Infrastructure as Code (IaC) and lets you automate your entire delivery process from start to finish.

    Your First Steps to Installation and Setup

    Image

    Alright, let's get our hands dirty and set up the Azure PowerShell module. This is where the magic begins, and thankfully, getting started is pretty painless. Before you can start firing off commands to manage your Azure resources, we just need to make sure your local machine is ready to go. The good news? The setup is quick and really only requires a single command to get everything installed.

    The one key thing you'll need is a modern version of PowerShell. For the best experience across Windows, macOS, and Linux, Microsoft recommends using PowerShell 7.2 or higher. This guarantees you have all the latest features, security patches, and cmdlet improvements needed for working with your cloud environment. If you're running an older version, this is a great excuse to upgrade.

    Once your PowerShell environment is up to date, you can pull the Az module straight from the PowerShell Gallery, which is the official central hub for all things PowerShell.

    Installing the Az Module

    The installation process is refreshingly consistent, no matter what operating system you're on. The Az module itself is what we call a "rollup" module. Think of it as a master package—when you install it, it automatically pulls in all the individual modules for different Azure services, like Az.Compute for virtual machines and Az.Storage for your storage accounts.

    To get the module installed just for your own user account, pop open a PowerShell terminal and run this command. This is the method I recommend for most people because it doesn't require administrator rights and keeps things tidy.

    Install-Module -Name Az -Scope CurrentUser -Repository PSGallery -Force

    This command reaches out to the PowerShell Gallery, grabs the latest version of the Azure PowerShell module, and installs it. The -Scope CurrentUser part is what tells it to install only for you, which helps prevent any conflicts with other users or system-wide configurations.

    Pro Tip: If you're setting up a shared machine, like a build server or a jump box, you might need to install the module for everyone. To do that, just run PowerShell as an administrator and swap out the scope: Install-Module -Name Az -Scope AllUsers ....

    Verifying a Successful Installation

    Once the installation finishes, you'll want to quickly check that everything worked. A simple verification step now can save you a headache later. The easiest way to do this is to ask PowerShell for the module's version details.

    Just run this command in your terminal:

    Get-InstalledModule -Name Az

    If you see output showing the version number and other info about the Az module, you're golden. That's your confirmation that everything is installed correctly and you're ready to connect to your Azure account, which is our very next step.

    Don't forget that keeping your Azure PowerShell module updated is just as critical as the initial install. Azure is constantly evolving, and module updates deliver support for new services, performance boosts, and important bug fixes. To update, simply run:

    Update-Module -Name Az -Force

    I make it a habit to run this every so often. With the module now installed and verified, you've got the foundational tool for automating just about anything in Azure.

    2. Connecting to Azure: Your Secure Handshake

    Image

    Alright, you've got the Azure PowerShell module installed. Now comes the important part: securely connecting to your Azure environment. This is the handshake that lets you start managing resources.

    Think of it like having different keys for your office building. You have your personal keycard for day-to-day access, but you might give a temporary code to a contractor or a special key to an automated cleaning service. Each method has a specific purpose, and choosing the right one is crucial for both security and workflow.

    For Your Daily Work: Interactive and Device Code Login

    When you're at your own machine, getting connected is simple. Just pop open PowerShell and run Connect-AzAccount. This command will typically launch a browser window where you can sign in with your usual Azure credentials. It's the most common method for direct, hands-on work.

    But what if you're on a server with no browser, like an SSH session? No problem. For these "headless" scenarios, Azure PowerShell has a slick solution.

    Just run Connect-AzAccount -UseDeviceAuthentication. Instead of a browser, PowerShell will give you a short, unique code. You then grab your phone or laptop, visit the Microsoft device login page, and punch in that code. It securely authenticates your terminal session without you ever typing a password on the remote machine. Simple, fast, and secure.

    For Automation: Service Principals

    When it comes to automation, like a CI/CD pipeline deploying your app, you can't have a script stopping to ask for a password. This is exactly what Service Principals are for.

    A Service Principal is essentially a non-human identity in Microsoft Entra ID (formerly Azure Active Directory). You create this "robot" account, give it only the permissions it needs to do its job, and then your scripts can use its credentials to log in. This follows the security best practice known as the principle of least privilege. With security being a top concern for over 70% of organizations in the cloud, this isn't just a good idea—it's essential.

    You'll connect by providing the Service Principal's credentials, like its application ID and a secret or certificate.

    Connecting using a Service Principal's credentials

    $credential = Get-Credential
    Connect-AzAccount -ServicePrincipal -Credential $credential -Tenant "YourTenantID"

    This approach is the cornerstone of professional DevOps, enabling secure, unattended automation in tools like Azure DevOps, GitHub Actions, and Jenkins.

    Why is this so important? By isolating automated tasks to a Service Principal, you contain your risk. If a script's credential is ever compromised, you can disable that one Service Principal instantly without affecting any user accounts. It's a fundamental part of building secure, enterprise-grade automation.

    The Gold Standard: Managed Identities

    For any code or script running inside Azure—on a Virtual Machine, in an Azure Function, or an App Service—there's an even better, more secure method: Managed Identities.

    A Managed Identity is an identity that Azure creates and manages for you. When you enable it on a resource, that resource can securely connect to other Azure services without needing any credentials stored in your code. No secrets, no certificates, no passwords to manage or accidentally leak.

    You'll encounter two flavors:

    • System-assigned: An identity tied directly to a single Azure resource. If you delete the resource, its identity is deleted too.
    • User-assigned: A standalone identity you create that can be assigned to one or more Azure resources. It has its own lifecycle, separate from any resource.

    Connecting from a resource with a Managed Identity enabled is almost laughably simple.

    On an Azure VM or other resource with a Managed Identity

    Connect-AzAccount -Identity

    That’s it. One command, no passwords. Azure handles the entire authentication flow securely behind the scenes. This is the most secure method available and should be your go-to choice for any automation running within the Azure ecosystem. It completely eliminates the headache of credential management.

    Putting Core Cmdlets into Practice

    Alright, you're connected to Azure. Now for the fun part: actually managing resources. Theory is one thing, but getting your hands dirty with real commands is where the Azure PowerShell module really starts to shine. We're going to skip the textbook-style lists and jump right into the kind of tasks you'd perform on a real project.

    This hands-on approach is all about building muscle memory. By the time we're done here, you'll see how just a few core commands can be strung together to deploy and manage a simple but complete application environment.

    The Foundation of Everything: Resource Groups

    Before you can spin up a virtual machine, a database, or pretty much anything else in Azure, you need a home for it. In Azure, that home is a resource group.

    Think of a resource group as a logical folder for all the components of a single application. It’s how you keep everything organized for management, billing, and security.

    The cmdlet you'll use for this is simple, and you'll probably type it more than any other: New-AzResourceGroup. Let's create one now.

    New-AzResourceGroup -Name "AZ204-Fast-RG" -Location "EastUS"

    With that single line, you've just told Azure to create a brand-new resource group named "AZ204-Fast-RG" in the East US data center. Azure will respond with details confirming its creation, including a provisioning state of "Succeeded." This is the first step for almost every deployment you'll ever do.

    Image

    As this shows, the workflow is a simple loop: you pick a command, feed it the details it needs (parameters), and then check the results Azure sends back. It's a powerful and repeatable pattern.

    Deploying and Controlling Virtual Machines

    With our resource group ready, we can start adding resources to it. A virtual machine (VM) is one of the most common, so let's start there. While the New-AzVM cmdlet has a ton of options, PowerShell makes it surprisingly easy to create a basic server with just a few key details.

    The cmdlet uses a configuration object to neatly bundle all the settings for the VM. This keeps your commands clean and readable instead of becoming one massive, unreadable line.

    First, create a credential object to secure the VM's admin account

    $cred = Get-Credential

    Next, define the VM configuration using a series of piped commands

    $vmConfig = New-AzVmConfig -VMName "myTestVM" -VMSize "Standard_B1s" | Set-AzVMOperatingSystem -Windows -ComputerName "myTestVM" -Credential $cred
    | Set-AzVMSourceImage -PublisherName "MicrosoftWindowsServer" -Offer "WindowsServer" -Skus "2019-Datacenter" -Version "latest" `
    | Add-AzVMNetworkInterface -Id $nic.Id # (Assumes a $nic object was created previously)

    Finally, create the VM inside our resource group

    New-AzVM -ResourceGroupName "AZ204-Fast-RG" -Location "EastUS" -VM $vmConfig

    That script might look a bit long, but it’s incredibly powerful. It defines the VM's size, its name, the exact Windows Server image to use, and how it connects to the network. And just like that, you have a running server in Azure, created entirely from your terminal.

    Of course, deploying a VM is just the beginning. The Azure PowerShell module gives you a full suite of commands to manage its entire lifecycle. You can easily start, stop, and restart VMs to perform maintenance or, more importantly, to save money.

    Here are the essentials for day-to-day VM management:

    • Start-AzVM: Boots up a stopped virtual machine.
    • Stop-AzVM: Shuts down a running VM and—crucially—deallocates its compute resources so you stop paying for them.
    • Restart-AzVM: Performs a simple reboot of the virtual machine.

    For instance, to shut down the VM we just created and stop the billing meter, you’d run this:

    Stop-AzVM -ResourceGroupName "AZ204-Fast-RG" -Name "myTestVM" -Force

    That -Force parameter is a handy trick for scripts, as it tells PowerShell not to wait for you to confirm the action.

    A Quick Look at Essential Cmdlets

    As you work with Azure, you'll start to notice patterns. Certain commands for creating, reading, updating, and deleting resources (often called CRUD operations) come up again and again. Here’s a quick reference table for some of the most common cmdlets you’ll use.

    Essential Cmdlets for Everyday Tasks

    Resource Type Common Cmdlet Action
    Resource Group Get-AzResourceGroup Lists all resource groups in your subscription.
    Virtual Machine Get-AzVM Retrieves the details of a specific VM.
    Storage Account Get-AzStorageAccount Shows information about one or more storage accounts.
    App Service New-AzWebApp Creates a new web application.
    SQL Database Get-AzSqlDatabase Lists databases on a specific Azure SQL server.

    This table is just a starting point, but mastering these will give you a solid foundation for managing a wide variety of Azure services directly from the command line.

    Provisioning a Storage Account

    Almost every application needs to store data somewhere, whether it's user-uploaded files, log data, or static assets. For this, Azure Storage is the workhorse service. Using PowerShell to create a new storage account is incredibly straightforward.

    The New-AzStorageAccount cmdlet is your tool for the job. You just need to provide a few key details.

    A critical one is the name. Unlike most Azure resources, a storage account name must be globally unique across all of Azure. To handle this, we can just append a random number to our desired name.

    Generate a unique name to avoid conflicts

    $storageName = "az204faststorage" + (Get-Random)

    Create the storage account

    New-AzStorageAccount -ResourceGroupName "AZ204-Fast-RG" -Name $storageName
    -Location "EastUS" -SkuName "Standard_LRS"
    -Kind "StorageV2"

    This command creates a general-purpose v2 storage account using Locally-Redundant Storage (LRS), which is a fantastic, cost-effective choice for many common scenarios.

    By getting comfortable with just these three core cmdlets—New-AzResourceGroup, New-AzVM, and New-AzStorageAccount—you’ve already mastered the fundamental workflow for building out infrastructure in Azure. This pattern of creating a container, deploying compute, and adding storage is one you'll use constantly on your Azure journey.

    Writing Smarter Scripts with Advanced Techniques

    https://www.youtube.com/embed/MP_UR5iWfZQ

    Taking the leap from firing off single commands to building real automation scripts is a game-changer. It’s like graduating from using a single power drill to designing and running a fully automated assembly line. In this section, we'll dive into the techniques that help you write scripts that are not just functional, but also safe, resilient, and efficient using the Azure PowerShell module.

    Anyone can run a cmdlet. The real magic happens when you craft scripts that can handle unexpected errors, manage complex workflows, and even let you peek into the future to prevent costly mistakes. These are the skills that separate the pros from the amateurs.

    Building Resilience with Error Handling

    What happens when your script tries to create a resource that already exists? Or when it can't find a virtual machine it's supposed to modify? Without solid error handling, your script will simply crash, potentially leaving your Azure environment in a messy, half-configured state. This is exactly why try-catch blocks are so important.

    Think of a try block as your optimistic plan: you're telling PowerShell, "Go ahead and attempt these actions, but keep an eye out for trouble." The catch block is your backup plan, your "in case of emergency, break glass" instructions. It lets you gracefully handle failures, log a useful error message, and decide whether to stop the script or carry on.

    try {
    # Attempt to create a resource group that might already exist
    New-AzResourceGroup -Name "my-critical-rg" -Location "WestUS" -ErrorAction Stop
    Write-Host "Resource group created successfully."
    }
    catch {
    # If it fails, this block runs
    Write-Warning "Resource group already exists or another error occurred."
    Write-Host "Error details: $($_.Exception.Message)"
    }

    The secret sauce here is -ErrorAction Stop. You have to include it inside your try block. It forces PowerShell to treat even minor hiccups as show-stopping errors, which guarantees your catch block will actually run when something goes wrong.

    Preventing Disasters with -WhatIf and -Confirm

    Automation is incredibly powerful, but with great power comes the ability to make catastrophic mistakes at lightning speed. A single typo in a script could accidentally wipe out an entire production environment. Thankfully, the Azure PowerShell module gives us two indispensable safety parameters: -WhatIf and -Confirm.

    The -WhatIf parameter is your script's "simulation mode." It shows you exactly what a command would do—without actually doing it. This is your single most important safety net.

    When you run Remove-AzResourceGroup -Name "my-critical-rg" -WhatIf, nothing gets deleted. Instead, PowerShell prints a message describing precisely what it would have done. This lets you double-check your work before you commit. The -Confirm switch goes a step further by pausing the script and asking for your explicit "yes" before executing a high-impact command.

    Working with Long-Running Operations and Multiple Subscriptions

    Some Azure tasks, like deploying a large database or a complex VM, aren't instant. They can take several minutes or longer to finish. If you run these commands normally, your PowerShell console will be locked up and unusable until they're done. The -AsJob parameter is the perfect solution, letting you run the task as a background job.

    You can kick off a long process and get your terminal back immediately. Later, you can check on its progress with Get-Job and grab the results with Receive-Job. It’s essential for juggling multiple tasks at once.

    Finally, most of us work across different environments—like dev, staging, and production—which often means switching between Azure subscriptions. You can easily list every subscription you have access to with Get-AzSubscription. To switch your active context, just run this:

    Set-AzContext -Subscription "Your-Subscription-Name-Or-ID"

    This command ensures all subsequent cmdlets are aimed at the right environment. It's a simple step that prevents you from accidentally making changes in production when you thought you were in a dev sandbox.

    These advanced techniques elevate the Azure PowerShell module from a basic command-line tool into a robust platform for serious, enterprise-grade automation. When you're orchestrating complex workflows that involve multiple services, like queuing messages for background jobs, you can learn more by reading our guide on what Azure Service Bus is and how it helps services communicate without being tightly connected.

    Understanding the Shift to Microsoft Graph

    Image

    If you've been working with Azure for a while, you know the world of cloud administration is always evolving. A major change is happening right now in how we manage identity. For years, we juggled two different PowerShell modules, AzureAD and MSOnline, to handle tasks in what we now call Microsoft Entra ID. This often meant bouncing between different sets of commands, which was anything but efficient.

    Microsoft's big-picture plan is to fix this. They're moving towards a single, unified endpoint for all Microsoft 365 services, and that endpoint is the Microsoft Graph API. Think of it as a central hub or a universal translator. It provides one consistent way to interact with everything from user accounts and groups to mailboxes and, of course, Azure resources.

    Why This Shift Is Happening

    This isn't just a spring cleaning of old tools; it’s a strategic move to build a more robust and future-proof platform. By funneling everything through Microsoft Graph, Microsoft gives developers and administrators a far more coherent and powerful toolkit. While the Az Azure PowerShell module is fantastic for managing Azure infrastructure—things like VMs, storage, and virtual networks—the modern standard for identity management is now the Microsoft Graph PowerShell SDK.

    This shift was cemented with a significant announcement: the old Azure AD PowerShell modules (AzureAD, AzureAD-Preview, and MSOnline) are officially deprecated. This marks a full-scale migration to the Microsoft Graph PowerShell SDK, with a clear timeline for retiring the old modules completely. You can get all the specifics from Microsoft's official announcement on the module deprecation.

    What does that mean in practical terms? Any of your scripts that still rely on Connect-MsolService or Connect-AzureAD are now on borrowed time. Migrating them isn't just a "good idea"—it's critical for keeping your automation running smoothly down the road.

    Understanding this transition is essential for future-proofing your scripting and automation skills. Embracing the modern toolset—the Az module for Azure resources and the Microsoft Graph SDK for Entra ID—is the only way to ensure your scripts remain secure, supported, and ready for whatever comes next.

    What This Means for Your Scripts

    For those of us in the trenches, this change demands action. It's time to start looking at any scripts or automation that use the old modules and plan their migration.

    • Audit Your Scripts: Your first job is to find everything that uses the old commands. Hunt down any scripts that call cmdlets from the MSOnline or AzureAD modules.
    • Learn the New Syntax: The Microsoft Graph PowerShell SDK has a different command structure. For example, a familiar command like Get-MsolUser is now Get-MgUser. You'll need to get comfortable with these new cmdlets.
    • Plan Your Migration: Don't put this off. Start planning the move now to avoid a scramble when the old modules are finally turned off for good. A proactive approach will save you a lot of headaches.

    By getting ahead of this change, you’re not just updating code; you're aligning your skills with Microsoft's modern management framework. In the long run, it will make your work more secure and a whole lot more efficient.

    Frequently Asked Questions

    Even the most seasoned developers have questions when working with a tool as robust as the Azure PowerShell module. Let's tackle some of the most common ones I hear, so you can solve problems quickly and get back to what matters—building great things on Azure.

    What Is the Difference Between Az PowerShell and Azure CLI?

    This is probably the most frequent question I get, and the honest answer is: it depends on you. Think of them as two different dialects for speaking to Azure. There's no single "best" choice, only what's best for your background and the way you work.

    • Azure PowerShell (Az module): If you live and breathe PowerShell, especially on a Windows machine, the Az module will feel like home. Its real magic is how it works with objects. You can seamlessly pipe the output of one command directly into another, letting you chain together sophisticated operations with ease.

    • Azure CLI: This tool is built for the cross-platform command line. If your background is in Linux or Bash scripting, you'll feel right at home with the CLI's syntax. The commands are generally shorter, more direct, and work with simple text strings instead of complex objects.

    So, which one should you use? The one that feels most natural to you.

    Key Takeaway: Go with Azure PowerShell if you love the power of object manipulation and are deep into the PowerShell ecosystem. Opt for Azure CLI if you prefer a simpler, text-based syntax and come from a Bash or Linux background.

    Can I Use the Old AzureRM and New Az Modules Together?

    Technically, you might be able to make it work, but I have to be blunt: don't do it. It's a recipe for headaches. Trying to run both the old AzureRM and the modern Az modules at the same time is a surefire way to cause command conflicts, making your scripts flaky and a nightmare to debug.

    The best practice here is clear and simple: completely uninstall the AzureRM module before you install the Az module. While there's a handy compatibility command (Enable-AzureRmAlias) to help ease the transition, your long-term goal should always be to fully migrate your scripts to the modern Az cmdlet syntax.

    How Do I Keep My Azure PowerShell Module Updated?

    Keeping your Az module up-to-date is crucial. Azure evolves constantly, with new services and features rolling out all the time. Your module updates are your ticket to accessing them, not to mention getting the latest security patches and bug fixes.

    Thankfully, the process is incredibly straightforward.

    Just pop open an elevated PowerShell window and run this one command:

    Update-Module -Name Az -Force

    Using the -Force parameter is important. It tells PowerShell to update all the individual sub-modules that make up the complete Az module, ensuring everything is on the latest version. Make this a regular part of your routine. Staying current is a hallmark of a professional developer, and if certification is on your radar, take a look at our guide on how do I get Microsoft certified.


    At AZ-204 Fast, we provide the focused tools you need to master Azure development. Our platform combines interactive flashcards, comprehensive cheat sheets, and dynamic practice exams to help you pass the AZ-204 exam efficiently. Get started today at https://az204fast.com.

  • Mastering Azure Active Directory Sync

    Mastering Azure Active Directory Sync

    Azure Active Directory Sync is what connects your traditional, on-premise Active Directory with its cloud counterpart, Microsoft Entra ID. At the heart of this process is the Azure AD Connect tool—it's the bridge that makes your local and cloud identity systems talk to each other. The whole point is to give your users one single identity, so they can access everything they need, whether it's on a local server or in the cloud.

    Why Azure AD Sync Is Non-Negotiable For Hybrid Setups

    Let's be honest, in any company that's balancing on-premise servers with cloud services, a unified identity system isn't just a nice-to-have; it's the very foundation of your security and your team's productivity. This is where a solid Azure Active Directory sync strategy becomes absolutely critical. It’s what ensures that when someone changes their password on their work computer, that new password just works when they go to log into Microsoft 365 a minute later.

    This synchronization gets rid of the headache users face when juggling multiple passwords. Instead of one password for their desktop and another for their cloud apps, they have a single identity. This simple change boosts user satisfaction almost immediately and drastically cuts down on the "I'm locked out!" help desk calls.

    Creating a Unified User Experience

    The biggest win you get from setting up Azure AD sync is Single Sign-On (SSO). With SSO, your users log in once to your corporate network, and that's it. They can then jump into all their approved cloud apps without being prompted for credentials again and again.

    Picture this real-world scenario:

    • An employee logs into their Windows PC, which is joined to your local Active Directory.
    • They open their browser and head to Salesforce, Microsoft Teams, or other SaaS tools.
    • Because their identity is synced, the apps already know who they are and grant access automatically.

    This smooth experience isn't just for convenience. It also means you can control access to important cloud resources, like those you might deploy with what is Azure App Service, using the same security groups you already manage on-premise.

    The Foundation Of Hybrid Security

    From a security perspective, synchronization is essential for keeping your policies consistent. Without it, you’re stuck managing two different directories, which doubles the work and creates blind spots for attackers to exploit. A synced environment means you can enforce the same security rules—like password complexity and account lockouts—everywhere.

    To get a clearer picture of how this works, it helps to understand the main pieces involved in the sync process.

    Key Components in the Sync Process

    The sync process isn't just one thing; it's a collection of components working together. Here’s a quick breakdown of what they are and what they do.

    Component Primary Function Key Responsibility
    Azure AD Connect The main installation wizard and engine. Orchestrates the entire synchronization flow between directories.
    Sync Engine The core service that runs the sync cycles. Reads changes from AD and writes them to Microsoft Entra ID.
    AD Connector Manages communication with on-prem Active Directory. Responsible for reading user, group, and device objects locally.
    Azure AD Connector Handles communication with Microsoft Entra ID. Responsible for writing and updating objects in the cloud.

    These components form the backbone of your hybrid identity, ensuring that changes in one environment are reliably reflected in the other.

    A compromised on-premises identity can become a direct pathway to cloud resources. Recent threat analyses show that attackers specifically target the credentials of Microsoft Entra Connect sync accounts to pivot from on-premises systems to the cloud, create backdoors, and gain administrative control.

    This makes it crystal clear: the sync process itself is a high-value target. Getting the configuration right and securing your Azure Active Directory sync is a fundamental piece of any modern defense strategy.

    The tool that pulls all this together, Azure AD Connect, is used by a huge majority of organizations to manage their hybrid identities. Its adoption is nearly universal in the enterprise world, with millions of users depending on it daily. For more real-world discussions on this, you can find a ton of insights from IT pros digging into Azure Active Directory sync topics on oneidentity.com.

    Preparing Your Environment for a Flawless Sync

    Image

    A successful Azure Active Directory sync doesn't just happen. From my experience, the folks who run into frustrating, time-consuming errors are the ones who jump straight to the installation wizard without doing the prep work.

    Think of it this way: you wouldn't build a house on a shaky foundation. Taking the time to prepare your on-premises environment is that foundational work. It's the single best thing you can do to ensure your sync runs smoothly right from the start.

    Cleanse Your On-Premises Directory with IdFix

    Let's be honest, your on-premises Active Directory has probably been around for a while. Over the years, it's collected its fair share of quirks—duplicate proxy addresses, odd characters in usernames, or UPNs that don't match your public domains. These might not break anything locally, but they will absolutely cause the sync to fail.

    This is where Microsoft's IdFix tool is invaluable. It’s a free utility that scans your directory and flags common errors that are known to cause sync problems.

    Running IdFix before you even think about installing Azure AD Connect will save you hours of headaches. It's designed to catch things like:

    • Format Errors: It spots attributes like proxyAddresses and userPrincipalName that aren't formatted correctly for the cloud.
    • Duplicate Attributes: It finds where multiple users share the same email or UPN, a major no-go in Microsoft Entra ID.
    • UPN Mismatches: It highlights user accounts whose UPN suffix doesn't match a domain you've actually verified in your tenant.

    Fixing these issues beforehand turns a reactive troubleshooting nightmare into a controlled, predictable process.

    Verify Domains and Prepare Accounts

    Before you can sync a user, Microsoft Entra ID needs proof that you own their domain. If your users have UPNs like jane.smith@yourcompany.com, you must have yourcompany.com verified in your tenant first. It’s a simple step, but an absolute must.

    The sync process also needs specific permissions. You'll need credentials for two key accounts during the setup wizard:

    1. On-Premises AD Account: This account needs Enterprise Administrator rights during the installation so the wizard can create a specific service account (it'll look like MSOL_xxxxxxxxxx). After setup, standard read permissions are all that's needed.
    2. Microsoft Entra ID Account: This needs to be a Global Administrator to handle the cloud-side configuration.

    Here's a pro tip I can't stress enough: Do not use your day-to-day admin account for this. Create a dedicated, cloud-only Global Admin account (like setupadmin@yourtenant.onmicrosoft.com) just for the installation. This sidesteps any potential lockouts from MFA or federation issues and is just a better security practice.

    Server Requirements and Network Configuration

    The server you choose for Azure AD Connect doesn't need to be a beast, but you must treat it as a Tier 0 asset. If it gets compromised, your entire environment is at risk. Attackers actively target these servers to move from on-prem to the cloud.

    Your best bet is a dedicated, domain-joined Windows Server. Don't load it up with other roles like IIS or file services.

    For connectivity, the server needs to talk to your domain controllers and have outbound access to specific Microsoft URLs over port 443 (HTTPS). The good news is you don't need a bunch of inbound ports open, which keeps your firewall rules clean and your security posture strong.

    Navigating Your Azure AD Connect Installation

    Alright, with the prep work out of the way, it’s time to get our hands dirty and actually install Azure AD Connect. This is where the magic happens, connecting your on-prem world to the cloud. The installation wizard itself is pretty good, but the choices you make during the setup will echo through your environment for years. Don't just fly through it on autopilot.

    Express vs. Custom Installation: Your First Big Decision

    Right out of the gate, the installer asks if you want to use Express Settings or a Custom Installation. This isn't a trivial choice.

    For a smaller shop with a single Active Directory forest and under 100,000 objects, Express Settings is a perfectly fine choice. It's built for speed—it defaults to Password Hash Synchronization, turns on auto-updates, and syncs everything. It gets the job done fast, but you sacrifice control.

    When to Go Custom

    Most enterprise environments I've worked in need the Custom Installation path. You'll definitely want to choose this if you need to:

    • Select a different sign-in method, like Pass-through Authentication or even a full Federation setup.
    • Get granular with which Organizational Units (OUs) or specific groups you want to sync.
    • Point Azure AD Connect to an existing, more robust SQL Server instead of the lightweight SQL Express it installs by default.
    • Specify a particular service account for the sync service, which is common for meeting security policies.

    Going custom gives you the fine-toothed comb you need for security and performance in any complex AD environment.

    This whole process is about making the right choices for your specific needs, which this flow illustrates nicely.

    Image

    As you can see, the path you take branches based on your company's security posture and how you need your identity system to behave.

    Choosing the Right User Sign-In Method

    This is probably the single most important decision you'll make here. It directly impacts how your users log in to Microsoft 365 and other cloud services every single day.

    Let's break down the real-world implications of each option:

    • Password Hash Synchronization (PHS): Honestly, this is the simplest and best option for most organizations. Azure AD Connect syncs a hash of your users' on-prem password hash—not the password itself—to Microsoft Entra ID. Users authenticate against the cloud, giving them a true single sign-on experience. The biggest win? It’s incredibly resilient. If your on-prem servers have a bad day, your team can still log in and work in the cloud.
    • Pass-through Authentication (PTA): With PTA, the authentication request gets handed off to your on-prem Domain Controllers for the final say. It's a solid middle ground if your security team has a strict policy against any form of password hash leaving the local network. Just know it requires installing a couple of lightweight agents on servers inside your network.
    • Federation (with AD FS): This is the heavy-duty option. It redirects all authentication to a dedicated Active Directory Federation Services (AD FS) farm you manage. While it gives you maximum control, it also adds a lot of moving parts, complexity, and potential points of failure. This is really only for large organizations with very specific compliance or advanced sign-on requirements.

    For most businesses, Password Hash Synchronization is the way to go. It strikes the best balance of simplicity, user experience, and resilience. You can always change it later if you need to.

    I can't tell you how many times I've seen teams default to Federation because it sounds more "enterprise," only to get bogged down for weeks trying to troubleshoot claims rules and proxy issues. Start simple with PHS unless you have a documented, unavoidable reason not to.

    Scoping Your Sync with OU Filtering

    After picking your sign-in method, you'll connect to your on-prem AD and your Microsoft Entra tenant using the admin accounts you prepared. The next screen is your chance to prevent a lot of future headaches.

    This is where you tell Azure AD Connect precisely which domains and Organizational Units (OUs) to include in the Azure Active Directory sync.

    By default, the tool wants to sync everything. This is a bad idea. Take a moment and carefully uncheck the OUs you don't need. Syncing things like old user accounts, dormant groups, or built-in containers full of service accounts just adds clutter and potential security holes to your cloud directory. Be intentional. Be selective.

    Once you’ve made your choices and hit install, the initial synchronization will kick off.

    Getting this setup right is a huge part of managing a modern hybrid identity system. If you're looking to turn this practical experience into professional recognition, check out our guide on how to get Microsoft certified. It outlines the certification paths for IT pros who manage these exact technologies.

    Customizing Your Sync Rules Beyond the Defaults

    The default settings in Azure AD Connect are great for getting you off the ground quickly. They handle the common scenarios and get your identities syncing without much fuss. But let's be honest, almost no organization is "one-size-fits-all." Your business has unique needs, and that's where the real power of this tool comes into play.

    https://www.youtube.com/embed/ZHNDDOWBMoE

    To tailor the sync process, you'll need to get familiar with the Synchronization Rules Editor. I'll admit, it can look a bit daunting the first time you open it. But once you get the hang of a couple of key concepts, you'll realize it's an indispensable tool for fine-tuning how identity data moves between your on-premises Active Directory and Microsoft Entra ID.

    The standard rules cover the basics, like syncing a user's displayName or userPrincipalName. But what happens when you need something more specific?

    Understanding Inbound and Outbound Rules

    The first thing to wrap your head around is the direction of data flow. It's all managed by two fundamental types of rules:

    • Inbound Rules: These control how data flows from a source, like your local AD, into the central staging area in Azure AD Connect called the metaverse.
    • Outbound Rules: These then dictate how that data gets pushed out from the metaverse to a target, which is usually Microsoft Entra ID.

    Think of the metaverse as a middleman. Inbound rules bring information in, you can manipulate it there if needed, and then outbound rules send the polished, final version up to the cloud.

    The other critical piece of the puzzle is precedence. Every rule is assigned a number, typically between 1 and 99 for custom rules. The lower the number, the higher the priority. This is incredibly important because it decides which rule gets the final say if multiple rules are trying to change the same attribute.

    My most important piece of advice: Never, ever edit the default, out-of-the-box sync rules. These are the ones with a precedence of 100 or higher. A future Azure AD Connect update could simply overwrite your hard work. Always create a new rule with a lower precedence (like 90) for your customizations. This guarantees your changes take priority and won't get wiped out.

    A Practical Customization Example

    Let's walk through a common, real-world scenario I've seen countless times. Imagine your company relies on an HR app that needs a unique employee ID populated in Microsoft Entra ID for every user. Right now, that ID is sitting nicely in the extensionAttribute1 field in your on-prem AD.

    The default sync rules won't touch this attribute. It's up to us to build a custom rule to bridge that gap.

    Here’s a simplified look at how you'd tackle this:

    1. Open the editor and start by creating a new Inbound Rule. Give it a low precedence number so it runs before the defaults.
    2. Define the scope of the rule. You'll specify that it should only apply to user objects, not groups or contacts.
    3. Create the transformation. This is where the magic happens. You’ll set up a "Direct" mapping that tells Azure AD Connect to take the value from the source attribute (extensionAttribute1) and flow it into an attribute in the metaverse. You could use a corresponding metaverse attribute, like extensionAttribute1, to keep things clean.
    4. Build a matching Outbound Rule. Finally, you create a new outbound rule. This one takes the data from the metaverse's extensionAttribute1 and maps it to a specific, available attribute in Microsoft Entra ID that your HR application is configured to read.

    With just a few clicks, you’ve ensured a vital piece of business data from your local system is now accurately reflected in your cloud directory. This kind of granular control is what makes your Azure Active Directory sync a true strategic asset, ensuring your identity data is exactly where it needs to be, in the format you need.

    Keeping Your Sync Healthy: Monitoring and Troubleshooting Common Issues

    Image

    Getting your Azure Active Directory sync up and running is a huge step, but the work doesn't stop there. A healthy hybrid identity environment needs consistent care and feeding. Syncing is a living process, and sooner or later, something will hiccup. The real skill is knowing where to look and what to do when it does.

    One of the biggest mistakes I see is treating the sync environment as "set and forget." This approach almost always leads to user-facing problems down the line. If you're proactive about monitoring and confident in your troubleshooting, you can turn potential meltdowns into minor, manageable fixes.

    Your First Line of Defense: Microsoft Entra Connect Health

    Think of Microsoft Entra Connect Health as the heartbeat monitor for your entire identity infrastructure. It’s a centralized dashboard right in the Azure portal that gives you a live look at the performance and stability of your Azure AD Connect servers. It's built to catch problems before they snowball.

    For example, Connect Health is always on the lookout for things like:

    • High CPU or memory usage on your sync server, which could grind synchronization to a halt.
    • Outdated versions of Azure AD Connect, which might harbor bugs or security holes.
    • Failures in the sync services, sending you an alert the moment changes stop flowing to the cloud.

    Getting comfortable with this dashboard is what shifts you from being reactive to proactive. Catching an alert here and quietly fixing it before the help desk phones start ringing is a massive win.

    Going Deeper with Synchronization Service Manager

    When a specific error pops up, your go-to tool on the sync server itself is the Synchronization Service Manager. This is where you get a granular, operational view of every single sync cycle. It's the place to diagnose the nitty-gritty details of why a particular user or group failed to sync.

    The interface is broken down into "Operations," which shows you the history of every sync run, and "Connectors," which represent your on-prem AD and Microsoft Entra ID. If you see a run profile with a "completed-sync-errors" status, that’s your starting point. Clicking it will show you the exact objects that failed and the specific error tied to them.

    Even in stable environments, you can hit snags. Sync jobs might run fine 99% of the time but then throw intermittent errors during an import or export cycle, as highlighted in some documented cases of directory sync failures on Microsoft Learn. This is why having these tools in your back pocket is so important.

    Common Sync Errors and What to Do First

    After managing an Azure Active Directory sync for a while, you'll start to see the same few errors crop up. This quick-reference table covers the usual suspects and the first thing you should check.

    Error Type Common Symptom First Action
    Duplicate Attribute An object fails to export with an error like AttributeValueMustBeUnique. Find the two objects (users, groups) with the conflicting attribute (e.g., proxyAddress or UserPrincipalName) in your on-prem AD and fix the duplicate.
    stopped-server-down The sync run fails instantly with this status in the Operations tab. This almost always points to a critical server problem. Check that the "Microsoft Azure AD Sync" service is running and that the server can reach your domain controllers and the internet.
    Large-Scale Deletes You get an email warning that the sync service stopped a large number of deletions. This is a safety feature. Investigate why the deletions were triggered. Often, an OU was accidentally removed from sync filtering. If the deletes are legitimate, you'll need to disable this protection temporarily.

    These are just the starting points, but they'll resolve the issue a surprising amount of the time.

    From my experience, the "Duplicate Attribute" error is hands-down the most common issue you'll face. It usually pops up when someone creates a new user with an email alias that belonged to an old, disabled account. The IdFix tool from Microsoft is your best friend for cleaning these up proactively before they become a problem.

    A Real-World Troubleshooting Scenario

    Let's walk through a classic example. A user, Jane, calls the service desk complaining her new password doesn't work for Microsoft 365. You jump into the Synchronization Service Manager and find her user object flagged with a "permission-issue" error during the last sync. That's a bit vague, so here's a practical checklist.

    1. Check the AD Connector Account: The first thing to do is verify the permissions for the MSOL_ account in your on-premises Active Directory. Has someone accidentally stripped its "Replicate Directory Changes" permission? I've seen it happen.
    2. Look for Blocked Inheritance: Next, find Jane's user object in "Active Directory Users and Computers." Go to her account's Security > Advanced settings and check if "permission inheritance" has been disabled. This is a common culprit that stops the sync account from reading the password hash changes.
    3. Force the Sync: Once you re-enable inheritance, you can run a targeted delta sync for just her account to push the change through immediately instead of waiting for the next cycle.

    Getting really good at troubleshooting these sync issues is an incredibly valuable skill. If you're studying for a certification, using resources like the MeasureUp practice tests can be a great way to test your understanding of how Azure identity management works in these real-world scenarios.

    Common Questions from the Field: Azure AD Sync

    When you're managing a hybrid identity system, you run into questions that the official documentation doesn't always answer directly. I've been in the trenches with Azure Active Directory sync, and certain queries pop up time and time again. Here are the straight-up answers to what admins really want to know.

    What Happens if My Azure AD Connect Server Goes Down?

    If your Azure AD Connect server suddenly goes offline, don't panic. Synchronization stops immediately, but it isn't an instant catastrophe for your users. Anyone already authenticated or using federated services can generally keep working just fine.

    The real problem is that no new changes from your on-premises Active Directory will sync to the cloud. New user accounts won't appear in Microsoft Entra ID. Password resets won't go through. Group membership updates will be stuck in limbo. It’s a quiet failure that gets more disruptive the longer the server stays down.

    Essentially, a downed server halts the flow of all new updates. Prolonged outages can cause stale data, provisioning backlogs, and even device registration failures. For a deeper dive into the specific impacts, you can learn more about Azure AD Connect server downtime on Microsoft Learn.

    Can I Have More Than One Active Azure AD Connect Server?

    Absolutely not. You can only have one active Azure AD Connect sync server connected to a single Microsoft Entra tenant. This is a non-negotiable limit. If you try to run two active servers at the same time, you'll create a chaotic mess of sync conflicts that can corrupt your identity data. It’s a recipe for disaster.

    What you can—and really should—do is set up a second server in staging mode. A staging server pulls down the same configuration as your primary server but doesn't actually write any data to either directory. It just sits there, ready to go.

    From Experience: Having a staging server is a lifesaver in a real-world disaster recovery scenario. If your main server fails, you can switch the staging server to active mode in minutes. This simple setup can turn what would be hours of downtime into a quick, five-minute fix.

    How Do I Upgrade Azure AD Connect?

    Your upgrade path depends entirely on how old your current version is. If you're just moving up a few minor versions, an in-place upgrade is usually your best bet. It’s simple—just run the new installer on your existing server, and it takes care of the process for you.

    But for major version jumps or if you're migrating from a really old installation, a swing migration is the safer, smarter approach. It’s a much more controlled process:

    1. First, you set up a completely new server with the latest version of Azure AD Connect.
    2. Then, configure this new server and put it into staging mode.
    3. Next, you put your old active server into staging mode, which effectively stops it from syncing.
    4. Finally, you switch the new server out of staging mode, promoting it to the active role.

    This method gives you a clean cutover and, just as importantly, a simple rollback path if anything goes wrong.

    Does Uninstalling Azure AD Connect Remove Synced Objects?

    This is a very common point of confusion, and the answer is no. Uninstalling the Azure AD Connect tool from your server does not delete the user and group objects that are already synced to Microsoft Entra ID.

    When you remove the software, synchronization just stops. The objects that were synced previously remain in the cloud, but their state changes to "cloud-only." This means any future changes you make to those objects in your on-premises AD will no longer be reflected in Entra ID. They are effectively severed from their on-prem source.

    This behavior is actually a good thing. It lets you decommission a sync server or perform a swing migration without the fear of accidentally wiping out all of your cloud user accounts.


    Are you a developer prepping for the AZ-204 exam? Don't just memorize—master the concepts. AZ-204 Fast offers a smarter way to study with interactive flashcards, comprehensive cheat sheets, and unlimited practice exams. Equip yourself with the tools you need to pass with confidence. Conquer your certification with AZ-204 Fast.

  • Azure Active Directory Integration Done Right

    Azure Active Directory Integration Done Right

    Integrating your application with Microsoft's cloud ecosystem all starts with a solid Azure Active Directory integration. This isn't just about adding a sign-in button; it's about connecting your app to a powerful, centralized identity provider. Getting this right is the foundation for secure user access, protected APIs, and streamlined management—essentials for any serious enterprise-level solution.

    Why Azure AD Is More Than Just a Login Box

    Image

    Before we even think about writing code, let’s get one thing straight: Azure Active Directory (now part of Microsoft Entra ID) is far more than a simple login screen. I’ve seen developers treat it as just another utility, but that misses the huge strategic value it brings to the table for everyone involved—from the dev team to IT admins and business leaders.

    When you do an Azure Active Directory integration correctly, your application goes from being a standalone island to a trusted citizen within the Microsoft ecosystem. This is about building secure, scalable, and user-friendly software that’s ready for the demands of big business right out of the gate.

    The Strategic Value of Centralized Identity

    At its heart, Azure AD gives you a single, authoritative source for user identities. As a developer, this is a massive win. You can stop worrying about building and maintaining your own user management systems. No more custom password storage, reset workflows, or account security—you offload all that heavy lifting to a platform trusted by millions of organizations.

    This shift to centralized identity pays off immediately:

    • Enhanced Security Posture: You instantly inherit Microsoft's world-class security features. We're talking about sophisticated threat detection, identity protection, and advanced monitoring, all baked in.
    • Simplified User Experience: Your users get the convenience of Single Sign-On (SSO). They can access your application using the same credentials they already use for Microsoft 365 and other services. It’s a simple change that dramatically reduces friction and password fatigue.
    • Enterprise-Grade Compliance: Organizations can apply consistent security policies, like multi-factor authentication (MFA) and conditional access rules, across every connected app—including yours.

    Azure AD is a cornerstone of Microsoft's cloud, acting as the identity and access management hub for a staggering number of users. As of early 2025, it supports approximately 722 million users worldwide, a testament to its scale and reliability.

    The Identity and Access Management (IAM) market is highly competitive, yet Microsoft's position is undeniably dominant. This table illustrates how Azure AD and its related services stack up against other major players.

    Comparing Leading Identity and Access Management Solutions

    IAM Solution Market Share (%)
    Microsoft (Azure AD, etc.) 26.5
    Okta 8.7
    Ping Identity 4.1
    IBM 3.5
    Oracle 3.2
    Other 54.0

    This data highlights just how integral Microsoft's identity solutions are to the modern IT infrastructure. Choosing to integrate with Azure AD means aligning your application with the market leader.

    Built for the Modern Enterprise

    With over 85–95% of Fortune 500 companies relying on Azure services, it's clear that Azure AD is a de facto standard. When you implement Azure Active Directory integration, you're not just adding a feature. You're aligning your product with the default identity system for countless businesses in retail, healthcare, government, and beyond.

    This alignment makes your application instantly more appealing to enterprise customers, who are always looking for solutions that are secure, manageable, and fit neatly into their existing tech stack. You can explore more statistics about Azure's global footprint on platforms like turbo360.com.

    2. Before You Code: Getting Your App Ready in Azure AD

    A solid Azure Active Directory integration doesn't start with code. It starts with preparation. I’ve seen too many projects stumble because of a rushed setup, leading to frustrating authentication errors that are a real headache to debug later. Think of this as laying the foundation; get it right, and the rest of the build goes much smoother.

    It all begins with registering your application inside your Azure AD tenant. This isn't just a bit of admin work; it's how you establish a formal identity and trust relationship with the Microsoft identity platform. Once you register your app, Azure gives you an Application (client) ID. This unique ID is what your code will use to introduce itself whenever it asks for security tokens.

    This flowchart lays out the essential sequence you'll follow inside Azure.

    Image

    This "Register, Configure, and Assign" loop is the core of the process. It's the standard workflow I use for any app I'm connecting to Azure AD, and it ensures everything is secure and manageable from the get-go.

    Diving into Your App Registration Settings

    After registering the app, your next stop is the "Authentication" blade in the Azure portal. This is where you tell Azure AD exactly how your application will communicate with it.

    One of the most critical settings here is the Redirect URI. This is essentially a whitelist of approved addresses. After a user authenticates, the Microsoft identity platform will only send the security tokens to a URI on this list. If your app’s sign-in request specifies a location that isn't registered, the whole process fails. It's a fundamental security check to stop tokens from being hijacked and sent somewhere malicious.

    I always think of the Redirect URI as a P.O. Box for security tokens. You wouldn't want a sensitive package delivered to an unknown address. By pre-registering the URI, you're telling Azure, "Only deliver my tokens to this specific, trusted location."

    Who Can Sign In? Defining Account Types

    You also need to make a key decision about who can use your application by setting the supported account types. Your choice here really depends on your audience.

    • Single tenant: The go-to for internal line-of-business apps. Only users in your organization's Azure AD tenant can sign in.
    • Multi-tenant: A must-have if you're building a SaaS product. This allows users from any organization with an Azure AD tenant to use your app.
    • Personal Microsoft accounts: Opens up your app to the public, allowing anyone with an Outlook.com, Xbox, or other personal Microsoft account to log in.

    If you’re building a multi-tenant or public-facing app, you’ll need a place to host it. You can learn more about what Azure App Service is and see how it’s designed for exactly these kinds of deployments.

    Finally, you need to create your application's "password"—either a client secret or a certificate. Your application uses this credential to prove its identity when it’s operating on its own, like when a web app needs to swap an authorization code for an access token.

    Handle these credentials with extreme care. Never, ever check them into source control or leave them in a config file. The best practice is to store them securely in a service like Azure Key Vault. Getting this foundational setup right is non-negotiable for a secure Azure Active Directory integration.

    Putting MSAL to Work: Implementing User Sign-In

    Image

    Alright, you’ve done the prep work in the Azure portal. Now for the fun part: making the sign-in experience actually happen in your application. This is where the Microsoft Authentication Library (MSAL) becomes your best friend.

    Think of MSAL as a specialist that handles all the heavy lifting of modern authentication protocols like OAuth 2.0 and OpenID Connect. It abstracts away the low-level, complex details so you don't have to manually build authentication requests or parse security tokens. Honestly, it’s a lifesaver. It lets you focus on your app's core features while dramatically reducing both boilerplate code and the risk of security missteps.

    Knowing how to handle Azure Active Directory integration is a seriously valuable skill. Microsoft’s identity solutions are dominant in the enterprise world. In 2025, market data from 6sense.com shows that Azure Active Directory alone captures roughly 21.42% of the Identity and Access Management (IAM) market. When you add in Microsoft's other identity services, their total share climbs to nearly 50%. This is exactly why getting this integration right is a key skill for any developer working in the Microsoft ecosystem.

    Initializing the MSAL Client

    First things first, you need to initialize the MSAL client in your code. This object is the central nervous system of your app's authentication logic. No matter what language you're using—be it .NET, Node.js, Python, or something else—the setup is conceptually the same. You'll feed it the configuration details you noted down from the Azure portal.

    You'll need these specific pieces of information:

    • Client ID: The unique Application (client) ID from your app registration.
    • Authority: The URL that points MSAL to the correct Azure AD endpoint. This URL changes based on whether your app is single-tenant, multi-tenant, or supports personal Microsoft accounts.
    • Client Secret or Certificate: If you're building a confidential client (like a back-end web app), this is the credential you created earlier to prove your application's identity.

    Once you have this client object initialized, it becomes your primary tool for interacting with the Microsoft identity platform.

    Kicking Off the Sign-In Flow

    With your MSAL client configured and ready to go, adding the actual sign-in functionality is surprisingly simple. You'll typically call a method like acquireTokenRedirect() or acquireTokenPopup(). This single function call handles all the work of building the proper authentication request and sending your user over to the official Microsoft sign-in page.

    This is where the magic happens. Your app hands off the authentication process entirely to Azure AD. At no point does your application ever see the user's password. It only receives the result: a secure ID token after a successful login. This separation is a fundamental principle of modern, secure authentication.

    After the user proves their identity, Azure AD sends them back to the Redirect URI you specified in your app registration. But this time, the request has an ID token attached. MSAL automatically intercepts this response, validates the token to ensure it’s legitimate, and then securely stores it in a cache. This token cache is what allows you to maintain the user's session without making them log in over and over again.

    Handling Sign-Out Correctly

    Signing users in is only half the battle; signing them out properly is just as crucial for security. A robust sign-out process cleans up the user's session data everywhere—both within your application and on Azure AD's side. Just clearing local cookies won't cut it.

    A complete sign-out is a two-step dance:

    1. Clear Local Session: Your app must first wipe its own session state, which includes clearing any tokens from the MSAL cache. MSAL provides simple methods to do this.
    2. Redirect to Azure AD Logout Endpoint: Next, you redirect the user to a specific end-session endpoint at Azure AD. This action formally invalidates their session with Microsoft, ensuring they are truly logged out.

    This two-step process is non-negotiable for preventing session hijacking and giving users a secure, complete sign-out. For a more detailed walkthrough with code examples, check out our guide on how to implement sign-in with the Microsoft identity platform.

    Securing Your APIs Beyond the Login

    Getting a user successfully signed in is a great first step, but the job of securing your application is far from over. Authentication confirms who someone is, but the real work happens with authorization, which dictates what they’re allowed to do. This distinction is absolutely critical for building a secure backend. For any real-world Azure Active Directory integration, protecting your API endpoints is just as crucial as handling the initial login.

    I like to think of it like this: authentication is the bouncer checking IDs at the club's front door. Once you're inside, authorization acts as the set of keys that determines which VIP rooms you can actually enter. Your backend API needs to be that vigilant key master, checking permissions for every single request it receives.

    Defining Permissions with Scopes

    This whole process really begins back in the Azure portal, specifically within your API's app registration. This is where you'll define custom permissions, which in the OAuth 2.0 world are called scopes. A scope is just a granular permission that your API advertises to client applications.

    For instance, rather than creating a single, overly permissive "access_everything" permission, you'd want to break it down. You could define much more specific scopes like:

    • Files.Read: Allows a client application to read files on the user's behalf.
    • Files.Write: Lets the client app create or modify those files.
    • Reports.Generate: Gives the app permission to kick off a report generation process.

    By creating these specific scopes, you're essentially building a menu of permissions that client apps can request. This is the foundation of a least-privilege security model, which ensures that an application only asks for—and gets—the exact access it needs to function, and nothing more.

    Requesting and Validating the Access Token

    Once your API has its scopes defined, your client-side application can then request an access token from Azure AD that is specifically "minted" for your API. During the login flow, the client asks the user to consent to the permissions it requires (e.g., "This app wants to read your files"). Assuming the user agrees, Azure AD issues an access token that contains these approved scopes as claims.

    Now, your backend API will receive this access token in the Authorization header with every request it gets from the client. And here comes the most important part of the entire process: validation.

    You must treat every incoming access token as untrusted until you've rigorously proven it's valid. The entire security of your API hinges on this strict validation process for every single call. This isn't a one-time check; it's a constant state of vigilance that underpins a modern zero-trust architecture.

    The validation isn't a single step but a series of critical checks:

    1. Signature: First, you verify the token was actually signed by Azure AD using its public key. This proves the token is authentic and hasn't been tampered with in transit.
    2. Issuer: Next, check that the iss (issuer) claim inside the token matches the Azure AD tenant you expect and trust.
    3. Audience: Finally, ensure the aud (audience) claim matches your API’s unique Application ID. This is vital because it confirms the token was created specifically for your API and not some other service.

    After confirming the token's authenticity, you can finally inspect its claims to make your authorization decisions. You'll look at the scp (scope) or roles claims to see what permissions the token actually grants. If a request comes in to write a file but the token only contains the Files.Read scope, you should immediately reject the request with a 403 Forbidden status code.

    Thinking about more complex, event-driven systems, it's also important to understand how to secure the communication channels themselves. If that's on your radar, you might find our guide on what Azure Service Bus is and its role in a secure system helpful.

    2. Hardening Your Azure AD Integration

    Image

    Getting your application to talk to Azure Active Directory is a great first step. But making that connection resilient and secure is what really matters for the long haul. Now it's time to move past the basics and adopt practices that will protect your application and its users from real-world threats.

    This isn't just about ticking a box. The stakes are incredibly high. Cybersecurity experts, like those at the Australian Signals Directorate, have pointed out that weaknesses in Active Directory are a common thread in major ransomware events. In fact, these vulnerabilities played a role in nearly every significant incident they analyzed. You can get a sense of the threat landscape from this breakdown of top Azure AD attacks.

    Let's dive into the practical steps you can take to fortify your integration.

    Start with the Principle of Least Privilege

    If you take only one thing away from this section, let it be this: always enforce the principle of least privilege. It's the golden rule of identity security.

    When you're configuring API permissions for your app, be stingy. Only grant the absolute minimum access required for your application to do its job. For example, if your app just needs to read the profile of the person signing in, don't grant a sweeping permission like user.read.all. Use the most restrictive scope that works.

    This one habit acts as your most effective first line of defense. Should your application ever be compromised, this principle dramatically shrinks the blast radius, limiting what an attacker can do.

    Put Conditional Access to Work

    This is where you can add some serious, intelligent automation to your security. Think of Conditional Access policies in Azure AD as smart bouncers at the door of your application. They check everyone who tries to sign in and enforce specific rules based on the situation.

    With Conditional Access, you can implement some truly powerful security measures. I’ve seen them stop attacks in their tracks. Here are a few must-haves:

    • Enforce Multi-Factor Authentication (MFA): This is non-negotiable. Require a second verification factor for users, especially if they’re coming from a network you don’t recognize or manage.
    • Require Compliant Devices: You can lock down access to only those devices that are managed by your organization and meet your security benchmarks.
    • Block Risky Sign-ins: Let Azure AD's Identity Protection do the heavy lifting by automatically blocking sign-in attempts it flags as high-risk.

    Think of Conditional Access as a set of dynamic "if-then" rules for your app's security. If a user tries to access sensitive data from an unmanaged device, then block them. If they sign in from a new country, then challenge them with MFA. This level of control is a game-changer.

    Maintain Essential Security Hygiene

    Finally, a few security practices are so fundamental they should be part of your team's DNA. These aren't one-and-done tasks; they are ongoing responsibilities.

    First, get your application secrets out of your config files. I can't stress this enough. Storing secrets in code or configuration is a recipe for disaster. Instead, use a dedicated secret store like Azure Key Vault. This allows your application to fetch credentials securely at runtime, keeping them out of your source control and deployment packages.

    Second, make a habit of keeping your Microsoft Authentication Library (MSAL) packages up to date. Microsoft is constantly patching these libraries to fix newly discovered security holes. Running on an old version is like leaving your front door wide open to known exploits. Don't make it easy for attackers.

    Answering Common Questions About Azure AD Integration

    Even with the best plan in hand, you're bound to run into a few head-scratchers when integrating Azure Active Directory. I've seen these same issues trip up developers time and time again. Let's walk through some of the most common questions so you can avoid these classic pitfalls.

    What Do I Do When an Access Token Expires?

    One of the first real-world problems you'll face is handling expired access tokens. It’s a jarring experience for a user when an app suddenly logs them out or throws an error just because a token expired. This is where proper token management becomes critical.

    Your application should be built to handle this gracefully. The Microsoft Authentication Library (MSAL) is designed to manage this entire lifecycle for you behind the scenes. When your API sends back a 401 Unauthorized response, it's your cue that the access token is no good. Instead of forcing a re-login, your code should call MSAL's acquireTokenSilent() method. This nifty function will automatically use its cached refresh token to get a new access token from Azure AD, all without the user ever noticing a thing.

    Should I Build a Single-Tenant or Multi-Tenant App?

    This is a fundamental architectural decision that dictates who can sign into your application. Getting this wrong early on can lead to some serious headaches down the road.

    • Single-Tenant: Think of this as a "members-only" club. It's perfect for internal, line-of-business (LOB) applications where access is strictly limited to users in your own organization's Azure AD directory. It's simpler and more secure for internal tools.

    • Multi-Tenant: This is the way to go if you're building a Software-as-a-Service (SaaS) product for the public. It opens your doors to users from any organization with an Azure AD account, giving you a much wider audience.

    From my experience, a frequent misstep is defaulting to a single-tenant setup for an app that you think will only be used internally. If there's even a small chance it could become a commercial SaaS product later, plan for multi-tenancy from day one. Migrating from single to multi-tenant is a complex undertaking that requires a lot of refactoring.

    Why Am I Getting a Redirect URI Mismatch Error?

    Ah, the infamous AADSTS50011 error. Seeing this is practically a rite of passage for anyone working with Azure AD. This error simply means that the "reply URL" your application sent in its authentication request doesn't perfectly match one of the Redirect URIs you've configured in the Azure portal.

    When you see this, meticulously check your registered URIs in Azure against the one in your application's configuration. The culprit is almost always a tiny, easy-to-miss detail:

    • A simple typo in the URL.
    • An http vs. https mismatch.
    • A missing or extra trailing slash (/).

    Getting a handle on these concepts is essential if you're aiming to pass the AZ-204 exam. At AZ-204 Fast, we've built an entire study system—from interactive flashcards and practice exams to detailed cheat sheets—all designed to help you study smarter.

    Ready to fast-track your certification? Check out the AZ-204 Fast platform and start your journey today.

  • What Is Azure Service Bus Simplified

    What Is Azure Service Bus Simplified

    Ever wonder how complex applications, like a sprawling e-commerce site, manage to keep all their moving parts in sync without falling apart? The secret often lies in a powerful tool like Azure Service Bus.

    At its heart, Azure Service Bus is a fully managed enterprise message broker. But what does that really mean?

    Think of it as a sophisticated digital post office for your applications. It provides a central, reliable place for different parts of your system to drop off and pick up messages. This simple concept is what allows modern applications to be both resilient and scalable, ensuring messages get delivered even if the intended recipient is temporarily busy or offline.

    What Is Azure Service Bus in Simple Terms?

    Image

    Let's stick with that e-commerce platform example. It isn't just one giant program. It's actually a collection of smaller, independent services working together. You'll have a service for user accounts, another for processing orders, one for inventory, and yet another for sending shipping notifications.

    In a less robust system, these services might call each other directly. When an order is placed, the order service has to directly tell the inventory service, then the shipping service, and finally the notification service. This "tightly coupled" design is incredibly fragile.

    The Problem with Direct Communication

    What happens if the inventory service goes down for a quick update right as a new order comes in? The whole process grinds to a halt. Or imagine a Black Friday sale. The sudden flood of orders could easily overwhelm the notification service, causing it to crash and lose track of which customers need updates.

    This is precisely the problem Azure Service Bus was built to solve. It steps in as the middleman. Now, the order service can just drop off an "Order Placed" message in a central location and move on, completely unaware of whether the other services are ready to handle it.

    To give you a quick overview, here's a summary of what Azure Service Bus brings to the table.

    Attribute Description
    Type Fully managed enterprise message broker
    Core Function Decouples applications by enabling asynchronous communication
    Key Components Queues (one-to-one), Topics & Subscriptions (one-to-many)
    Main Benefit Improves application reliability, scalability, and flexibility

    This intermediary model is what makes modern, distributed systems work so effectively.

    Key Takeaway: The primary role of Azure Service Bus is to decouple applications. By allowing services to communicate asynchronously—meaning they don't have to be active at the same time—it dramatically boosts the reliability and scalability of your entire system.

    This approach immediately unlocks several critical advantages:

    • Load Balancing: If a service gets slammed with requests, the messages simply wait patiently in a queue. This prevents services from crashing during traffic spikes.
    • Enhanced Reliability: Messages are held securely in the Service Bus until the receiving application confirms it has successfully processed them. If a receiver crashes mid-task, the message isn't lost and can be retried.
    • Greater Flexibility: You can update, replace, or add new services without disrupting the flow. The inventory service can be taken offline for maintenance; when it comes back, it will just start processing the orders that have queued up.

    This messaging pattern is a cornerstone of modern cloud architecture. The growing demand for these robust communication tools is clear. The enterprise service bus (ESB) software market, which includes platforms like Azure Service Bus, was valued at $1.12 billion and is projected to hit $2.07 billion by 2033. You can learn more about these market trends and see why this technology is so fundamental to building resilient applications.

    Understanding the Building Blocks of Service Bus

    To really get a handle on what Azure Service Bus can do, you need to know its core components. These are the fundamental pieces you'll use to build tough, scalable messaging systems. Let's break down the three essentials: Namespaces, Queues, and Topics.

    I find it helpful to think of these parts like a digital postal system. Each one has a specific job, but they all work together to make sure your messages get where they need to go, right on time.

    The Foundation: Your Namespace

    Everything starts with the Namespace. You can picture the Namespace as the entire post office building. It's a dedicated, unique container in Azure that holds all your messaging components—your Queues and your Topics.

    When you spin up a new Service Bus instance, the first thing you're actually creating is this Namespace. It gives you a unique domain name (an FQDN) that your applications use to connect. Essentially, it's the address for your entire messaging operation, keeping your app's messages neatly separated from everyone else's on Azure. Every single Queue or Topic you make will live inside this container.

    Queues: The Direct Delivery Route

    Once you have your Namespace, one of the most common things you'll create is a Queue. Sticking with our postal analogy, a Queue is like a private mailbox for a single recipient. It’s built for simple, one-to-one communication between two different parts of your application.

    Here's how it works: a sender application drops a message into the Queue, and a single receiver application picks it up to process it. This creates what we call temporal decoupling, which is just a fancy way of saying the sender and receiver don't have to be online at the same time. The message just waits safely in the Queue until the receiver is ready for it.

    This setup is perfect for jobs like:

    • Order Processing: An e-commerce site can send an "order created" message to a Queue. A separate order processing service can then grab that message whenever it has the bandwidth.
    • Task Offloading: A web app can offload a heavy task, like generating a big report, by sending a request to a Queue. A background worker can then pick it up and do the heavy lifting without slowing down the user-facing app.

    A fantastic feature of Queues is the competing consumer pattern. If you have several receivers listening to the same Queue, only one of them will successfully grab and process any given message. This makes it incredibly easy to scale out your processing power—just add more receivers.

    This diagram shows how everything fits together in Azure Service Bus, highlighting how core features like messaging, security, and reliability are all interconnected.

    Image

    The image makes it clear: while Queues and Topics are the workhorses for messaging, they're built on a solid foundation of security and reliability that makes the whole service so powerful.

    Topics: The Broadcast System

    Queues are great for one-to-one messaging, but what if you need to shout an announcement for anyone who's interested? That's exactly what Topics are for. A Topic is like a public bulletin board or a news feed. A publisher sends one message to the Topic, and many different systems can each get their own copy.

    So, how do they get their copy? Through Subscriptions. A Subscription is basically a virtual queue that's tied to a specific Topic. Each Subscription gets a fresh copy of every single message that's sent to the Topic it's listening to.

    Let's go back to our e-commerce store example:

    1. A single "Order Placed" event is published to an OrderTopic.
    2. Several services are interested in this event, and each has its own Subscription to the OrderTopic:
      • The InventoryService subscribes so it can update stock levels.
      • The ShippingService subscribes to start preparing the package for shipment.
      • The AnalyticsService subscribes to track sales trends in real-time.

    Each service gets its own independent copy of the message from its own subscription. They can all work in parallel without ever stepping on each other's toes. This is the classic publish/subscribe (or pub/sub) pattern, and it’s the bedrock of modern, flexible, event-driven systems. You can add new subscribers or remove old ones whenever you want, without ever touching the original publishing application. Frankly, this incredible flexibility is one of the biggest reasons developers turn to Azure Service Bus.

    How Service Bus Manages Your Messages

    Image

    Now that we've covered the basic building blocks of Queues and Topics, we can dig into how Azure Service Bus actually orchestrates the flow of communication. It’s about more than just getting a message from point A to point B; it’s about managing that message's entire journey with real precision and rock-solid reliability. This is where you start to see the service's true power and how it solves complex, real-world development headaches.

    The two main patterns you'll work with are direct communication and the publish/subscribe model. Think of a Queue as a direct, one-to-one line, making sure a message is handled by only one receiver. In contrast, a Topic acts like a broadcast system, fanning out a single message to many different subscribers who might be interested. Getting this distinction right is fundamental to building a robust architecture. The market seems to agree on its effectiveness; within the messaging software space, Azure Service Bus holds a 3.40% market share, serving over 1,602 customers. You can see how it stacks up against the competition if you're curious.

    While these patterns are the foundation, the advanced features provide the fine-tuned control you need for serious, enterprise-level applications. Let's walk through some of these features using a practical e-commerce example.

    Ensuring Order with Message Sessions

    Picture this: a customer updates their shipping address a few times right before their order is processed. If those "address update" messages arrive out of order, you could easily ship their package to the wrong place. That’s a real problem, and it's exactly what Message Sessions are designed to prevent.

    Message Sessions essentially create a dedicated, private lane for a group of related messages. By tagging all messages for a specific order with the same session ID (like order-123), you guarantee they are handled in sequence by a single receiver. This first-in, first-out (FIFO) behavior within a session is absolutely critical for any process that demands strict ordering.

    • Create Order: The session order-123 is started.
    • Update Address: This message gets locked to the order-123 session.
    • Process Payment: This one is also locked to the order-123 session.

    A receiver then locks the entire session, processes all of its messages in the correct sequence, and only then releases the lock. This simple mechanism prevents another part of your system from accidentally grabbing a later message and processing it out of turn.

    Handling Problems with Dead-Lettering

    So, what happens when a message just can't be processed? Maybe an order contains a product ID that doesn't exist, or the payment gateway is down for a moment. Instead of letting that broken message jam up the main queue or get stuck in a frustrating retry loop, Service Bus gives you a safety net: the dead-letter queue (DLQ).

    Every Queue or Subscription automatically gets its own secondary DLQ. When a message fails to process after a few tries or breaks a rule (like its time-to-live expiring), Service Bus automatically shunts it over to the DLQ.

    Key Insight: The dead-letter queue isn't a digital graveyard. It’s more like an isolation ward for problematic messages. It lets you inspect, fix, and even resubmit them later, all without bringing your main application to a halt. This is a must-have for building resilient systems that can handle the unexpected.

    In our e-commerce example, an order with a bad customer ID would land in the DLQ. The main system keeps chugging along, processing valid orders without interruption, while a developer or an automated tool can investigate the dead-lettered message to figure out what went wrong.

    Scheduling with Message Deferral and Timestamps

    Not every task needs to happen right away. Sometimes you need to schedule something for the future or just delay it for a bit. Service Bus has two great features for this.

    1. Scheduled Messages: You can set a property on a message called ScheduledEnqueueTimeUtc, telling Service Bus to keep it on ice until that exact moment. This is perfect for things like sending a "Your order has shipped!" email exactly 24 hours after you confirm shipment.
    2. Message Deferral: This one is a bit different. A receiver can peek at a message but decide it's not ready to handle it yet. Instead of just letting it go, the receiver can "defer" it by taking note of its unique sequence number. The message stays in the queue but is hidden from other receivers until it's specifically requested again using that sequence number. This comes in handy for complex workflows where one step depends on another that isn't quite finished.

    Putting Azure Service Bus into Practice

    Alright, we've covered the components and patterns. But theory only gets you so far. The real magic happens when you see how Azure Service Bus solves actual business problems, making systems more resilient, scalable, and a whole lot easier to manage.

    At its heart, Service Bus is all about decoupling. It lets different parts of an application talk to each other without being directly wired together. This simple concept is a game-changer, allowing your systems to handle failures gracefully and grow without needing a complete architectural tear-down.

    Orchestrating Complex E-Commerce Operations

    Think about an e-commerce platform. When a customer places an order, it kicks off a whole chain of events. Service Bus acts as the central traffic cop, making sure every step happens reliably—especially during a chaotic event like a Black Friday sale.

    Imagine an OrderPlaced Topic managing the entire process:

    1. Payment Processing: The order system publishes a message to the OrderPlaced topic. The payment service, a subscriber, picks it up, processes the payment, and then publishes its own message to a PaymentConfirmed topic.
    2. Inventory Management: The inventory system, listening to the PaymentConfirmed topic, gets the message and immediately deducts the item from stock. This simple step is crucial for preventing overselling.
    3. Shipping and Logistics: Meanwhile, the shipping department’s system, also subscribed to PaymentConfirmed, gets the green light to start fulfillment—from picking the item to printing the shipping label.
    4. Customer Notifications: A separate notification service listens in, grabs the details, and sends the customer an order confirmation email.

    If you tried to build this without a message broker, the whole process would be brittle. If the email service went down, the entire order might fail. With Service Bus, the "send notification" message just sits patiently in its subscription queue until the service is back online. That’s the difference between a fragile system and a truly robust one.

    The real power here is adaptability. What if you want to add a new fraud detection service? Simple. You just create a new subscription to the OrderPlaced topic. The original order-taking application doesn't need a single line of code changed. That's incredible flexibility.

    Ensuring Reliability in Financial Services

    The financial world runs on precision and trust. Transactions have to be processed correctly, in the right order, and without a single byte of data getting lost. This is where the more advanced features of what is Azure Service Bus really prove their worth.

    Take a stock trading platform. A flurry of trades from a single user must be executed exactly as they were placed. By using Message Sessions, the platform can group all trades from one user together. This guarantees a "buy" order is always handled before that same user's "sell" order for the same stock, preventing costly sequencing mistakes.

    For critical operations like fund transfers, guaranteed delivery is non-negotiable. Service Bus ensures that once a "transfer funds" message is accepted, it will be processed at least once, even if parts of the system crash and need to restart.

    Connecting Disparate Systems in Healthcare

    Healthcare is notorious for having specialized systems that just don't play well together. You’ve got one system for patient records (EHR), another for lab results, and a third for billing. Service Bus can step in as the universal translator and delivery service.

    When a doctor orders a lab test, the EHR system can publish a message to a LabTestOrdered topic. The lab's system (LIS) subscribes, picks up the order, and runs the test. Once the results are in, the LIS publishes a ResultsReady message, which the EHR system consumes to update the patient's file. This asynchronous flow means each system can be updated or maintained on its own schedule without disrupting patient care.

    The adoption of Azure Service Bus is surprisingly broad. Recent data shows it’s not just for big players; 39% of its customers are small businesses, while 37% are large corporations. The top industries using it are Information Technology (31%), Computer Software (14%), and Financial Services (6%), showing just how versatile it is. You can discover more about Azure Service Bus customer demographics to get a bigger picture.

    These examples aren't just hypotheticals. They show that Service Bus is a practical, powerful tool for building modern applications you can actually depend on.

    Choosing the Right Service Bus Pricing Tier

    Image

    Picking the right pricing tier in Azure Service Bus is a decision that has a real impact on your application's performance, what it can do, and how much you'll spend. Microsoft offers three tiers—Basic, Standard, and Premium—and each is built for a different kind of job. If you get this choice wrong, you could end up paying for power you don't need or, worse, starving a critical system that needs more muscle.

    I like to think of it like picking an internet plan for your house. You wouldn't spring for a gigabit fiber connection just to check email, and you certainly wouldn't try streaming 4K movies over an old dial-up line. It's the same idea here. The goal is to match the tier's capabilities with your application's real-world needs for scale, reliability, and budget.

    A Breakdown of the Three Tiers

    Each tier is a step up from the one before it, adding more features and boosting performance. Let's dig into what each one is really for, so you can choose wisely.

    • Basic Tier: This is your starting line. The Basic tier is really just for development, testing, and other non-critical tasks. It only gives you Queues and comes with some pretty strict limits on things like message size and storage. It’s perfect for getting your feet wet and learning the ropes without a big investment, but it’s not built for the demands of a live production environment.

    • Standard Tier: For most production applications, this is the sweet spot. The Standard tier is the workhorse of the family, bringing Topics and Subscriptions into the mix. This unlocks the incredibly useful publish/subscribe pattern, which is a game-changer for many architectures. It also adds crucial features like duplicate detection and transactions, giving you the reliability you need to run a real business.

    • Premium Tier: When you absolutely cannot compromise on performance and predictability, you need the Premium tier. This tier gives you dedicated, isolated resources, meaning your workload won't be slowed down by other customers on the platform. The result is consistently low latency and high throughput, which is non-negotiable for enterprise-grade, mission-critical systems.

    The performance jump to Premium is no joke. According to Microsoft's own benchmarks, some workloads have seen performance gains of over 150% since the tier was first introduced. For anyone studying for the AZ-204 exam, knowing these differences is vital, as it's a common topic. If you're in that boat, check out resources like AZ-204 Fast for some targeted practice.

    My Two Cents: Stick with the Standard tier for most production apps that need a good balance of features and cost. Only move to Premium when you need guaranteed performance, dedicated hardware, and advanced features like geo-disaster recovery for your most important workloads.

    Azure Service Bus Tiers Comparison

    To lay it all out, a side-by-side comparison can make the choice much clearer. This table shows you exactly what you get as you move up the ladder from Basic to Premium.

    Feature Basic Tier Standard Tier Premium Tier
    Primary Use Case Development & Testing General Production Mission-Critical Systems
    Topics & Subscriptions No Yes Yes
    Resource Model Shared Shared Dedicated
    Performance Variable Good Predictable & High
    Geo-Disaster Recovery No No Yes
    VNet Integration No No Yes

    As you can see, the decision really boils down to a trade-off between cost and capability.

    Ultimately, start by mapping out what your application truly requires. Do you need to send a single message to multiple downstream systems? Then you need Standard or Premium for Topics. Is predictable, lightning-fast performance essential for processing financial transactions? Premium is your only real option. By answering these kinds of practical questions, you can confidently pick the tier that gives you the right power at the right price.

    Why Adopting Service Bus Is a Smart Move

    Bringing a tool like Azure Service Bus into your application architecture is more than just a technical tweak—it's a strategic move. It fundamentally changes how your services talk to each other, creating a system that's far more reliable, scalable, and ready for whatever comes next. The real magic lies in its ability to decouple your application's components.

    This separation immediately makes your entire system more resilient. Service Bus offers durable messaging, which is a fancy way of saying it holds onto messages securely until the receiving application is ready for them. So, if a downstream service crashes or needs to be taken offline for an update, no data is lost. Messages just wait patiently in a queue, preventing the kind of data loss that can be disastrous in tightly connected systems.

    Scale Services Independently

    One of the biggest wins you get is the power to scale different parts of your system independently. In a classic, monolithic setup, a traffic spike in one corner can ripple through and take down everything. With Service Bus acting as the middleman, each service can scale on its own based on the message load it's facing.

    Think about an e-commerce site running a flash sale. The order processing service might get hammered, but that won't stop the website from accepting new orders. Those orders simply line up in a queue, and you can automatically spin up more instances of the processing service to work through the backlog. This elastic scaling keeps the user experience smooth even under intense pressure, which directly protects your revenue and reputation.

    This kind of robust traffic management is a big reason why Microsoft was named a Leader in the 2024 Gartner® Magic Quadrant™ for Integration Platform as a Service for the sixth consecutive time. You can learn more about this recognition of Microsoft's integration capabilities on their official blog.

    Achieve Greater Development Agility

    Decoupling also unlocks a ton of development flexibility. When services aren't tied directly to each other's code, your teams can work on them in parallel, which really speeds up development. You can update, replace, or even completely rebuild a single service without having to coordinate a massive, all-hands-on-deck deployment.

    For instance, you could decide to swap out an old email notification service for a shiny new one that also sends push notifications. The new service just needs to start listening to the same message topic, and the switch happens without the core order system ever knowing anything changed.

    The Bottom Line: Adopting Azure Service Bus reduces operational risk while boosting your ability to adapt. It helps you build systems that not only handle today's workload but are also ready to grow and evolve with your business, letting you innovate faster and with more confidence.

    This agility is why so many developers focus on mastering these concepts for their certifications. If you're studying for the AZ-204 exam, a deep understanding of Service Bus is non-negotiable. Tools like AZ-204 Fast are designed specifically to help you get a firm grip on these critical architectural patterns so you can walk into your exam with confidence.

    Frequently Asked Questions About Azure Service Bus

    Now that we've covered the fundamentals of Azure Service Bus, let's tackle some of the common questions that pop up when you start putting these concepts into practice. Think of this as the practical "how-to" part of the conversation, designed to clear up any lingering confusion and help you make smarter architectural choices.

    Azure Service Bus vs. Event Grid

    One of the most common head-scratchers for developers new to Azure messaging is figuring out the difference between Azure Service Bus and Azure Event Grid. They both deal with messages, but they're built for entirely different jobs.

    Here’s a simple analogy: think of Service Bus as a registered mail service for delivering critical business packages. It ensures the package gets there, in order, and is signed for. Event Grid, on the other hand, is like a news alert system—it broadcasts lightweight notifications that something happened.

    • Azure Service Bus is all about transactional messaging. It’s for sending commands or business data that must be processed, like "place this order" or "update this customer record." It uses a pull model, where a receiver actively fetches messages from a queue when it's ready.

    • Azure Event Grid is built for event-driven architecture. It reacts to state changes—things that have already happened, like "a new blob was created in storage" or "a virtual machine has started." It uses a push model, automatically sending notifications out to anyone who has subscribed to that event.

    The Bottom Line: Reach for Service Bus when you need iron-clad reliability, message ordering, and complex processing for critical operations. Go with Event Grid when you need to simply react to events happening across your Azure ecosystem with a lightweight, push-based system.

    When to Use a Queue Instead of a Topic

    Choosing between a Queue and a Topic really comes down to one simple question: how many different systems need to hear about this message?

    You should use a Queue for straightforward, one-to-one communication. When a message is sent to a queue, it's destined for a single receiver to pick it up and process it. This is perfect for offloading a specific task to a background worker, ensuring only one worker grabs the job. A great example is a request to generate a PDF report—you only want one service to do that work.

    Use a Topic for one-to-many communication, often called the publish/subscribe (or "pub/sub") pattern. Here, a publisher sends just one message to the topic, and multiple, independent subscribers can each get their own copy to act on. This is ideal when a single event needs to kick off several different processes. For instance, a new customer order might need to trigger an inventory update, a confirmation email, and a notification to the shipping department all at once.

    Can Azure Service Bus Be Used for Real-Time Communication?

    In a word, no. Azure Service Bus is not the right tool for real-time applications like a live chat or a multiplayer game. Its purpose is to enable asynchronous messaging.

    What does that mean? It’s designed to decouple your applications, so the sender and receiver don't need to be online and available at the exact same moment. It prioritizes reliability and guaranteed delivery over instantaneous communication.

    While messages in Service Bus are often delivered with very low latency, its core strengths are managing queues and ensuring a message will get there eventually. For true, real-time, two-way communication between a server and its clients, you'd want to use a dedicated service like Azure SignalR Service. Service Bus makes sure your message arrives reliably; SignalR makes sure it arrives right now.


    Passing your certification exam requires more than just reading—it demands active recall and targeted practice. AZ-204 Fast provides the focused tools you need, with interactive flashcards and dynamic practice exams designed to build deep knowledge and confidence. Conquer the AZ-204 exam efficiently with our evidence-based learning platform at https://az204fast.com.

  • What Is Azure App Service? Complete Guide to Building & Scaling Apps

    What Is Azure App Service? Complete Guide to Building & Scaling Apps

    At its heart, Azure App Service is a fully managed Platform-as-a-Service (PaaS). This means it takes care of all the behind-the-scenes grunt work—managing servers, operating systems, and networking—so you can pour all your energy into what really matters: writing great code.

    Think of it like leasing a fully-equipped professional kitchen instead of trying to build one from the ground up. You just bring your recipes (your code) and get straight to cooking.

    What Is Azure App Service in Simple Terms

    Let's stick with that kitchen analogy. Imagine you're a chef with a brilliant concept for a new restaurant. You have a couple of paths you could take.

    First, you could buy a plot of land, hire architects, deal with construction crews, and personally oversee the plumbing and electrical work. This gives you absolute control, but it’s a massive undertaking that demands a ton of time, money, and expertise in things that have nothing to do with cooking.

    Your other option? Lease a spot in a modern food hall. The building itself, the utilities, daily maintenance, and even security are all handled for you. You just show up, set up your station, and focus entirely on creating amazing dishes and serving your customers. This is exactly the role Azure App Service plays for developers.

    It completely removes the burden of managing the underlying infrastructure—the digital equivalent of plumbing and electricity. Instead of stressing about patching servers, updating operating systems, or configuring network rules, you can dedicate your time to building and enhancing your web app or API.

    To help you get a quick handle on these core ideas, here’s a simple breakdown of what App Service is all about.

    Azure App Service At a Glance

    Concept Simple Explanation
    PaaS You manage the app and data; Azure manages the servers, OS, and network.
    Fully Managed Microsoft handles patching, maintenance, security, and infrastructure for you.
    Developer Focus The goal is to let you write and deploy code, not manage hardware.
    Scalability Easily handle more users by adjusting a slider, not by adding new servers manually.

    Ultimately, App Service lets you move faster and concentrate on innovation.

    The Power of a Managed Platform

    Azure App Service isn't just a standalone tool; it's a core part of the massive Microsoft Azure cloud ecosystem. With Azure holding a significant 20% share of the global cloud infrastructure market and serving nearly half a million organizations—including 85% of Fortune 500 companies—you can be confident you're building on a stable, world-class platform. You can dig deeper into these numbers and explore Microsoft Azure's growth on ElectroIQ.

    This screenshot from the official product page perfectly captures the service's promise: build and scale your apps without the infrastructure headaches.

    Image

    As the image shows, App Service is incredibly flexible, supporting a wide range of application types and programming languages. It's not a one-size-fits-all solution but a versatile environment built for real-world development needs.

    At its core, App Service is about developer velocity. It's designed to dramatically shorten the distance between an idea and a globally available application by removing the most common infrastructure roadblocks.

    So, whether you're launching a personal blog, a sophisticated e-commerce platform, or a critical API for a mobile app, App Service gives you a powerful and managed foundation. This leads to faster development, effortless scaling, and way less operational stress, making it a top choice for developers building for the web today.

    A Look Inside the App Service Architecture

    To really get what Azure App Service is all about, we need to pop the hood and see how it’s built. The architecture is surprisingly straightforward but incredibly powerful, designed to give you a perfect mix of convenience and control. It all starts with the foundation where your app lives.

    This foundation is called the App Service Plan. Think of it like renting a workshop for your project. It's not the project itself, but the physical space and tools you have available—the workbench size (CPU), the square footage (memory), and the storage cabinets. When you create an App Service Plan, you're picking out the specific server resources, the geographic location, and the features your app will have access to.

    You're essentially reserving your own private corner of Azure's massive infrastructure. The best part? This single plan can host one big application or several smaller ones, which is a great way to consolidate costs by sharing those resources.

    The App Service Plan and Your Web App

    Understanding the relationship between the App Service Plan and your actual Web App is key. The plan is the "house," and your Web App is the "family" living inside. You can easily upgrade the house—say, from a small two-bedroom to a sprawling mansion—by changing the plan's pricing tier, all without disrupting the family inside.

    This setup shows how everything fits together neatly. The App Service Plan provides the horsepower for your Web App, which can then take advantage of powerful features like Deployment Slots.

    Image

    As the diagram shows, the plan is the top-level container. It provides all the computing power needed for one or more web apps running within it. This separation is what makes scaling and managing your resources so flexible.

    Deployment Slots: A Test Kitchen for Your Code

    Once your app is up and running in its plan, you get access to one of Azure App Service's most loved features: Deployment Slots. Imagine your main, live application is the bustling kitchen of a popular restaurant. A deployment slot is a fully equipped, identical test kitchen right next door.

    These are live, running apps with their own unique web addresses, but they are completely separate from your production environment. Here, you can deploy a new version of your code, try out experimental features, or check configuration changes without affecting a single customer. It’s your private sandbox.

    This is an absolute game-changer for keeping your app stable and always online. You can run a full end-to-end test of a new release in an environment that perfectly mirrors production. In fact, development teams that use proper staging environments catch over 60% more bugs before they ever reach an end-user.

    Deployment slots are the ultimate cure for the classic "but it worked on my machine!" problem. They offer a safe, isolated space to validate every update before it goes live, which is a cornerstone of any professional CI/CD (Continuous Integration/Continuous Deployment) pipeline.

    Once you’re confident that the new version is solid, you can perform a "swap."

    Zero-Downtime Swaps and Built-In Load Balancing

    The swap is where the real magic happens. With a single click, Azure instantly reroutes all your production traffic from the old version of your app to the new one sitting in the staging slot. The infrastructure even "warms up" the new code before sending it any traffic, guaranteeing zero downtime for your users.

    Here’s how it works:

    • Before the Swap: Your main "production" slot is live, and the "staging" slot holds the new code.
    • During the Swap: Azure prepares the staging slot. Once it's ready, it atomically switches the network pointers between the two slots.
    • After the Swap: The staging slot is now your live production app. Your old production slot becomes the new staging environment, holding the previous version of your code.

    The whole process is seamless. And if you suddenly find a bug in the new release? You can just as easily swap back, giving you an instant rollback.

    Finally, every App Service Plan comes with built-in load balancing right out of the box. As you scale out your app to run on multiple servers to handle more traffic, Azure automatically spreads the incoming requests across all of them. This prevents any single instance from getting overwhelmed and ensures your app stays fast and reliable for everyone.

    Key Features That Empower Modern Developers

    Image

    The real magic of Azure App Service isn't just its architecture; it's the toolbox it hands to developers. These aren't just flashy features—they are practical solutions designed to solve the everyday headaches of building, deploying, and running applications. This is why so many teams are choosing it.

    And they're doing so in a rapidly growing market. Global enterprise spending on cloud infrastructure hit a massive $94 billion in the first quarter of 2025, which is a 23% jump from the year before. A huge chunk of that growth comes from platforms like App Service, proving just how essential they've become. If you're curious about the numbers, you can read the full cloud market share analysis on CRN for a detailed breakdown.

    This trend makes one thing clear: developers need platforms that make their lives easier. So, let's get into the specific features that make App Service a go-to choice.

    Build with the Tools You Already Love

    One of the best things about App Service is that it’s polyglot—it speaks your team’s language. You aren’t locked into a single, rigid tech stack. Instead, you get the freedom to use the tools and frameworks you already know and are productive with.

    This flexibility is a game-changer. Whether your team is built around .NET, .NET Core, Java, Node.js, Python, or even PHP, App Service treats them all as first-class citizens.

    It takes care of the runtime management behind the scenes, so you just push your code. The platform handles the rest, ensuring the right environment is configured and patched, which means no more late nights managing runtime updates.

    Automate Your Path to Production

    In modern development, getting from code to production quickly and safely is the name of the game. This is where Continuous Integration and Continuous Deployment (CI/CD) comes in, creating an automated pipeline from your repository straight to your users. App Service nails this with deep, native integrations with the DevOps tools you likely already use.

    You can effortlessly connect your app to repositories on:

    • GitHub: Set up GitHub Actions to automatically build, test, and deploy every time you merge a pull request.
    • Azure DevOps: Craft sophisticated release pipelines for fine-grained control over your deployment stages.
    • Bitbucket and other Git repos: Easily configure automated deployments from pretty much any Git repository out there.

    When you combine this automation with features like Deployment Slots, you get a powerful, low-risk workflow. You can push new code to a staging environment, run all your tests, and then swap it into production with zero downtime.

    Scale Your App Effortlessly

    Imagine your app gets featured on a major news site. Your traffic explodes from a few hundred users to hundreds of thousands in an hour. With old-school infrastructure, that’s a recipe for a crash. With Azure App Service, it’s a reason to celebrate, thanks to auto-scaling.

    Think of auto-scaling as an elastic waistband for your application. It automatically adds or removes server instances based on what's happening in real-time.

    Auto-scaling isn't just for handling surprise traffic spikes; it's a huge cost-saver. You only pay for the extra horsepower when you need it. When things quiet down, the system scales back down automatically, keeping your bill in check.

    You can get really specific with how it works, setting up rules based on all sorts of metrics.

    Common Auto-Scaling Triggers:

    • CPU Percentage: "If the average CPU across all instances tops 70% for 5 minutes, add another one."
    • Memory Usage: "If memory pressure climbs past 80%, scale out."
    • Scheduled Times: "Between 9 AM and 5 PM on weekdays, always keep at least three instances running."

    This lets your app deliver a smooth, consistent experience for users while making your cloud spending smart and predictable.

    Secure Your Application by Default

    Security shouldn’t be an add-on; it has to be baked in from the start. App Service gives you a layered security model that protects your apps from common threats right out of the box.

    Microsoft pours over $1 billion a year into cybersecurity R&D, and App Service is a direct beneficiary. The platform handles all the underlying OS patching and gives you the tools to lock down your endpoints.

    Key security features include:

    • Managed Identities: Let your app securely talk to other Azure services (like a SQL database) without ever storing passwords or secrets in your code.
    • Custom Domains & SSL: Easily map your domain and secure it with an SSL/TLS certificate. App Service even gives you a free managed certificate to get started.
    • Authentication & Authorization: With just a few clicks, you can integrate with Azure Active Directory, Google, Facebook, and more to protect your app.

    These features give you a solid security foundation, letting you focus on building great features on a platform that takes security as seriously as you do.

    Real-World Use Cases for Azure App Service

    Knowing the features is one thing, but the real test of any platform is seeing how it handles actual business problems. Let's step away from the technical specs and look at where Azure App Service truly proves its worth in the real world.

    The beauty of App Service is its versatility. It's just as useful for a small startup getting its first product off the ground as it is for a massive enterprise juggling a complex portfolio of applications. The whole point is that its managed environment lets your team focus on building great software, not managing servers.

    Powering High-Traffic Websites and E-commerce Stores

    Picture a retail company gearing up for a huge Black Friday sale. They know their website is about to get hit with a tidal wave of traffic. The last thing they need is a crash or a slowdown that costs them sales. This is a classic scenario where App Service shines.

    With auto-scaling, the site can automatically spin up more resources to handle the massive influx of shoppers. Then, once the rush is over, it scales back down to normal levels. This keeps the customer experience snappy during the chaos while ensuring you aren't paying for idle servers during quiet times.

    This is a huge competitive advantage. Instead of the dev team being on high alert, worrying about server capacity, they can focus on what matters: pushing out last-minute promotions and making sure the checkout process is flawless.

    On top of that, it's incredibly easy to hook into a Content Delivery Network (CDN) like Azure CDN. This lets you cache things like product images and videos on servers all over the globe, so your international customers get lightning-fast page loads.

    Hosting Backend APIs for Mobile and Web Apps

    Most modern apps aren't a single, monolithic block of code. You usually have a sleek frontend—a mobile app or a single-page web app—that talks to a backend API. That API is the brain of the operation, handling business logic, user logins, and database interactions. App Service is an excellent home for these critical APIs.

    It comes with security features baked right in. You can easily connect to Azure Active Directory for authentication or use managed identities to talk to your database securely without ever having to hard-code a password. Developers don't have to waste time reinventing the wheel on security.

    Microsoft’s massive global infrastructure is a major plus here. With a presence in over 60 regions through more than 300 physical data centers, Azure has the largest footprint of any major cloud provider. This is how App Service can offer low-latency, high-availability solutions to over 350,000 organizations as of 2024, a figure that jumped 14.2% from the previous year. You can dig into more of these impressive numbers by checking out these Azure statistics on Turbo360.

    Running Background Jobs and Scheduled Tasks

    Not every task happens because a user clicked a button. A lot of crucial work happens behind the scenes: processing a batch of uploaded photos, sending out a daily email newsletter, or running a data cleanup script overnight. This is where a feature called WebJobs comes into play.

    WebJobs are simply programs or scripts that you run in the background on your App Service plan. Think of them as the dedicated prep cooks in a busy restaurant kitchen. They handle all the time-consuming prep work, so the line cooks (your main application) can focus on getting meals out to customers instantly.

    You can set up WebJobs to run in a few different ways:

    • On a schedule: For instance, "generate a sales report every morning at 3 AM."
    • Continuously: Perfect for watching a queue and processing new messages as soon as they appear.
    • On-demand: Triggered manually or by an API call whenever a specific job needs to run right now.

    Because this is built directly into your App Service plan, you don't need to spin up a whole separate service just for background processing. It keeps your architecture simpler and your costs down. The ability to run these different workloads makes understanding what is Azure App Service so important for developers designing modern, resilient systems.

    Choosing the Right Service for Your Scenario

    App Service is incredibly powerful, but it isn't the only tool in the Azure toolbox. Depending on your specific needs, another service like Azure Functions or Azure Kubernetes Service (AKS) might be a better fit. Here's a quick guide to help you decide.

    Scenario Best Fit Azure Service Why It's the Best Fit
    Building a web app or API with a persistent server environment. Azure App Service Ideal for traditional web applications. Provides a fully managed platform with auto-scaling, deployment slots, and integrated CI/CD.
    You need to run small, event-triggered pieces of code. Azure Functions The "serverless" choice. You only pay for the compute time you use, perfect for microservices or simple, stateless tasks.
    You need maximum control and orchestration for complex, containerized applications. Azure Kubernetes Service (AKS) The go-to for container orchestration at scale. Offers portability and fine-grained control over your microservices architecture.

    Ultimately, the best choice comes down to your project's specific requirements for control, scalability, and complexity. For most web development, App Service hits that sweet spot of power and simplicity.

    How to Select the Right App Service Plan

    Image

    Choosing the right App Service Plan can feel a bit like picking a cell phone plan—you're faced with several tiers, each offering different features and price points. The goal is to match your application's actual needs with the right set of resources, so you're not paying for horsepower you'll never use. It’s all about finding that sweet spot between performance and cost.

    Think of the pricing tiers as a ladder. You can start on the lower rungs for simple projects and climb your way up as your app gains traction and complexity. Let's walk through each level so you can make an informed, cost-effective decision.

    Development and Hobbyist Tiers

    For anyone just dipping their toes into Azure App Service, learning the platform, or spinning up a small personal project, the entry-level tiers are perfect. Think of these as your personal development labs, ideal for testing out ideas without a big commitment.

    • Free Tier: This is exactly what it says on the tin. You get a small slice of shared computing resources at zero cost, making it the perfect sandbox for learning how App Service works. It's fantastic for quick proofs-of-concept or hobbyist sites where you expect very little traffic.
    • Shared Tier: This is a small but important step up from Free. Your app still runs on infrastructure shared with other customers, but it unlocks the ability to use a custom domain. This makes it a great choice for staging environments or very low-traffic apps where top-tier performance isn't the primary concern.

    These plans are all about removing the barrier to entry, letting you experiment and build without worrying about the bill.

    Production-Ready Tiers for Growth

    Once your app is ready for prime time and real users, you need a plan with dedicated resources and professional-grade features. These tiers are built for serious applications that demand reliability, scalability, and consistent performance.

    The Basic Tier is your first foray into dedicated hardware. It's an excellent choice for apps with low or predictable traffic patterns, like a small business website or an internal company tool. You get your own compute instances, meaning you're no longer competing with others for processing power.

    As your app's user base grows, the Standard and Premium Tiers are where you'll likely land. These are the real workhorses of App Service, offering the essential features that most production workloads depend on.

    With the Standard and Premium tiers, you unlock powerful capabilities like auto-scaling and deployment slots. For any serious application that needs to handle unexpected traffic spikes and roll out updates with zero downtime, these features are absolute game-changers.

    These are the plans that give you the tools to build a truly resilient and scalable service that can grow with your business.

    Enterprise and Mission-Critical Tiers

    For applications with the most stringent requirements, Azure provides a top-tier solution built for maximum security and performance. This is for those situations where "good enough" simply won't cut it.

    The Isolated Tier is engineered for mission-critical workloads that require the highest levels of security and complete network isolation. This plan runs your applications inside a private, dedicated Azure Virtual Network. It's the go-to choice for government agencies, financial institutions, and any organization with strict compliance and security mandates. You get total control over your environment, ensuring your app is completely sealed off from other tenants.

    Alright, let's get your hands dirty. We've talked a lot about what Azure App Service is, but the best way to really understand it is to use it. This walkthrough will guide you through deploying your first web app.

    We'll keep it simple and focus on a common scenario: pushing code directly from a GitHub repository. Think of it as a "quick win" to see how everything connects.

    Let's get that first app live.

    Step 1: Create the App Service Resource

    First things first, you need to create the App Service resource in the Azure Portal. This is essentially the empty shell, the "container" that will eventually run your application code.

    1. Log into the Azure Portal and click "Create a resource."
    2. In the search bar, type "Web App" and hit enter. Select the official "Web App" service.
    3. Click "Create" to start the setup process.

    You'll now see the main configuration screen where you'll define the basics for your new app.

    Pro Tip: The name you give your app becomes its first public URL (like yourappname.azurewebsites.net). It has to be globally unique, so pick something memorable! Don't worry, Azure will tell you right away if the name is already taken.

    Step 2: Configure Your App and Plan

    This is the most important part of the setup. You'll be configuring both the app itself and the App Service Plan it runs on. It's where you match your code's needs with the "virtual real estate" we discussed earlier.

    Here's what you need to fill out on the creation screen:

    • Subscription & Resource Group: Pick your Azure subscription. Then, either create a new resource group or choose an existing one. Grouping resources makes them much easier to manage later.
    • Name: Give your web app that unique name.
    • Publish: We're deploying code, so select "Code."
    • Runtime Stack: This is critical. You have to tell Azure what language your app is written in. Choose from options like .NET, Node.js, or Python. If you're just testing things out with a sample repository, Node.js is usually a safe and easy bet.
    • Operating System: Linux or Windows? This often depends on your chosen runtime stack and personal preference.
    • Region: Select an Azure region that's physically close to you or your users. Closer means faster.

    Next, you'll set up the App Service Plan. You can create a new one on the fly or add this app to an existing plan if you already have one. For your first time, starting with a Free or Basic tier is perfect. It's a low-cost way to get a feel for things.

    Once everything looks good, click "Review + create," and then "Create." Azure will take a few minutes to get all the resources ready for you.

    Step 3: Deploy from a GitHub Repository

    Now that your App Service is provisioned and waiting, it's time to give it some code to run. Connecting it to a GitHub repo is one of the smoothest ways to do this.

    1. Navigate to your new App Service resource in the Azure Portal.
    2. Look for the "Deployment Center" in the left-hand menu, filed under the "Deployment" section.
    3. Choose "GitHub" as your source. You'll need to authorize Azure to connect to your GitHub account—it's a standard and secure process.
    4. Select the GitHub organization, the specific repository, and the branch you want to deploy. For most projects, this will be your main branch.

    Once you save this configuration, the magic happens. App Service automatically creates a GitHub Actions workflow file in your repository. This workflow triggers a process that pulls your code, builds it if necessary, and deploys the final product to your App Service.

    You can watch the deployment happen in real-time in the logs. After a minute or two, the job will complete, and your app will be live at its public URL.

    Congratulations! You just deployed your first web app to the cloud.

    Frequently Asked Questions About App Service

    When you're first digging into Azure App Service, a few questions almost always pop up. Let's tackle some of the most common ones to clear things up and help you see exactly how this service can fit into your projects.

    Is App Service the Same as a Virtual Machine?

    Not at all—they operate on completely different principles.

    Think of a Virtual Machine (VM) as Infrastructure-as-a-Service (IaaS). It's like buying a plot of land. You own it, but you're also responsible for everything: laying the foundation, building the structure, and handling all the upkeep like plumbing and electricity. In technical terms, you manage the OS, security patches, server updates—the works.

    Azure App Service, by contrast, is a Platform-as-a-Service (PaaS). This is more like leasing a fully furnished, move-in-ready apartment. The building management handles all the infrastructure headaches—the OS, the hardware, the security—so you can just move in and focus on what matters most: your app's code and your business logic. This managed approach is the very essence of App Service.

    Can I Use Docker Containers with App Service?

    Yes, absolutely. App Service has first-class support for running custom Docker containers, a feature often called "Web App for Containers." This setup really gives you the best of both worlds.

    You get the flexibility and consistency of a containerized environment, where your app and its dependencies are neatly packaged, combined with the convenience of a fully managed platform.

    This means you can hand off your container to App Service, and it takes care of the rest. You don't have to worry about the underlying server or OS configuration. It's a perfect solution for teams already building with containers who want to stop managing infrastructure.

    How Does App Service Handle Database Connections?

    App Service itself doesn't host your database. Instead, it’s built to connect securely and easily to dedicated database services running separately in Azure.

    Your application code simply connects to one of these external database resources. Some popular pairings include:

    • Azure SQL Database for robust, relational data.
    • Azure Cosmos DB for high-performance, globally distributed NoSQL data.
    • Azure Database for MySQL, PostgreSQL, or MariaDB when you prefer an open-source option.

    The key is to manage the connection securely. You should never hard-code credentials into your app. Instead, you store connection strings in the App Service configuration. These are injected into your application as environment variables at runtime, keeping your sensitive information safe and out of your source code.


    Are you preparing for the AZ-204 exam? Don't leave your success to chance. AZ-204 Fast provides the focused, evidence-based tools you need to master the material and pass with confidence. With interactive flashcards, comprehensive cheat sheets, and dynamic practice exams, you'll be fully equipped for success. Start your accelerated learning path today at https://az204fast.com.

  • How to Use Flashcards for Studying Your Ultimate Guide

    How to Use Flashcards for Studying Your Ultimate Guide

    If you want to get the most out of your flashcards, you need to do three things: keep each card focused on a single idea, force yourself to actually remember the answer before flipping it over, and review your cards at specific, spaced-out times. This isn't just a random trick; it's a method grounded in cognitive science that builds stronger, longer-lasting memories than just rereading your notes.

    The "Why" Behind Smart Flashcard Studying

    First, let's get one thing straight: rote memorization is out. The real magic of flashcards isn't the paper or the pixels, but how you use them. When you understand two key ideas—active recall and spaced repetition—you can turn this simple study tool into a serious learning engine. These aren't just abstract theories; they're the practical reasons why a deliberate approach to flashcards works so well.

    This is all about studying smarter, not just harder. When you follow a system, the whole process feels less overwhelming and becomes far more effective. A 2017 study highlighted this perfectly: when students were taught a structured flashcard method, their usage actually doubled. More importantly, the students who found the method easy to follow also scored much higher on their exams. It’s clear proof that the right technique can be a total game-changer. You can dig into the details of the study on structured flashcard use and exam performance yourself on SAGE Journals.

    To help you get started, here's a quick rundown of the core principles that make flashcard studying so powerful.

    Core Principles for Smarter Flashcard Use

    Principle What It Means Why It Supercharges Learning
    Active Recall Forcing your brain to retrieve information without any hints or prompts. It strengthens neural pathways, making memories easier to access in the future.
    Spaced Repetition Reviewing information at increasing intervals over time. It interrupts the natural process of forgetting, moving knowledge from short-term to long-term memory.
    Single-Concept Cards Each flashcard focuses on one isolated question and answer. It avoids confusion and allows you to pinpoint exactly what you do and don't know.

    Thinking about your study process through this lens is what separates casual review from deep, effective learning.

    The Power of Active Recall

    Active recall, often called retrieval practice, is the simple act of pulling information out of your brain on command. It’s the difference between seeing a definition and thinking, "Oh yeah, I know that," and truly forcing your mind to produce the answer from scratch. That mental effort—that little bit of struggle—is precisely where the learning sticks.

    Imagine you're trying to create a trail through a dense forest. The first time, it's tough going. You have to push branches aside and figure out the best route. But every time you walk that same path, it gets clearer and easier to follow. Active recall does the exact same thing for your brain's neural pathways, strengthening the connections to the information you need.

    The concept is straightforward but incredibly powerful: Every time you successfully pull a memory out of your brain, you make that memory easier to find the next time you need it.

    Fighting the Forgetting Curve

    The second piece of the puzzle is spaced repetition. This idea is designed to work directly against something called the "forgetting curve," which is just a fancy way of describing how our memory of new things fades over time. Spaced repetition works by scheduling your review sessions right at the moment you're most likely to forget something.

    Instead of cramming everything at once, you review material at longer and longer intervals. You might see a new card again in a day, then three days later, then a week after that, and so on.

    This is where digital tools really shine. Platforms like Anki or our own AZ-204 Fast platform handle all the scheduling for you, making sure you see the right card at the perfect time. It makes your study sessions incredibly efficient because you stop wasting time on things you’ve already mastered and focus your energy on the concepts that need reinforcement.

    Creating Flashcards That Actually Work

    Image

    The real magic of flashcards doesn’t happen when you’re flipping through them for the tenth time. It starts the moment you decide what to write on them. Your entire study session hinges on the quality of the cards you create, whether you're using classic paper index cards or a slick digital app.

    Physical vs Digital Flashcards: Which Is Right for You?

    I get this question all the time: "Should I use physical or digital flashcards?" Honestly, there's no single right answer. The physical act of writing out a card can do wonders for locking information into your memory. But you can't deny the sheer power and convenience of digital tools, which can automate the entire review process for you.

    Digital flashcards have become especially popular in demanding fields like medicine. One 2021 study found that a staggering 87% of medical students considered electronic flashcards a helpful study aid, with 83% recommending them to their peers. That's a huge vote of confidence for tackling incredibly complex subjects. If you want to dive deeper, you can read the full study on electronic flashcard use in medical education.

    To help you decide, here’s a quick breakdown of the pros and cons of each approach. Think about your subject, your learning style, and what you realistically see yourself sticking with.

    Feature Physical Flashcards Digital Flashcards
    Creation Process Manual; writing helps with memory encoding. Quick to create; allows for copy-paste and multimedia.
    Portability Can be bulky; limited to what you can carry. Infinitely portable on your phone, tablet, or laptop.
    Spaced Repetition Manual sorting required (e.g., Leitner system). Automated scheduling based on your performance.
    Multimedia Limited to text and hand-drawn sketches. Can include images, audio clips, and even videos.
    Cost Low initial cost (cards, pens). Often free (e.g., Anki) or low-cost subscription.
    Best For Kinesthetic learners; subjects with simple concepts. Complex subjects; large volumes of information; on-the-go study.

    Ultimately, the best tool is the one you'll actually use consistently. Don't be afraid to experiment with both to see what clicks for you.

    The One Concept Per Card Rule

    If you take only one piece of advice from this guide, make it this one: stick to one single, isolated concept per card. It's so tempting to cram related ideas onto one card to "be efficient," but it's the most common mistake I see people make. This just overloads your brain and makes it impossible to know what you actually know and what you're just glossing over.

    If you can't answer the question on a card with a single, focused piece of information, your card is too complicated. Break it down.

    Let's take a big topic like photosynthesis. A bad card would ask, "Explain photosynthesis." A good set of cards would break that down into bite-sized questions:

    • What is the chemical equation for photosynthesis?
    • What is the primary function of chlorophyll?
    • Where do the light-dependent reactions take place?

    This approach gives you surgical precision. When you get a card wrong, you know exactly which piece of information needs more work, instead of feeling like you have to re-learn the entire topic.

    Use Your Own Words

    Here's another non-negotiable rule: always synthesize the information in your own words. Simply copying a definition straight from a textbook is a waste of time. It feels productive, but it completely bypasses the real learning process.

    The act of forcing yourself to rephrase a concept—to explain it as if you were teaching it to a friend—is a powerful form of active learning. It forces you to grapple with the idea, connect it to your existing knowledge, and truly make it your own.

    This is what a simple, effective card looks like in Anki, a popular digital flashcard app. The interface is intentionally minimalist to keep you focused.

    Image

    It just shows you a single prompt, and based on how well you recall the answer, the software's algorithm will decide when to show you that card again.

    Finally, don't underestimate the power of visual cues. A quick diagram, a simple sketch, or even a relevant image can create a strong mental hook that text alone can't match. If you're studying a historical battle, a tiny, hand-drawn map can be far more memorable than a list of dates. By following these principles, you’ll be creating powerful learning tools, not just passive reminders.

    Putting Spaced Repetition into Practice

    Alright, you get the theory behind spacing out your reviews. So how do you actually do it? This is where we move from the why to the how, turning that knowledge into a real, automated study plan that lets you focus on the information you're most likely to forget.

    First, let's look at the foundation of any good spaced repetition system: the flashcard itself.

    Image

    Getting this part right is everything. A clear, single-idea flashcard is the building block for an effective study session. Everything else builds from here.

    The Classic Leitner System

    Long before apps and algorithms, there was the Leitner System. It’s a beautifully simple, hands-on method using physical boxes to manage your review schedule. I love starting people here because it lets you physically see and feel how spaced repetition works. It makes you appreciate the magic that digital tools now do for us automatically.

    Here’s how you’d set it up:

    • Box 1 (Daily Review): Every new card you make starts in this box. You’ll check this one every day.
    • Box 2 (Every Other Day): When you answer a card from Box 1 correctly, it gets promoted to Box 2.
    • Box 3 (Weekly Review): Correct cards from Box 2 graduate to this box.
    • Box 4 (Bi-Weekly Review): Nailed a card from Box 3? It moves up again.
    • Box 5 (Archived/Mastered): Once you get a card from Box 4 right, it's considered learned.

    The crucial rule? If you get a card wrong—no matter what box it’s in—it gets demoted all the way back to Box 1. This simple system brilliantly forces you to see difficult concepts more often while letting the easy stuff fade into the background. It's a tangible way to make your study sessions incredibly efficient.

    Digital Automation with Apps

    As you can probably guess, juggling hundreds of cards with the Leitner System can get messy. That's where technology steps in. Platforms like the open-source Anki or our own AZ-204 Fast platform take the core logic of the Leitner System and put it on steroids with powerful algorithms.

    These apps completely automate the scheduling. Your job is simple: show up for your daily review and be brutally honest about how well you remembered each card.

    The core function of a spaced repetition algorithm is simple: to show you a piece of information right before your brain is about to forget it. Trusting this process is key to your success.

    When a digital app shows you a card, you’ll rate how well you recalled the answer. The options usually look something like this:

    • Again: You got it wrong or didn't know it at all. The app will show it to you again very soon, maybe even in the same session.
    • Hard: You got there in the end, but it was a real struggle. The time until you see it again will increase, but only by a little.
    • Good: You recalled it correctly without too much trouble. The review interval will now jump significantly.
    • Easy: You knew it instantly. The app will push this card far into the future.

    Your feedback is what fuels the algorithm. It uses your ratings to calculate the perfect next review date for that specific card. A card you mark as "Good" might pop up in three days, then ten days, then a month later. Meanwhile, a card marked "Again" might come back in one minute, then ten minutes, and then the next day. This creates a personalized learning path, ensuring every minute you spend studying is focused on cementing your weakest memories.

    How to Run Your Review Sessions

    Image

    This is where the magic happens. After all the work of creating your flashcards, the review session is what actually cements the information in your brain. But here's the catch: just passively flipping through cards and nodding, "Yeah, I know that," is practically useless.

    To make this stuff stick, you have to force your brain to do the heavy lifting. The goal is to simulate the pressure of an exam, making your mind actively retrieve the information from scratch. That little bit of struggle is exactly what builds stronger, more reliable memories.

    Make Your Brain Work for It

    Before you even look at your first card, make a conscious decision to use active recall. It’s a small shift in mindset that completely changes the effectiveness of your study time.

    Here are a few simple but powerful ways to do this:

    • Say It Aloud: Actually speak the answer. It feels different, and it is. You're engaging more of your brain than you do with silent reading.
    • Write It Down: Keep a blank notebook or whiteboard handy. Scribble down the answer from memory. This process immediately exposes what you think you know versus what you actually know.
    • Teach It: Explain the concept out loud to an empty chair, a pet, or a patient friend. If you can teach it, you’ve mastered it.

    Doing any of these turns a passive flip-through into a dynamic learning experience. This is the heart of using flashcards effectively—it's about the effortful engagement, not just mindless repetition.

    The Importance of Radical Honesty

    Your entire flashcard system, especially if you're using a spaced repetition tool like AZ-204 Fast, hinges on one thing: your honesty. When it's time to grade yourself, there's no room for "Well, I was close" or "I kind of knew it."

    Be brutally honest with your self-assessment. If you hesitated, stumbled, or only recalled part of the answer, mark it as incorrect. This discipline is what makes the system work.

    This isn’t about being hard on yourself. It’s about feeding the learning algorithm accurate information. If you mark a card "correct" when you were shaky on the answer, the system will assume you know it well and won't show it to you again for a long time. By then, you’ll have forgotten it.

    Marking it "incorrect" ensures you see it again soon, giving your brain another chance to strengthen that weak connection.

    Managing Your Study Flow

    Once you get into a groove, you need to manage your deck to keep your sessions productive without getting buried in cards. Two simple practices will keep you sharp and prevent burnout.

    First, if you're using physical cards, shuffle the deck every single time. Our brains are sneaky good at picking up on patterns. If you see the same cards in the same order, you might start recalling answers based on what came before, not because you truly know the material. Digital platforms thankfully handle this for you.

    Second, be smart about how many new cards you introduce. Trying to learn 100 new concepts in one day is a recipe for disaster. A much more sustainable pace is adding 15-20 new cards per day. This strategy keeps your daily review pile from growing into an overwhelming monster.

    Ultimately, the fastest way to learn is by focusing on the material you struggle with. Research consistently shows that study methods forcing you to recall things you don't know are far better for long-term memory. A flashcard efficiency study found that this targeted struggle is key. By being active and honest in your reviews, you're making sure every minute you spend studying is as effective as possible.

    Avoiding Common Flashcard Mistakes

    We've all been there. You put in the hours, you make the cards, but the information just doesn't seem to stick. Even with the best tools, it's surprisingly easy to fall into a few common traps that completely sabotage your study sessions. These little mistakes can quietly undermine the whole point of active recall and spaced repetition, making your study time a lot less effective than it could be. Let's troubleshoot the process so every minute you spend reviewing really counts.

    One of the biggest culprits is the overly complex card. I see this all the time. To "save time," people will cram an entire paragraph or a list of five different concepts onto a single card. The result is a 'wall-of-text' flashcard that’s impossible to answer cleanly. It turns honest self-grading into a total guessing game. If you find yourself giving a long, rambling explanation for a single card, that's a red flag. It needs to be broken down.

    Mistaking Recognition for Recall

    Here’s another subtle but critical pitfall: confusing recognition with genuine recall.

    Recognition is that familiar feeling when you flip a card over and think, "Oh yeah, I knew that." But did you really? Recall is when you pull the complete answer from the depths of your memory before you see it. True, lasting learning only happens with real recall.

    This is why being too easy on yourself is so dangerous. When you give yourself a pass for just recognizing the answer, you're not actually strengthening that memory pathway. You're just practicing your ability to spot something familiar, which is a completely different skill—and one that won't help much when you need to produce an answer from scratch on an exam.

    The goal isn't to feel good because you recognized an answer. The goal is to build the mental muscle to retrieve it on demand. If it wasn't a clean, confident recall, it wasn't a correct answer. Period.

    To fight this, you have to be brutally honest with your self-grading. It’s a binary choice: either you knew it 100%, or you didn't. There's no in-between.

    Practical Fixes for Common Pitfalls

    So, how do we keep our study sessions sharp and effective? It comes down to a few practical fixes that reinforce good habits and stop bad ones from forming.

    Here are some of the most common mistakes I’ve seen and how to fix them on the fly:

    • The Mistake: Your card asks something like, "What are the three types of muscle tissue?" This forces you to recall a list. What happens if you only remember two? Do you mark it right or wrong? It’s ambiguous.

      • The Fix: Split it up. Make three separate, atomic cards. "What is one type of muscle tissue?" "What is a second type?" This makes grading simple and honest.
    • The Mistake: You review your cards in the same order every time. Before you know it, your brain starts using the previous card as a cue for the next answer, creating a false sense of mastery.

      • The Fix: If you're using physical cards, shuffle the deck before every single session. No exceptions. Good digital platforms like AZ-204 Fast handle this automatically, which is a huge advantage.
    • The Mistake: Your cards are just definitions copied word-for-word from a textbook. This promotes passive recognition, not deep understanding.

      • The Fix: Reframe your questions to require context or application. Instead of "Define API," a much better question would be, "How does an API gateway help manage microservices?" This forces you to actually think and synthesize information, not just parrot it back.

    By actively sidestepping these common blunders, you can transform your flashcards from a simple review tool into a powerhouse system for deep, durable learning.

    Frequently Asked Questions About Using Flashcards

    Even with the best strategy, questions are bound to come up. Over the years, I've heard the same few questions from people who are really trying to get the most out of their flashcards. Let's tackle them so you can refine your own study process.

    https://www.youtube.com/embed/w8uhdZ9897I

    How Many New Flashcards Should I Make Per Day?

    This is the big one, but there's no single magic number. My advice? Start with a manageable goal, something like 15-20 new cards per subject each day.

    The goal here isn't to create a mountain of cards overnight. It's about building a consistent, sustainable habit. A focused 20-minute session every day is infinitely more effective than a frantic three-hour cramming marathon once a week. If you're using a digital app, it'll handle the review schedule for you, but keeping the new card count sensible prevents that dreaded feeling of being overwhelmed.

    What if I Keep Forgetting the Same Card?

    First off, don't get frustrated—this is a feature, not a bug! When a card keeps tripping you up, your brain is sending you a clear signal. It's a signpost pointing directly at a gap in your understanding. Instead of just mindlessly hitting the "Again" button, it's time to investigate.

    Take a hard look at the card. Is the concept too broad or tangled? If so, break it down. Split that one difficult card into two or even three simpler, more focused ones.

    You can also try enriching the card. Add something that makes it stick: a silly mnemonic, a quick sketch, or a personal example that connects the idea to something you already know. This creates new neural pathways and gives your brain a stronger hook to grab onto next time.

    Can I Really Use Flashcards for Complex Subjects?

    Absolutely, but you have to shift your thinking. For complex topics, flashcards shouldn't be about simple definitions. The real power comes from framing your cards to answer "why" and "how" questions. This moves you from passive memorization to active recall and explanation.

    For instance, instead of a card that asks "What is X?", try these formats:

    • How does this framework solve the scalability problem?
    • Why is this approach preferred over the alternative?
    • What is the primary function of this specific service?

    When you shift from "what" to "how" and "why," your flashcards transform from passive reminders into active problem-solving tools, forcing true comprehension.

    This is also why I’m a huge advocate for making your own cards. The very act of summarizing a complex idea into a concise question and answer is where a massive part of the learning happens. It’s tempting to download a pre-made deck, but they're best used for inspiration, not as a replacement. The creation process itself is a powerful study tool.


    Ready to stop just memorizing and start truly understanding complex technical topics? AZ-204 Fast provides over 280 interactive flashcards, dynamic practice exams, and progress analytics built on these proven learning principles. Take control of your certification prep and conquer the exam with confidence. Check out the platform.

  • Master Exams Using Spaced Repetition Study Method

    Master Exams Using Spaced Repetition Study Method

    The spaced repetition study method is a learning technique that feels a bit like magic, but it’s pure brain science. It’s all about reviewing information at progressively longer intervals. Instead of cramming, you revisit material at the precise moment you're about to forget it, which forces your brain to build a stronger, more permanent memory.

    Why Cramming Fails and Spaced Repetition Succeeds

    Let’s be honest, we’ve all been there. You pull an all-nighter before a big exam, fueled by caffeine and sheer willpower, only to find that the information vanishes a week later. That’s cramming, or “massed practice,” in a nutshell. It stuffs information into your short-term memory, which is like writing in sand—it creates the illusion of knowledge, but it doesn't last.

    The spaced repetition study method is a completely different game. Think of building memory like building muscle. One marathon gym session (cramming) will leave you exhausted, not strong. But consistent, well-timed workouts build real, lasting strength. Spaced repetition does the same for your brain, turning flimsy short-term recall into solid, long-term mastery.

    Working With the "Forgetting Curve," Not Against It

    Our brains are actually wired to forget. It’s a survival mechanism to prevent us from being swamped by useless trivia. A 19th-century psychologist named Hermann Ebbinghaus first mapped this out with his "forgetting curve," which shows just how quickly and predictably we lose information we don't actively try to retain. Cramming is a futile fight against this natural process.

    Spaced repetition, on the other hand, strategically works with the forgetting curve. Every time you review a topic just as it’s getting hazy, you reset the curve, making it flatter. This means you can wait longer and longer between reviews without losing the information. This approach is a game-changer for dense, technical subjects, like preparing for a tough certification. Many students find it indispensable when mastering the AZ-204 exam using dedicated tools like AZ-204 Fast.

    The whole idea is beautifully simple: by timing your reviews to interrupt the natural forgetting process, you force your brain to work a little harder to retrieve the memory. It's this "desirable difficulty" that makes the memory stick for good.

    The chart below shows just how steep that drop-off in memory can be without a smart review strategy.

    Image

    As you can see, without reinforcement, memory retention can plummet to around 30% in just a month. This really drives home how inefficient learning something only once can be.

    Spaced Repetition vs Traditional Cramming

    To see the difference clearly, let's put the two approaches side-by-side.

    Aspect Spaced Repetition Study Method Traditional Cramming
    Timing Reviews are spaced out over increasing intervals (days, weeks, months). All studying is packed into one or a few long sessions right before an exam.
    Focus Long-term retention and true understanding. Short-term recall for immediate performance (like an exam).
    Memory Builds strong, long-term memory pathways. Relies on fragile, short-term memory that fades quickly.
    Efficiency Highly efficient; maximizes retention with minimal time over the long run. Inefficient; requires re-learning the same material from scratch later.
    Outcome Deep, durable knowledge that can be applied in the real world. Superficial knowledge that is mostly forgotten after the test.

    The takeaway is clear: while cramming might get you through a test tomorrow, spaced repetition builds knowledge that will actually serve you in your career.

    The Science of How We Remember and Forget

    Image

    Have you ever wondered why some things you learn stick with you for years, while others disappear almost as soon as you close the book? It’s not random. There's a whole science behind how our brains hold onto information, and this is the foundation of the spaced repetition study method. It’s not just a study tip; it's a system grounded in the very mechanics of how we learn.

    Think of your memory like a muscle. When you first learn something, like a new Azure CLI command, it's like lifting a weight for the first time. The muscle is engaged, but the gains are temporary unless you train it again. If you don't, that strength fades away pretty quickly. This natural decline is what psychologists call the Forgetting Curve.

    Pioneered by Hermann Ebbinghaus way back in the 1880s, the Forgetting Curve illustrates a simple but powerful truth: we forget things at a predictable and surprisingly rapid pace. In fact, the most significant drop in memory happens within the first 24 hours. A single, intense study session is like one trip to the gym—it's a good start, but it won't build lasting strength on its own.

    The Power of "Desirable Difficulty"

    So, how do you build that mental muscle? This is where the real genius of spaced repetition shines. Every time you review a piece of information, you're doing another rep, strengthening that memory. But the trick is all in the timing. Reviewing too soon is a waste of effort, and if you wait too long, you've forgotten it completely and have to start over.

    The sweet spot for a review is right at the moment you’re about to forget. Forcing your brain to recall something at this point takes a little effort. It's a bit of a struggle, and that struggle is what cognitive scientists call desirable difficulty.

    It might sound strange, but letting yourself almost forget is precisely what cements a memory for the long haul. That slight mental strain signals to your brain, "Hey, this is important! Don't lose it." This process makes the memory far more resilient.

    This is a world away from cramming. When you cram, you're just bombarding your brain with information without ever giving it a chance to forget and actively retrieve. Without that "desirable difficulty," the knowledge is fragile and fleeting.

    How Each Review Builds a Stronger Memory Path

    Each time you successfully recall something, you’re not just hitting refresh. You're fundamentally changing how that memory is stored. Imagine your brain is a vast, dense forest. The first time you learn something new, you're hacking a rough, narrow path to a specific spot. It's easy to get lost trying to find it again.

    But every time you successfully retrieve that memory—especially when it takes a bit of work—you're widening and clearing that trail. The path becomes well-trodden and easier to follow. This is the basic idea behind what’s known as the study-phase retrieval theory.

    Research consistently shows that this act of reactivating and reinforcing memory pathways makes spaced learning far more effective than studying in one big block. As you can read in this in-depth research on learning strategies, spacing out your learning sessions also helps encode information in different contexts, making your memories more flexible and easier to access when you need them.

    The spaced repetition study method beautifully combines these two principles—fighting the Forgetting Curve and using study-phase retrieval. It tracks your performance to schedule your next review session at the perfect interval, strengthening your knowledge just before it fades. It's a scientific approach that ensures your hard work translates into lasting knowledge, not just a temporary brain dump.

    From a German Psychologist to Modern Study Apps

    Image

    The spaced repetition study method feels like a modern invention, something cooked up in our current obsession with productivity hacks. But its story actually begins over a century ago with a single psychologist and a relentless series of self-experiments. This isn’t some new trick; it’s a fundamental principle of learning, refined over decades of research.

    Our journey starts in the late 1800s with Hermann Ebbinghaus, a German psychologist captivated by how we remember and, more importantly, how we forget. In the 1880s, he began a painstaking process of memorizing thousands of nonsense syllables—think "WID" and "ZOF."

    His goal was to study memory in its rawest form, without the influence of pre-existing knowledge. He discovered something profound: we forget information in a predictable pattern over time. But he didn't stop there. Ebbinghaus found he could fight this natural decay by reviewing the syllables at specific, ever-increasing intervals, which dramatically improved his long-term recall.

    From Theory to Validation

    For a long time, Ebbinghaus's ideas were mostly confined to psychology textbooks. His "forgetting curve" was a fascinating concept, but its real-world application needed more rigorous testing to prove its worth. That crucial validation came nearly 100 years later, cementing the method's scientific credibility.

    In 1978, psychologists Thomas Landauer and Robert A. Bjork gave Ebbinghaus's work the scientific backing it needed. They conducted a study with psychology students, asking them to remember face-name pairs. Their research confirmed that spreading out the review sessions didn't just work—it massively boosted recall compared to cramming the reviews close together. This foundational research is a key part of the history of spaced repetition.

    This study provided the hard evidence for what Ebbinghaus had observed decades earlier. It proved the spacing effect was a real, powerful phenomenon that could be reliably used to make learning stick.

    “The most effective strategy for retaining information is to review it at increasing intervals, strengthening the memory each time it’s about to fade.”

    This very principle is the engine behind every modern spaced repetition system. The goal isn't to study harder; it's to study smarter by working with your brain's natural rhythm.

    The Dawn of Digital Spaced Repetition

    The final piece of the puzzle was bringing the spaced repetition study method out of the lab and into our hands. The biggest hurdle was managing the complex schedule. Manually tracking when to review hundreds or thousands of facts with paper flashcards is possible, but it quickly becomes an overwhelming chore.

    The digital leap forward was pioneered by people like Dr. Piotr Wozniak in the late 1980s. He developed one of the very first computerized spaced repetition algorithms, which he called SuperMemo. This was a game-changer. For the first time, a computer could track a learner's performance on every single piece of information.

    The algorithm was elegant. It would show you a fact, and you'd rate how well you remembered it. Based on your answer, it calculated the perfect time to show you that item again—maybe in a few days, a few weeks, or even months down the road. This brought a few huge advantages:

    • Automation: The software handled all the tedious scheduling.
    • Personalization: The review intervals were tailored to your unique memory patterns.
    • Efficiency: Your study time was laser-focused on the exact information you were about to forget.

    This innovation turned spaced repetition from an interesting psychological theory into a powerful, practical tool anyone could use. Today, this core idea is the backbone of countless learning apps, including specialized certification tools like AZ-204 Fast. The path from a psychologist's notebook to intelligent software proves a simple truth: understanding how our brains learn is the key to unlocking our true potential.

    Applying Spaced Repetition to Your AZ-204 Exam

    Knowing the theory behind the spaced repetition study method is one thing, but actually using it to pass a beast of an exam like the Microsoft AZ-204 is where the rubber meets the road. This exam is notoriously dense, covering a massive range of services and concepts—from Azure Storage and Cosmos DB to App Service and Azure Functions.

    Let’s be honest, just reading the docs or binging video courses isn't going to cut it. With so much information to absorb, the forgetting curve will have a field day with your memory. To succeed, you need a system that methodically drills hundreds of critical facts into your long-term memory. This is exactly what a well-executed spaced repetition strategy provides.

    Breaking Down the AZ-204 Beast

    The first step is to take the huge AZ-204 curriculum and slice it into tiny, "atomic" pieces of information. The idea is to create simple question-and-answer pairs that you can review in seconds. A classic mistake is making your flashcards too broad.

    For instance, a bad flashcard might ask: "Explain Azure Cosmos DB." A question like that is far too open-ended. It doesn’t test a specific fact and lets you get away with passive recognition. You'll glance at a long answer, think, "Yeah, I kind of know that," and move on without actually cementing anything.

    A much better way is to create sharp, focused questions. Take a look at these examples:

    • Question: What's the default consistency level for a new Azure Cosmos DB account?
      Answer: Session consistency.
    • Question: Which API is best for new graph database apps in Azure Cosmos DB?
      Answer: Gremlin API.
    • Question: Name the five consistency levels offered by Azure Cosmos DB.
      Answer: Strong, Bounded Staleness, Session, Consistent Prefix, and Eventual.

    See the difference? Each one targets a single, testable fact. This format is perfect for the rapid-fire reviews that are the heart of an effective spaced repetition study method. Answering these specific questions forces your brain into active retrieval, which is the secret sauce for building strong, lasting memories.

    The goal is to make every review a small test of one precise piece of information. This forces your brain to work just hard enough to pull out the answer, creating the "desirable difficulty" that makes knowledge stick.

    Of course, creating and managing hundreds of these cards by hand is a massive chore. You'd have to figure out a system to track which cards you've mastered and which ones you keep forgetting. This is where a good tool becomes a game-changer.

    Let a Tool Handle the Heavy Lifting with AZ-204 Fast

    Instead of getting bogged down in manual card creation and scheduling, a dedicated platform like AZ-204 Fast does the work for you. It comes loaded with a pre-built library of over 280 atomic flashcards, all designed from the ground up for effective spaced repetition. The system handles all the scheduling behind the scenes.

    As you go through the cards, you simply rate how confident you were in your answer. The platform's algorithm takes that feedback and builds a personalized study plan tailored to you.

    Here's a glimpse of the kind of personalized feedback the tool provides:

    This dashboard instantly shows you which exam topics are your strong suits and which ones need more work, so you can focus your energy where it counts. The system makes sure you’re constantly strengthening your weak spots without wasting time on concepts you already know cold.

    This adaptive learning is what makes the spaced repetition study method so powerful. It takes the guesswork and grunt work out of studying, letting you focus completely on learning. This targeted approach makes your study time incredibly efficient and seriously boosts your chances of success on exam day.

    Best Practices for Effective Spoken Repetition

    Image

    Jumping into a spaced repetition system is a brilliant first step, but how you use it is what really separates success from frustration. A few key practices can take your study sessions from a passive chore to a powerful way of building knowledge that actually sticks. These strategies will help you sidestep common mistakes and squeeze every ounce of value out of your review time.

    The most important shift in thinking is understanding the difference between simply recognizing an answer and truly recalling it. Recognition is that easy, familiar feeling of seeing an answer and thinking, "Oh, right, I knew that." Active recall, however, is the mental workout of pulling that answer from your memory without any prompts. That effort is the secret sauce of an effective spaced repetition study method.

    Master the Art of Active Recall

    Every time a flashcard pops up, you have a choice. You can flip it over right away, or you can genuinely try to dredge up the answer on your own. Forcing yourself to do the latter is what forges strong, lasting memories.

    To make sure you're always practicing active recall, stick to a few simple rules during your reviews:

    • Commit to an Answer: Before you even think about revealing the answer, say it aloud or scribble it down. This holds you accountable and stops you from falling into the "I basically had it" trap.
    • Be Brutally Honest: If your answer was just a little off, mark it as incorrect. The system's algorithm relies on honest feedback to schedule your next review at the perfect time.
    • Embrace the Struggle: That feeling of mental strain is actually a good thing! It means your brain is actively working to strengthen the neural connection to that piece of information.

    The core of this practice is simple: Treat every single review card like a mini-exam. This small shift in mindset from passive reviewing to active testing is what separates a decent study routine from a great one.

    Craft High-Quality Atomic Flashcards

    The quality of your flashcards is just as critical as the algorithm scheduling them. The absolute best cards are "atomic"—they test one, and only one, piece of information. This keeps your reviews quick, sharp, and incredibly effective.

    Think about it this way: a bad card might ask, "Explain Azure Functions." That's way too broad. A good, atomic card asks something specific, like, "What type of trigger starts an Azure Function on a schedule?"

    Here are a few tips for making great flashcards:

    • One Idea Per Card: Fight the temptation to cram multiple facts onto a single card. Break down complex topics into their smallest, most fundamental parts.
    • Keep It Simple: Use clear, straightforward language. Long, convoluted sentences are your enemy during a fast-paced review.
    • Format as Question and Answer: This structure naturally forces you to practice active recall instead of just passively reading a fact.

    For those studying for a specific certification like the AZ-204, it pays to find a resource that's already done this heavy lifting for you. You can find more study tips and strategies over on the AZ-204 Fast blog.

    Find Your Rhythm with Consistency

    When it comes to the spaced repetition study method, consistency will always beat intensity. Studying for 20-30 minutes every single day is monumentally more effective than cramming for three hours once a week. A daily habit keeps your review queue manageable and prevents it from turning into a mountain of overdue cards you'll dread facing.

    While early spaced repetition schedules were fairly rigid (reviewing after 1 day, 7 days, 30 days, etc.), modern systems are much smarter. They adapt to you, recognizing that you'll forget some concepts faster than others. This personalized approach is what makes today's tools so powerful.

    Your goal is to strike a healthy balance between learning new things and reviewing what you've already covered. A good rule of thumb is to clear out your daily reviews first. Then, use whatever time you have left to introduce new material. This ensures you're constantly reinforcing your existing knowledge—which is the entire point of this method.

    Of course. Here is the rewritten section, designed to sound like it was written by an experienced human expert.


    Spaced Repetition in the Real World: Your Questions Answered

    Once you start using the spaced repetition study method, you’re going to have questions. That’s not just normal; it’s a sign you’re taking it seriously. Moving from the theory of how something should work to the reality of fitting it into your daily life always brings up a few practical hurdles.

    Let's walk through the most common questions people ask when they start. My goal here is to give you clear, no-nonsense answers based on what actually works, so you can fine-tune your approach and get the most out of this powerful technique.

    How Much Time Do I Really Need to Spend Each Day?

    This is the big one, and the answer is probably a relief: consistency is far more important than intensity. There’s no magic number, but for most people, a focused session of 15 to 30 minutes a day beats a four-hour cram session on Sunday every single time.

    The whole point is to build a habit that sticks, even when you’re busy. A good spaced repetition system, like the one inside AZ-204 Fast, does the heavy lifting for you by managing your review schedule. Your job isn’t to watch the clock; it’s just to clear the queue of cards the algorithm serves up. Some days that might take 10 minutes. Other days, closer to 25.

    When you focus on clearing your daily queue, you let the system worry about the timing. This turns studying from a dreaded chore into a simple, manageable daily task.

    What Happens If I Miss a Day? (Please Don't Say I'm Doomed)

    Life happens. You’re going to miss a day eventually, and it’s not a catastrophe. Modern spaced repetition software is designed to be forgiving, so don't panic if you get off track.

    When you log back in, the algorithm will simply show you the most overdue cards first. You haven't broken the system or erased all your hard-earned progress. While a daily routine is the ideal for locking in knowledge, the spaced repetition study method is resilient enough to handle a few bumps in the road.

    The most important thing is to stop one missed day from turning into a missed week. Just get back to it as soon as you can. The system will adapt and help you catch up.

    I like to think of it like watering a plant. Forgetting once won't kill it, but a month of neglect will. Get back on schedule, and your memory will keep growing.

    Can This Really Work for Big, Conceptual Topics?

    Absolutely, but it requires a bit of finesse. Spaced repetition is an obvious fit for things like vocabulary words or historical dates, but it’s just as effective for understanding complex ideas in programming, philosophy, or even engineering.

    The trick is to break down big, fuzzy concepts into small, "atomic" questions. Instead of one giant card that says, "Explain RESTful APIs," you create several laser-focused ones:

    • Question: In the context of REST, what does "stateless" mean?
    • Question: Which HTTP verb is both idempotent and used to create or replace a resource?
    • Question: What’s the main purpose of the GET method in a REST API?

    This forces you to grapple with the individual pieces of a complex topic. By mastering the building blocks one by one, you end up with a much deeper and more durable understanding of the whole concept. This is essential for certification exams, where you need both quick recall and a solid grasp of the underlying principles to succeed.

    Help! I Have a Huge Backlog of Reviews. What Do I Do?

    It’s a terrible feeling—opening your study app and seeing a mountain of overdue cards. This "review avalanche" usually happens after taking a break or after being a little too ambitious with adding new material. The key is to be strategic, not heroic.

    Here's a simple game plan to dig yourself out:

    1. Set a Daily Time Limit: Decide on a realistic amount of time you can commit each day—say, 30 minutes—and stop when you hit it. Don't even think about clearing the whole backlog at once.
    2. Pause All New Material: Hit the brakes on learning anything new. For now, your only job is chipping away at the existing review pile.
    3. Chip Away Consistently: Just do your 30 minutes every day. It might take a few days or even a week, but you’ll see that overdue number shrink.
    4. Slowly Reintroduce New Cards: Once your queue feels manageable again, you can carefully start learning new material.

    This methodical approach prevents burnout and reinforces what the spaced repetition study method is all about: making learning a sustainable, long-term habit.


    Ready to put these ideas into practice and master your certification exam? AZ-204 Fast gives you everything you need, from pre-built atomic flashcards to adaptive practice exams, all powered by a smart spaced repetition algorithm. It’s time to stop cramming and start building knowledge that lasts.

    Learn more and see how it works at https://az204fast.com.